2020年12月30日星期三

Autel IM508/IM608 VAG IMMO Function List

 Here offer the newest Autel IM508/IM608 VAG IMMO function list.

Something important to know!

1.For VW IMMO IV:

Go to Volkswagen-->Advanced Mode-->IMMO 4 Instrument CAN pay per use, 10 dollars for key adding and all key lost by OBD.

As long as it is VAG IMMO IV, no matter what year and model of the vehicle are. (Note: except for illegal vehicle data)

2.IMMO IV+MQB key support key adding and all key lost. (support the latest PASSAT, Jetta, support latest Passat, Beetle after year 2017, Multivan, Tiguan, Sharan key adding and all key lost by OBD)(Note: Except for illegal vehicle data)

3.“MQB Instrument for VW and Audi” support all Continental VDO, Johnson JCI instrument, full liquid crystal MQB instrument;MQB instrument all key lost (latest model with 49 or 5C key chip type is not supported.) Skoda supports all Continental VDO and full liquid crystal MQB instrument,Doesn’t support Johnson control instrument(JCI). Adding key for free, all key lost is not supported.

4.“Fail to enter the service mode or fail to read IMMO data” normally this problem can be solved by going to “advanced mode”. If it can’t be solved, please contact the technical support.


Autel MaxiIM IM508/Autel IM608 VAG IMMO Function List:

ModelsInstrument typeadd key all key lostreplace component
LavidaVDO CDC32xx+24C32, before 2013 IMMO III and halfread engine by OBDneed engine to support this function,manually input cs code.supported
 2013-2014, IMMO IVread instrument by OBDdump mode with instrument/modify the vehicle IMMO data by OBD

engine/

instrument

Lavida/Gran Lavida/Langyear after 2015, IMMO 4 Instrument CANread instrument by OBD(advanced mode pay-per-use)read instrument by OBD

engine/

instrument

Jetta1999~2006, IMMO IIIunsupported(remove immobilizer box)unsupported(remove immobilizer box)unsupported
2006~2010, IMMO IIIread instrument by OBD/engineSame as key adding

engine/

instrument

2010~2013, IMMO III and halfsupported(need to get PIN code from dealer)supported(need to get PIN code from dealer)supported
2013~2014, IMMO IV Instrumentread instrument by OBDOBD modify the vehicle IMMO data by OBD

engine/

instrument

 year after 2013, IMMO IV Instrument CANread instrument by OBDGo to "advanced mode"-->"IMMO 4 Instrument CAN" to perform key adding and all key lost by OBD.unsupported
SAGITARBefore 2010, IMMO III and halfread instrument by OBDread instrument by OBDsupported
2011~2014, IMMO IVread instrument by OBDdump mode with instrument/modify the vehicle IMMO data by OBD

engine/

instrument

After 2015, IMMO 4 Instrument CANread instrument by OBDGo to "advanced mode"-->"IMMO 4 Instrument CAN" to perform all key lost by OBD.unsupported
 Santana 2000/3000Before 2009, IMMO III1.read immobilizerby OBD
2.read engine by obd(need engine to support this function)
Same as key adding

engine/

instrument

 SantanaAfter 2009, IMMO III and half1.read immobilizer/engine(need immobilizer &engine to support this function)
2.remove immobilizer (dump mode)
same as key addingsupported
2013~2014, IMMO IVread instrument by OBDGo to "advanced mode"-->"IMMO 4 Instrument CAN" to perform key adding and all key lost by OBD or dump mode.

engine/

instrument

After 2015, IMMO  IVread instrument by OBDGo to "advanced mode"-->"IMMO 4 Instrument CAN" to perform key adding and all key lost by OBD.

engine/

instrument

Golf 4Before 2009, IMMO IIIread instrument by OBD/engineSame as key adding

engine/

instrument

Golf  62009~2013, IMMO IVread instrument by OBDSame as key adding

engine/

instrument

POLOBefore 2011, IMMO III1.read immobilizerby OBD
2.read engine by obd
Same as key addingsupported
2011~2014, IMMO IVread instrument by OBDGo to "advanced mode"-->"IMMO 4 Instrument CAN" to perform key adding and all key lost by OBD/dumpe mode with instrument

engine/

instrument

After 2015, IMMO IVread instrument by OBDgo to "advanced mode"-->"IMMO 4 Instrument CAN" to perform key adding and all key lost by OBD.unsupported
PassatBefore 2012, IMMO III1.read immobilizer by OBD
2.read engine by obd
Same as key addingsupported
2012~2015, IMMO IVread instrument by OBDdump mode with instrument/modify the vehicle IMMO data by OBD

engine/

instrument

Borabefore 2008, IMMO III1.read immobilizerby OBD
2.read engine by obd
Same as key addingsupported
2009~2014, IMMO IVread instrument by OBDdump mode with instrument/Go to "advanced mode"-->"IMMO 4 Instrument CAN" to perform key adding and all key lost by OBD.

engine/

instrument

After 2015, IMMO IVread instrument by OBDGo to "advanced mode"-->"IMMO 4 Instrument CAN" to perform key adding and all key lost by OBD.

engine/

instrument

Passat B6/CC2006~2016, Comfort module1.read engine by OBD
2.connect to the gateway

dump mode with comfort

module

engine/

comfort module

Tiguan2010~2013, IMMO IVread instrument by OBD

dump mode with instrument/modify

the vehicle IMMO data

by OBD

engine/

instrument

After 2013, IMMO IVread instrument by OBD

(advanced mode

pay-per-use)read

instrument by OBD

before 2014 support engine/

instrument

TouranVDO CDC32xx+24C32, Before 2011, IMMO III and half1.read instrument by OBD
2.read engine by obd(need engine to support this function)+search for 7th byte
1.read instrument by OBD
2.modify the vehicleIMMO data by OBD

(need engine to support

this function)
3.dump mode with

instrument

supported
2012~2015, IMMO IVread instrument by OBD

dump mode with instrument/modify the

vehicle IMMO data by

OBD

engine/

instrument

Touareg2003~2010, KESSY1.read engine by obd(need engine to support this function)+search for 7th byte
2.dump mode with KESSY
dump mode with KESSYengine/KESSY(some are unsupported)
2011~2017, IMMO VRead BCM2 by OBDcurrently unsupportedcurrently unsupported
PhaetonBefore 2012, KESSY1.read engine by obd(need engine to support this function)+search for 7th byte
2.dump mode with KESSY(some are unsupported)

remove the chip of KESSY

(some are unsupported)

engine/KESSY(some are unsupported)
Sharan2001~2010, IMMO III1.read instrument by OBD
2.read engine by obd(need engine to support this function)
same as key addingsupported
2011~2015, IMMO IVread instrument by OBD

dump mode with instrument/modify the

vehicle IMMO data by OBD

(need engine to support this function)

engine/

instrument

Caddy2005~2009, IMMO III and half1.read instrument by OBD
2.read engine by obd(need engine to support this function)+search for 7th byte
1.same as key adding
2.dump mode withinstrument
3.modify the vehicle

IMMO data by OBD

(need engine to support

this function)

supported
Beetle2003~2011, IMMO IIIread engine by obd(some need to do with dump mode(Currently no supported))same as key addingsupported
2012~2015, IMMO IVread instrument by OBD

Go to "advanced mode"-->

"IMMO 4 Instrument CAN"

to perform key adding and

all key lost by OBD.

engine/

instrument

AtlasAfter 2016, IMMO VRead BCM2 by OBDAfter 2015, all key lost is unsupportedcurrently unsupported
Multivan2014~2016, IMMO IVread instrument by OBD

dump mode with instrument/modify

the vehicle IMMO data by OBD

some are supported
after 2017, IMMO IV+MQB keyread instrument by OBDSame as key addingunsupported
Sharanafter 2017, IMMO IV+MQB keyread instrument by OBDSame as key addingunsupported
Tiguanafter 2016, IMMO IV、IMMO IV+MQB keyread instrument by OBDSame as key addingunsupported
Passatafter 2016, IMMO IV、IMMO IV+MQB keyread instrument by OBDSame as key addingunsupported
BeetleAfter 2015, IMMO IV、IMMO IV+MQB keyread instrument by OBDSame as key addingunsupported
 Function lists  with VW MQB instrument
ModelInstrument TypeAdd keyAll key lostReplace components
Lamandoafter 2014, MQB InstrumentMQB Instrument by OBD30 dollars per vehicleunsupported
Golf 7after 2014, MQB Instrument
Golf Sportsvanafter 2016, MQB Instrument
Lavida Plusafter 2018, MQB Instrument
Boraafter 2018, MQB Instrument
Magotan B8after 2016, MQB Instrument
Tiguan Lafter 2016, MQB Instrument
Tiguan llafter 2017, MQB Instrument
Touran Lafter 2016, MQB Instrument
Teramont after 2017, MQB Instrument
Arteonafter 2017, MQB Instrument
Crafterafter 2017, MQB Instrument
T-Rocafter 2017, MQB Instrument
Tayronafter 2018, MQB Instrument
 Threk/Tharuafter 2018, MQB Instrument
Passatafter 2018 Oct, MQB Instrument by OBD
Boraafter 2019 Nov, MQB InstrumentUnsupportedUnsupportedUnsupported
Touaregafter 2019, MQB Instrument
POLOafter 2019 Sep, MQB Instrument
T-Rocafter 2019 Nov, MQB Instrument
Passat B6after 2019 Nov, MQB Instrument

Learn more Autel key programmer, please visit: https://www.cardiagtool.co.uk/wholesale/original-autel-tool/
2020年12月29日星期二

ThinkCar 2 (Thinkdriver) Diagnose 2014 Honda Accord No Issues!

 Confirmed! It has been tested and verified that ThinkCar 2 (Launch Thinkdriver) can do all system diagnosis on 2014 Honda Accord without any issue.

Here is the related test report.

All tools required:

Thinkcar 2 OBD2 Bluetooth scanner

Honda Accord year 2014

Android smartphone

thinkcar2-diagnose-2014-honda-accord-1


Operation:

1.Turn on the ignition switch

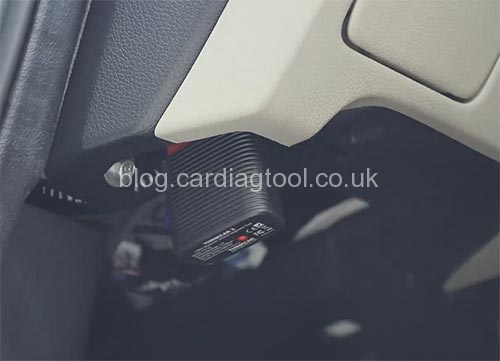
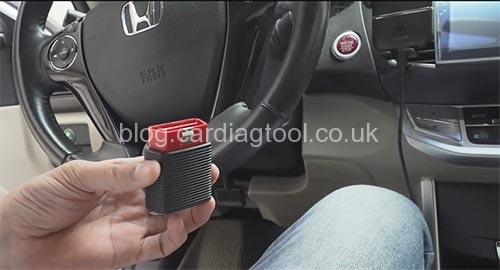
2.Plug Thinkcar2 dongle to the OBD port of the vehicle

thinkcar2-diagnose-2014-honda-accord-2

3.Connect Thinkcar 2 scan tool with the mobile phone via Bluetooth

4.Open “ThinkCar Pro” APP has been installed on Android smartphone

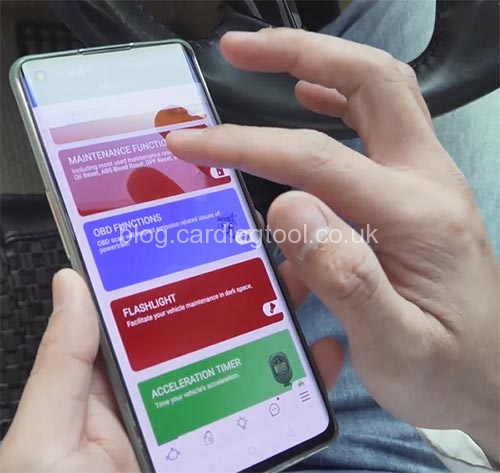
There are main 5 kinds of functions in the main menu

thinkcar2-diagnose-2014-honda-accord-3

-All System Diagnostic

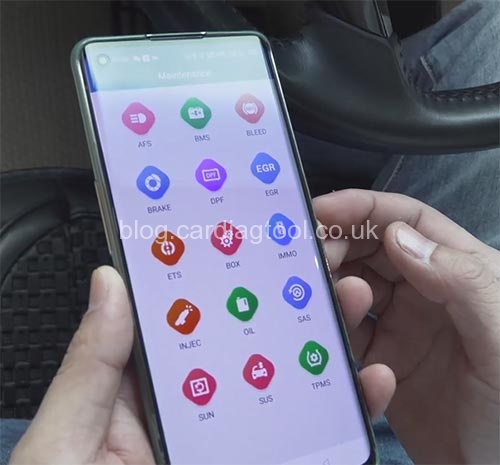
-Maintenance Functions

->> supports 15 special functions (AFS, BMS, Bleed, Brake, DPF, EGR, ETS, BOX, IMMO, INJEC, OIL, SAS, SUN, SUS and TPMS)

thinkcar2-diagnose-2014-honda-accord-4

-OBD Functions

->> Supports standard OBD diagnostic protocol, vehicle coverage after 1996.

-Flashlight

->> This function can open mobile phone light to see the OBD port of vehicle clearly and make it easier to connect the device.

- Acceleration timer (100m Acceleration)

The test:

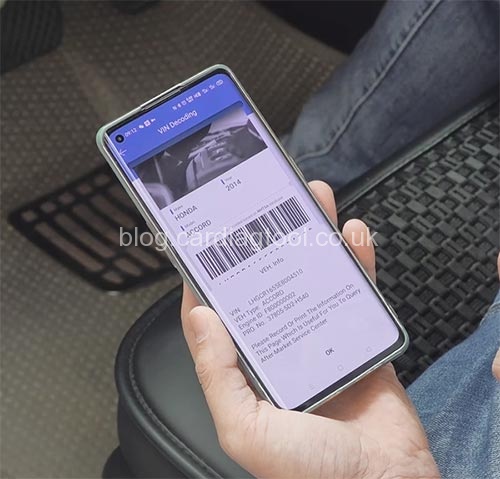
1.Detect VIN and vehicle info- success!

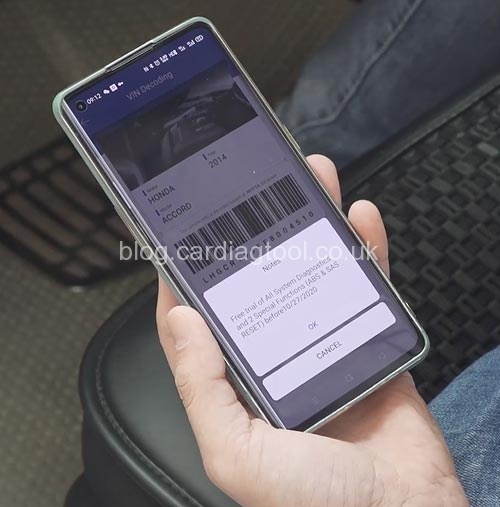
Select “All System Diagnostic”

It starts detecting VIN automatically

If this is your first time to use, it will prompt you that “Free trial of all system diagnostics and 2 special functions (ABS & SAS reset) before…”

thinkcar2-diagnose-2014-honda-accord-5

Just click “OK” to continue

Read out VIN, vehicle type, engine ID and PRO No successfully

thinkcar2-diagnose-2014-honda-accord-6

Note: Follow the prompt to record or print the info on this page which is useful for you to query.

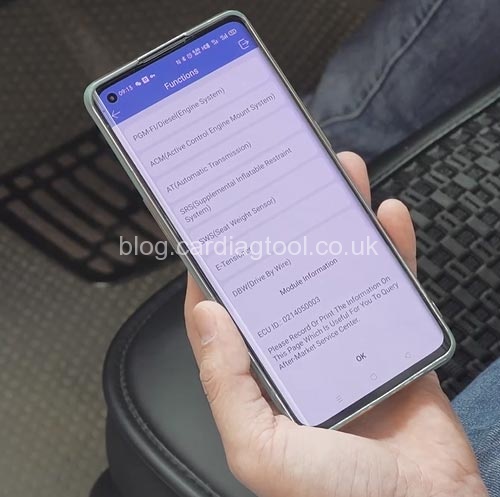
2.Read engine system ECU ID- success!

Tap “System Selection”-> “PGM-FI/Diesel (Engine system)”

Then it read out the ECU ID quickly

thinkcar2-diagnose-2014-honda-accord-7

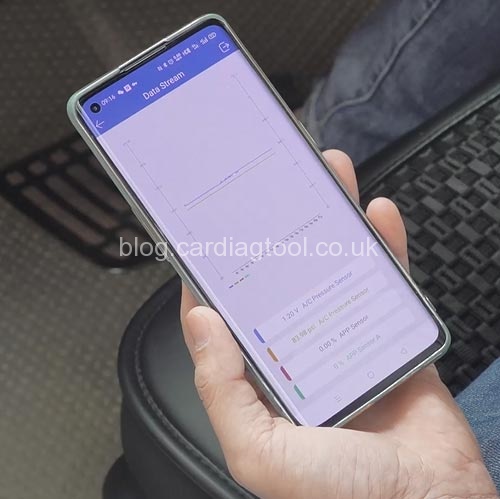
3.Read data stream- success!

Select “Read Data Stream”-> “Manual Select”

Just select some options to check

Read out the corresponding data successfully, and then choose 4 options at the same time to see the data stream

thinkcar2-diagnose-2014-honda-accord-8

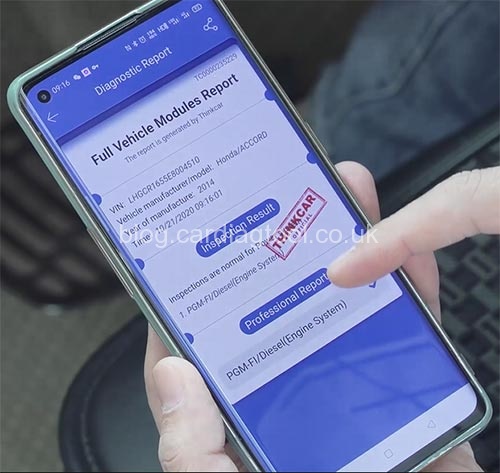
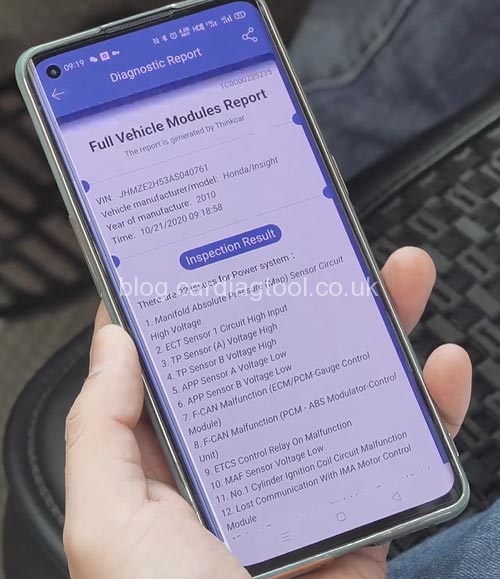
4.Generate report- success!

Click “report” to generate the corresponding test inspection report

thinkcar2-diagnose-2014-honda-accord-9

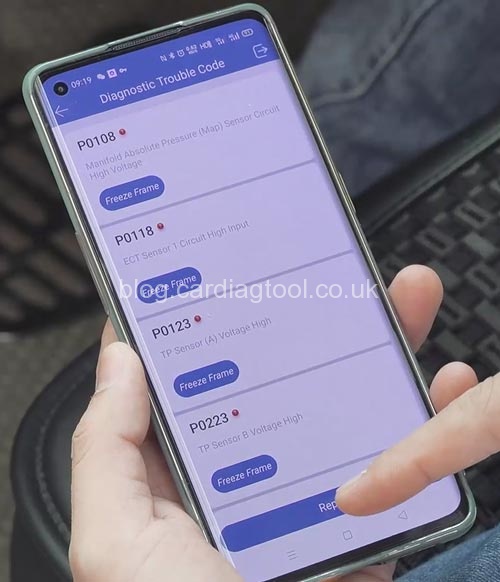
5.Read fault code- success!

Read out all DTCs, click “Report” to generate the corresponding diagnostic report

thinkcar2-diagnose-2014-honda-accord-10 thinkcar2-diagnose-2014-honda-accord-11

In conclusion:

Thinkcar 2 is a cost-effective professional Bluetooth OBD2 scanner to use on Android or IOS smartphone with the unique APP. It’s easy to carry and diagnose vehicle inc. detect VIN, read fault codes, read data stream and generate test report, etc. A good diagnostic tool for car owner!

ThinkCar 2 ThinkDriver Professional OBD2 Bluetooth Scanner for iOS & Android:

http://www.cardiagtool.co.uk/thinkcar-2-auto-scanner.html

Read also:

LAUNCH THINKDRIVER USER MANUAL: SOFTWARE PURCHASING+ ACTIVATION+ USING TIPS

LAUNCH THINKDRIVER CANNOT READ VIN NUMBER AUTOMATICALLY SOLUTION


How to Use Launch X431 V+ HD3 Heavy Duty Diagnostic Tool?

 This post comes with quick start guide of Launch X431 V+ HD3 Heavy Duty Diagnostic Tool.

x431v+-hd3-user-guide-1

Part 1: How to connect X431 V+ HD3 with vehicle?

Part 2: How to setup WLAN communication?

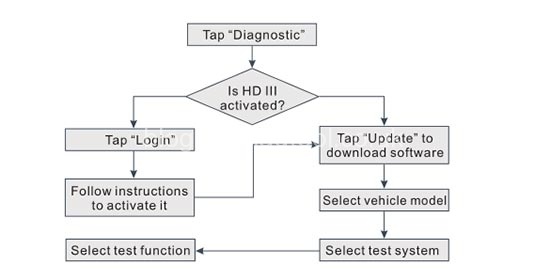
Part 3: How to activate HDIII & download software?

Part 4: How to switch between passenger and commercial vehicles?

Part 5: How to start diagnostics by X431 V+ HD3?

Part 1: How to connect X431 V+ HD3 with vehicle?

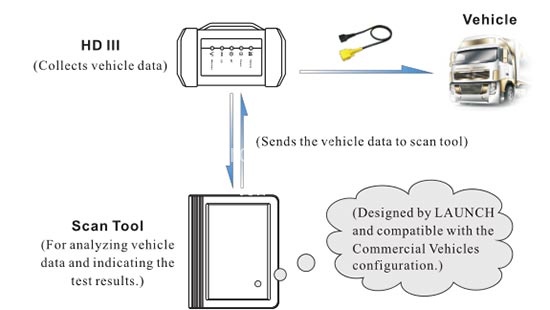
See this image to learn the function of each device:

x431v+-hd3-user-guide-2

1.Locate the vehicle’s DLC (Data Link Connector) is typically a connector where diagnostic code readers interface with the vehicle's on-board computer. The DLC location varies from vehicle to vehicle. It is generally located in driver’s cab.

2.Turn on the ignition switch

3.For vehicles equipped with OBD II management system, plug one end of the diagnostic cable into the vehicle’s DLC, and the other end into the diagnostic socket of the HD device, and then tighten the captive screws.

x431v+-hd3-user-guide-3

4.For vehicles not equipped with OBD II management system, it is necessary to use the corresponding adaptor cable, and then follow one of the methods below to make connection:

x431v+-hd3-user-guide-4

Part 2: How to setup WLAN communication?

To establish the WLAN communication between the HD III and Launch X431 v+ scan tool, follow the steps to operate:

1.Connect X431 PRO3 and HD3 and vehicle in correct connection

2.Power the scan tool on and launch the diagnostic application

3.After logging successfully, select “Personal center”-> “VCI Management (or “Diagnostic connector connection management)” -> “Use Wi-Fi communication”, a pull- down option list appears:

1).Works as WLAN hotspot:

Once enabled, the HD III and scan tool forms a LAN network to make communication. In this case, the scan tool cannot surf the Internet.

2).Workas Network adaptor (Recommended):

Once enabled, a WLAN connection dialog box appears. Input the network name and access password until it is properly connected. In this case, the scan tool can surf the Internet and communicate with the HD III.

Part 3: How to activate HDIII & download software?

If you had a diagnostic tool of 12V passenger car configuration and intend to extend the diagnostics of commercial vehicles, follow LAUNCH X431 V+ HD3 TRUCK DIAGNOSTIC TOOL SOFTWARE TUTORIAL to activate and update the HD III:

Note: Please make sure that the diagnostic tool is properly connected to the Internet before proceeding this step.

Part 4: How to switch between passenger and commercial vehicles?

If several VCI connectors and HD III devices are activated on the X431 V+ HD3 diagnostic tool, a list of connectors will be displayed in the “VCI (or “My Connector”)”, which can be accessed by tapping “Personal Center”.

  1. Switch from a passenger car to a commercial vehicle

Step 1: Enter “VCI (or “My Connector”) -> select the HD III S/N (starting with 98649)

Step 2: Return to the diagnostic main menu

Step 3: Connect the HD III, diagnostic tool and vehicle

Step 4: Tap “Heavy-duty” tab to select the corresponding vehicle model

Then follow the on-screen prompts to start a diagnostic session.

  1. Switch from a commercial vehicle to a passenger car:

Step 1:Enter “VCI (or “My Connector”) -> select the VCI connector S/N

Step 2: Return to the diagnostic main menu

Step 3: Connect the VCI connector, x431 pro3 scan tool and vehicle

Step 4: Use VINScan or manual diagnosis to start diagnosis

Part 5: How to start diagnostics by X431 V+ HD3?

Follow the sequence below to start a new diagnostic session.

x431v+-hd3-user-guide-5

Learn more…

Launch X431 V+ HD3 Problem & Solution

1.Problem: Communication error with vehicle ECU:

Solution:

Please confirm:

1) Whether the VCI is properly connected.

2) Whether the vehicle ignition switch is ON.

3) If all checks are normal, send vehicle year, make, model and VIN number to cardiagtool.co.uk using Dia. Feedback feature.

2.Problem: Failed to enter into vehicle ECU system

Solution:

Please confirm:

1) Whether the vehicle is equipped with the system.

2) Whether the VCI is correctly connected.

3) Whether the vehicle ignition switch is ON.

4) If all checks are normal, send vehicle year, make, model and VIN number to us using Diagnostic Feedback feature.

3.Problem: How to save power?

Solution:

1) Please turn off the screen while X-431 V+ keeps idle.

2) Set a shorter standby time.

3) Decrease the brightness of the screen.

4) If WLAN connection is not required, please turn it off.

5) Disable GPS function if GPS service is not in use.

4.Problem: How to handle when you encounter “Insufficient storage space”?

Solution: If this happens while downloading the diagnostic software, please proceed as follows:

1).Get your X-431 V+ username and password ready. If you forgot the password, please dial our after-sales support center hotline to retrieve it with the product Serial Number.

2).Reset the X-431 V+ to the default factory settings (For details, please refer to Item 5 in this Chapter).

3).Tap “Settings” -> “WLAN”, slide the switch to ON and then choose the desired WLAN network to connect.

4).Open the browser and visit www.dbscar.com to download and install the latest App.

5).After the installation is completed, launch the application and login with your username and password.

6). Tap “Update” to download the diagnostic software.

Note: For new App, the software structure and storage space occupied by the vehicle software have been optimized so as to avoid the occurrence of insufficient storage.

5.Problem: How to reset X-431 V+?

Solution: Resetting may cause data loss. Before doing so, please make sure important data and information has been backed up.

  1. Tap “Settings” -> “Back & Reset”.
  2. Tap “Factory data reset”.
  3. Tap “Reset tablet”.
  4. Tap “Clear all data” to start resetting until the tool automatically reboots.

6.Problem: The diagnostic application is failing.

Solution:

  1. Press the Home key on the tool
  2. Select “Settings”-> “Apps”
  3. Select the application name from the Apps list
  4. Select “Force Stop”, and then press “OK” to confirm
  5. Select “Clear Data”, and then press “OK” to confirm

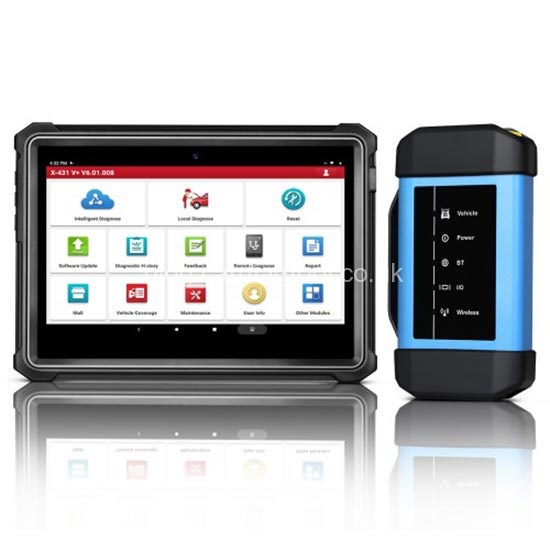
Launch X431 V+ HD3 Wifi/Bluetooth Heavy Duty Truck Diagnostic Tool:

http://www.cardiagtool.co.uk/launch-x431-hd-iii-module-heavy-duty-truck-diagnostic-tool.html


VW JETTA 2013 Add New Blade Key with Autel MaxiIM IM608

 This tutorial is about how to add new blade key with Autel IM608 and XP400 Pro on Volkswagen Jetta 2013. It applies to the user who is a new to the VW systems or who just wants to know what the MaxiIM IM608 scan tool can do.

What will you learn?

1.What tools and setup are required to do this procedure

2.Commonly used terms you will encounter working with VW’s

3.Identify the different VAG IMMO generations

4.Identify the different VAG IMMO systems

5.How to add a key to a 2013 VW Jetta by Autel MaxiIM IM608

1.What tools and setup are required to do this procedure

Autel MaxiIM IM608 Pro auto key programmer

XP400 Pro programmer

One 2013 VW Jetta working key

One new blade key

autel-im608-add-vw-jetta-2013-blade-key-1

Connection:

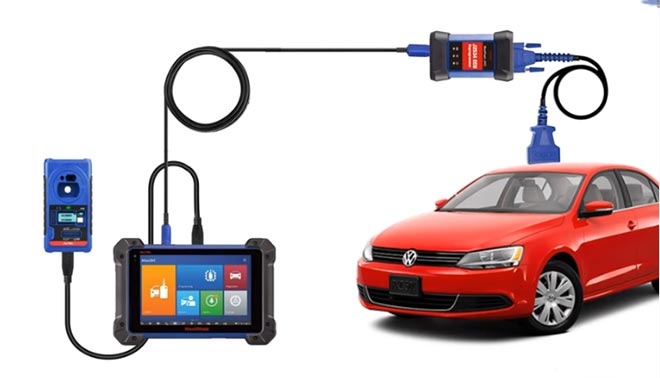
1.Connect Autel IM608 tablet and XP400 Pro via USB cable

2.Connect IM608 and J2534 programmer via VCI USB cable

3.Connect J2534 to the vehicle’s DLC via main OBD cable

autel-im608-add-vw-jetta-2013-blade-key-2

Note: Dont connect XP400 Pro to the vehicle directlyOtherwise it will cause the device to burn out!

In general, we’ll connect the VCI via Bluetooth, but here recommend you to use VCI USB cable. The reason is that sometimes depending on the vehicle, you’re working on the Bluetooth connectivity can let’s say interrupt the key relearning operation. To avoid that any frequencies doing that, just give it a direct connection and to tell you the truth it actually will run through. Its sequence a little bit faster than Bluetooth.

2.Commonly used terms you will encounter working with VW’s

  • Dealer key: a dealer key is a key that must be preconfigured to a specific VIN before it can be learned into the vehicle. (The vehicle will reject and key that is not preconfigured before hand, even when the transponder type is correct).
  • Learn key:All keys lost will be cleared then learned via ignition switch
  • Add key:With the serial programmer (XP400 Pro), the key will be added to the system
  • Service mode:In order to gain access and read info from the vehicle, it must be in a service mode state. That dash turns off even though the ignition is on.
  • Pin code: A 4 to 5 digit number needed to code new keys on VVW/AUDI IMMO systems.
  • Transponder key:A transponder key is a key with a “microchip” or a RF transmitter built into the plastic head of the key. IT transmits a low-level signal from a key that is read by a remote receiver.

3.Identify the different VAG IMMO generations

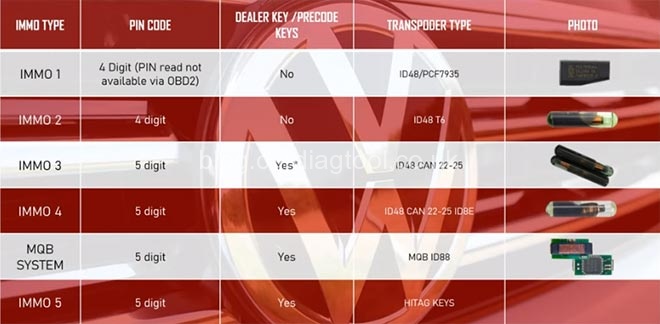
autel-im608-add-vw-jetta-2013-blade-key-3

  • IMMO 1 would probably start off from year 2004. It requires a four-digit PIN code, but you cannot get the PIN via OBD, you probably have to do this via bench with the serial number. It does not require a dealer key and the transponder type is ID48/PCF7935.
  • IMMO2 is probably between the year 2000 and 2005. It requires a four-digit PIN code and it also does not need a pre-coded key and the transponder type key is ID48 T6.
  • IMMO 3 is probably between year 2004 and 2009. It requires a five-digit PIN code and it also requires pre-coded keys. However there are some scenarios where it does not require. Only VW will like IMMO and IMMO 4. There’s a lot of integration between them.
  • IMMO 4 would probably go between year 2005 and 2019. It requires a five-digit PIN code and it also requires pre-coded keys.
  • MQB system is probably between year 2013 and up. It requires a five-digit PIN code and it also requires pre-coded keys.
  • IMMO 5 is probably between year 2009 and 2019. It requires a five-digit PIN code and it also requires pre-coded keys.

4.Identify the different VAG IMMO systems

Learning each generation’s immobilizer system will help you understand how to approach that particular key coding.

  • IMMO 1 uses the IMMO Box
  • IMMO 2 uses the instrument K-line
  • IMMO3 uses the instrument CAN
  • IMMO 4 uses the instrument CAN, Kessy system, MQB system, EZS system and comfort module.
  • IMMO 5 uses BCM2

5.How to add a key to a 2013 VW Jetta by Autel MaxiIM IM608

Step 1: Insert the working blade key into the key slot

Step 2: Turn the key into position 1 (Don’t ignite car engine)

Step 3: Select “IMMO” in IM608 tablet

Step 4: Identify vehicle model automatically

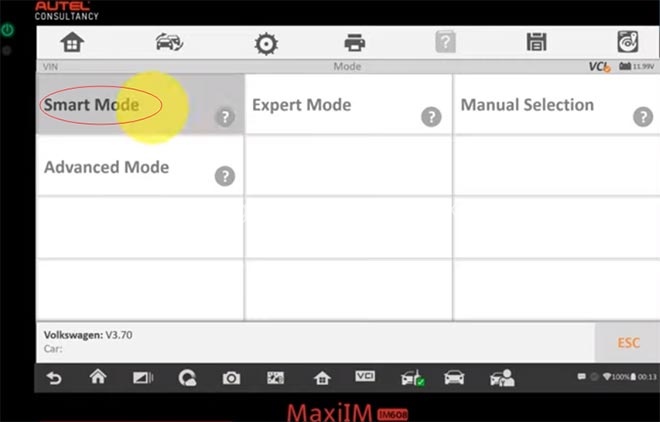
Step 5: Select “Smart mode”

autel-im608-add-vw-jetta-2013-blade-key-4

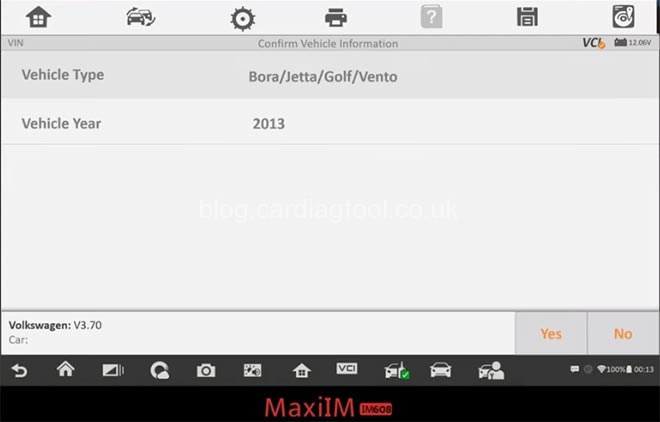
Step 6: Confirm the vehicle info

autel-im608-add-vw-jetta-2013-blade-key-5

Step 7: Analyzing vehicle immobilizer type automatically…

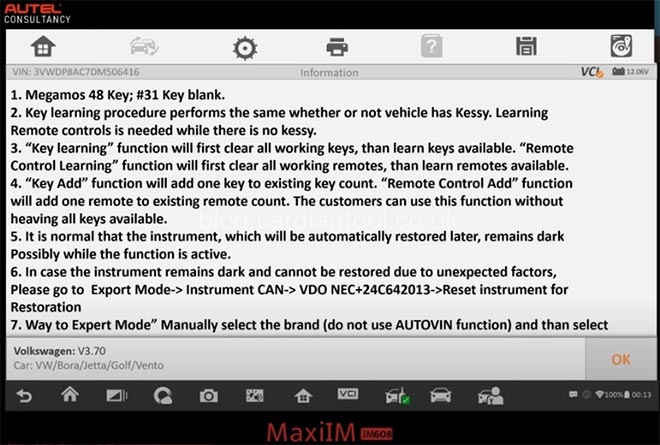
Step 8: Read the operation instruction and press “OK”

autel-im608-add-vw-jetta-2013-blade-key-6

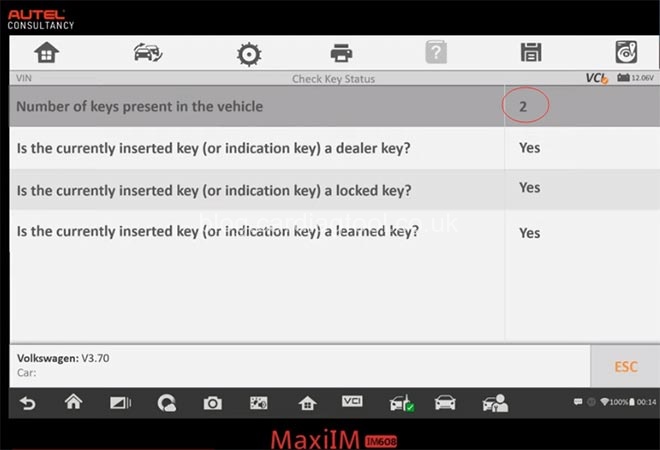
Step 9: Check the key status and click “ESC”

The current key number is 2.

autel-im608-add-vw-jetta-2013-blade-key-7

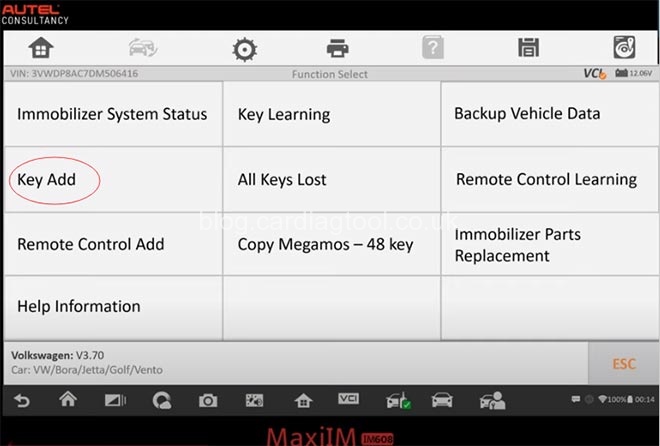
Step 10: Select “Key Add”

autel-im608-add-vw-jetta-2013-blade-key-8

Step 11: Confirm to use Key Add function

Note: If vehicle with Kessy, the remote start function may fail after using key add function. For the vehicle to start, the key need to be pressed close to the key indication area.

Step 12: Read IMMO data

Step 13: Make dealer key

->> Confirm to make a dealer key

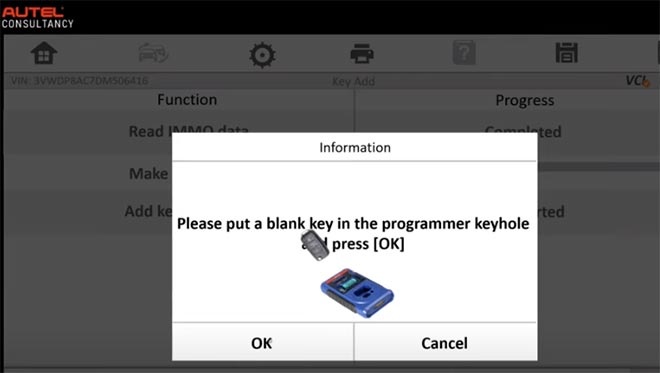
->> Put the blank key in the XP400 programmer key hole and press “OK”

autel-im608-add-vw-jetta-2013-blade-key-9

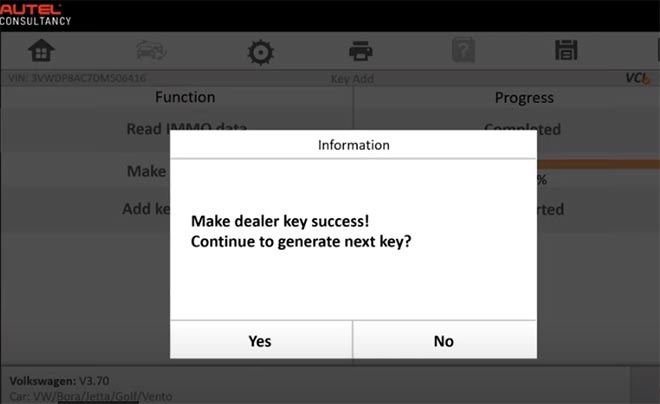
->> Make dealer key successfully

Confirm to make next key or not depends on your need

autel-im608-add-vw-jetta-2013-blade-key-10

Step1 4: Add key to vehicle

Note: The instrument will have a black screen, which is normal. It will illuminate automatically later.

The following operation will modify the instrument data. The ongoing process is non-interruptible, or it may cause the damage to the instrument.

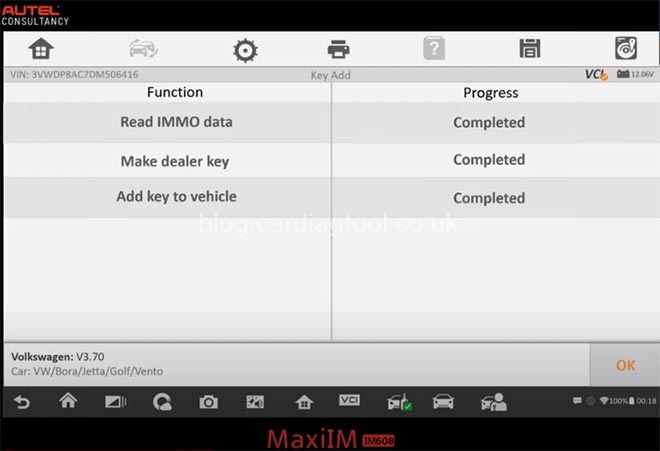
Step 15: Adding new blade key by Autel IM608 key programmer is completed.

autel-im608-add-vw-jetta-2013-blade-key-11

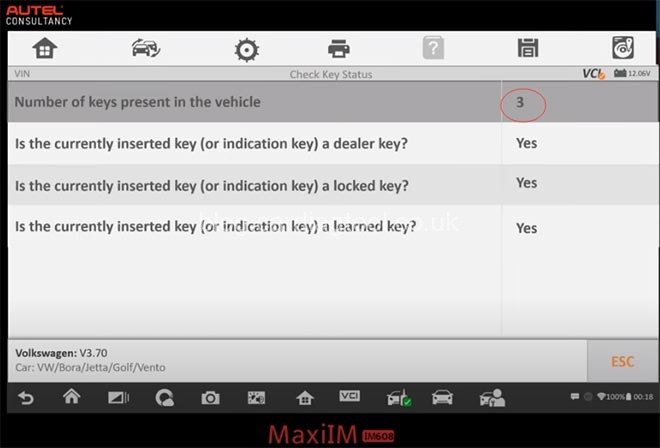
Step 16: Check the key status, now the number of keys present in the vehicle is 3.

autel-im608-add-vw-jetta-2013-blade-key-12

Finally, test the new key function to see if everything is working.

Done!

Please kindly notice:

Some instances when you do a key coding procedure, the remote settings might be lost. Sometimes they don’t and they will be fine. If it does you need to go to the remote control learning and relearn the amount remote.

To sum up:

1.It’s a good practice to use a direct connection when doing key coding (No Bluetooth connected)

2.Dealer key is a key that needs to be preconfigured in before it can be learned to the vehicle. (Doesn’t mean it needs to order from dealer).

3.If your accidently erase the original key, you just have to learn the key again by selecting the key learning option. Since the key is already preconfigured there no need to make a dealer key.

4.Certain cases the remote will automatically be configured. Most cases you will need to configure the remotes separately from the immobilizer.

5.You can use aftermarket keys but you may run into quality issues with the key.

Autel IM608 Pro key programmer comes with MaxiIM IM608 tablet, XP400 Pro key programmer, MaxiFlash ECU reprogrammer and key programmer adapter kit (optional), which adds more advanced functions than IM608.

If you’re interested in IM608 Pro, please feel free to contact us.

Email: sales@CarDiagTool.co.uk
Skype: cardiag.co.uk
Whatsapp: +86 15002705698

VXDIAG VCX SE for Benz All-around Review 2020

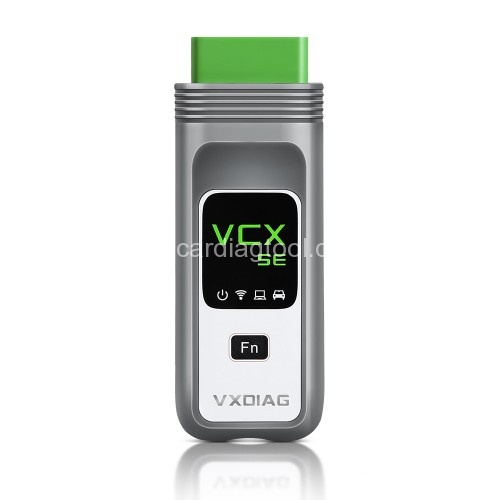
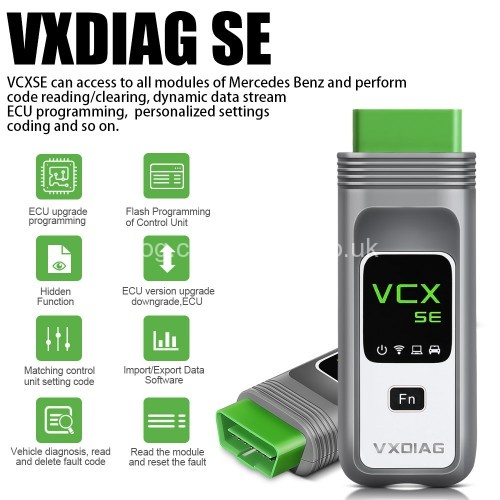
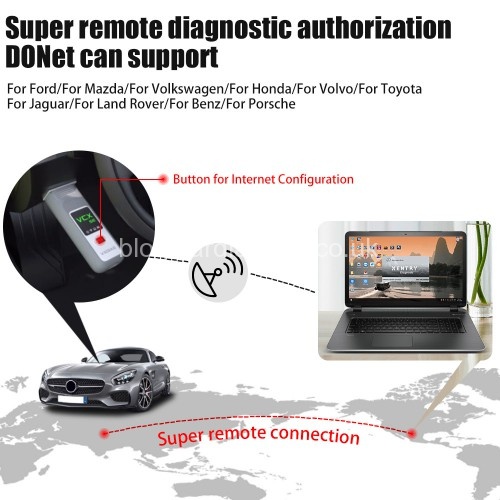
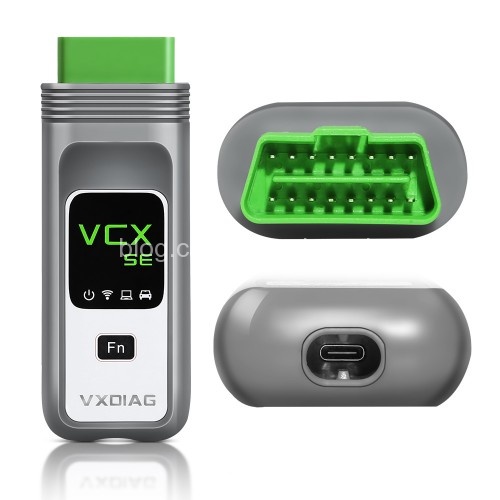
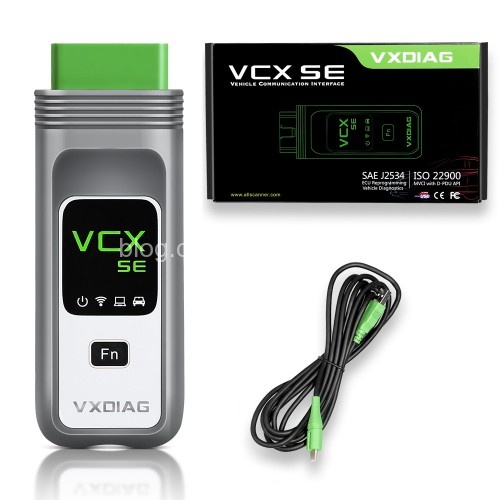
 VXDIAG VCX SE for Benz is a professional diagnostic & programming tool for almost all Mercedes Benz cars from 1996 to 2020. The great function is that it features in the super remote diagnostic function with DONet authorization. Go ahead to learn more details.

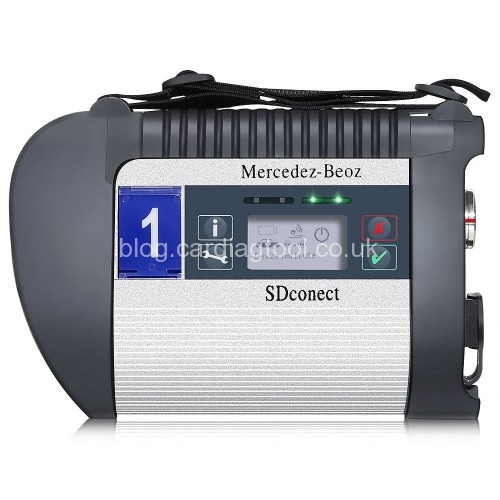
Look at the comparison between VXDIAG VCX SE for Benz and sdconnect C4 /C5 /C6 firstly.

ItemVXDIAG VCX SE BenzSD Connect C4/C5/C6
Image vxdiag-vcx-se-benz-user-manual-1 vxdiag-vcx-se-benz-user-manual-2
SoftwareXentry (All MB from 2010+)YesYes
DAS (All MB from 2001 to 2009)YesYes
WIS (Workshop Information System)YesYes
EPC (Electronic Parts Catalog)YesYes
DTS (universal  Engineering Tester for diagnostic and control functions of vehicle)YesYes
Vediamo (used by the plant engineers to develop diagnosis and engineering software)NoYes
HHT -WIN (All MB from late 80’s to 99)NoYes
CoverageDoIP (Diagnostics over Internet Protocol)YesYes (sdconnect c4 plus)
FunctionAll-system All-function diagnosisYes (Read /clear codes, read dynamic data stream etc)Yes
Online Coding / programmingYesYes
Remote diagnosisYes (with donet authorization)No
OthersRetrofiting, modification, ECU upgrade. Super engineer programming, personalized settings etc.Yes

VXDIAG Benz DoiP VCX SE is very suitable for auto repair shops, auto refitting studios, auto programming engineers, auto refitting enthusiasts, etc.

The top 5 reasons:

1.Supports super remote diagnosis with donet authorization while sdconnect C4 /C5 /C6 doesn’t support.

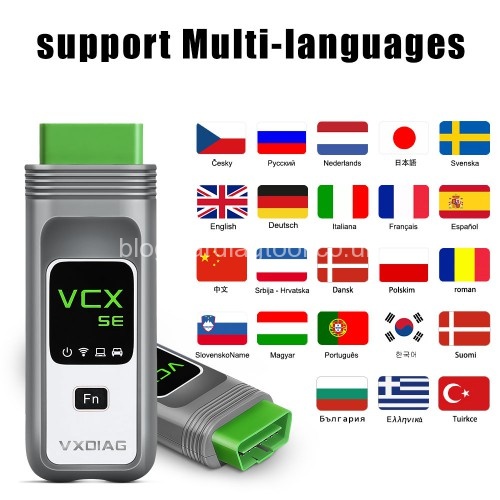
2.Multi-languages available: English, German, French, Italian, Spanish, Portuguese, Finland, Denmark, Swedish, simplified Chinese, etc.

vxdiag-vcx-se-benz-user-manual-3

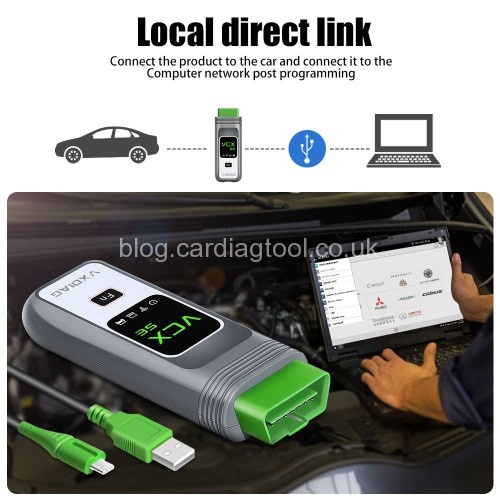
3.Many different communication methods supported:

Wifi connection: yes

USB connection: yes

Internet connection: yes

VCX SE will meet the different needs of users.

4.Update: Both firmware and SOIP firmware can be updated.

5.Hardware warranty: 3 year.

 So what is “super remote diagnosis” and “DONet authorization”?

The device with DONet authorization can perform online programming / diagnosis and coding. It will perfectly solve the problem that Mercedes Benz account cannot be input remotely because the Benz account will be bound with the computer and hardware.

vxdiag-vcx-se-benz-user-manual-4

Besides Mercedes Benz, the super remote diagnosis Donet authorization function also supports diagnosing and programming the following car makes: Porsche 2, Porsche 3 (Doip), BMW (BMW Doip), Ford, Mazda, GM (Chevrolet, Buick, GMC, Cadillac, Holden, Opel, Vauxhall Pontiac, Hummer, Saab, Saturn), VAG (VW AUDI Seat Skoda Bentley Lamborghini), Land Rover, Jaguar, Subaru, also supports Volvo car models diagnosis.

vxdiag-vcx-se-benz-user-manual-5

Something important to know!

It’s difficult to do online programming using SD C4/C5/C in the future. Because the original factory will bind the account & authorization to the computer. It’s almost impossible to have many original factory online accounts.

If SD C4 C5 won’t support DOIP protocol communication, that indicates many multimedia models after year 2016 like hu5 hu6 hu7 hu55 hu5s module will not support communication, diagnosis or programming. Also the other control systems of some cars Also adopt the doip protocol, then sdc4 /c5 won’t support them neither.

Therefore, VXDIAG VCX SE BENZ Diagnostic & Programming Tool will be better choice.

For example: If Benz realizes one license per machine, as long as the computer I use is authorized by Benz, then I can realize super remote diagnosis donet online programming for customers who have bought VXDIAG Benz DoiP VCX SE hardware through super remote diagnosis Donet authorization. All the customers have to do is plug his VXDIAG Benz DoiP VCX SE into the car with the network and offer the serial number of the device to the person who operates the software.

There is a good benefit for users to get VXDIAG VCX SE BENZ. Once you purchase this diagnostic tool, you can enjoy the free authorization to open super remote diagnosis Donet authorization and use it for free for life. The activity is only for four months. After the activity, you need to pay for the authorization if you want to open it. (It’s expensive!)

VXDIAG Benz DoiP VCX SE display:

vxdiag-vcx-se-benz-user-manual-6 vxdiag-vcx-se-benz-user-manual-7 vxdiag-vcx-se-benz-user-manual-8
If you’re interested in this Benz diagnostic & programming tool, here you can go.
http://www.cardiagtool.co.uk/vxdiag-vcx-se-benz-diagnostic-programming-tool.html

Xhorse VVDI2 Professional Tool Tutorials: Software Update

  Xhorse VVDI2 Full version   has Highlights as follows: 1.Free Lifetime Online firmware and software update Xhorse VVDI2 Full Version V7.1....