2021年1月31日星期日

OBDSTAR MS80 Scanner Outlook: Appearance, Register & Update Tutorial

 Positioning as professional-level intelligent diagnosis motorcycle scanner, OBDSTAR MS80 aims to provide an unprecedented intelligent diagnosis and maintenance experience-the first fault guidance, technical bulletin, data flow assistance, diag socket, and other functions to help customers diagnose accurately and efficiently.

obdstar-ms80-scanner-outlook-appearance-register-update-tutorial-1


By learning and watching the uploaded video in Cardiagtool YOUTUBE Channel, I believe you guys will get what you want and need to know about the function display, appearance, register & update, embedded document of user manual, FAQs, etc.


Please follow up to get started this journey.


Part 1. Appearance & function display:

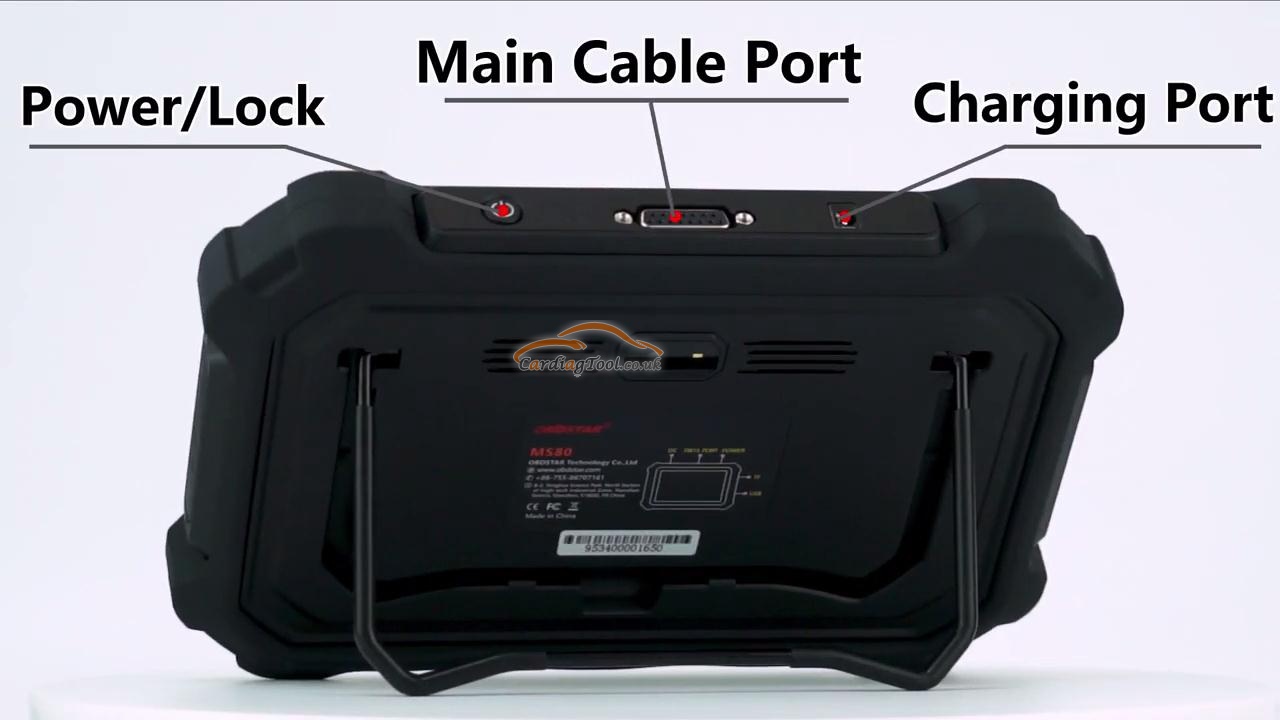
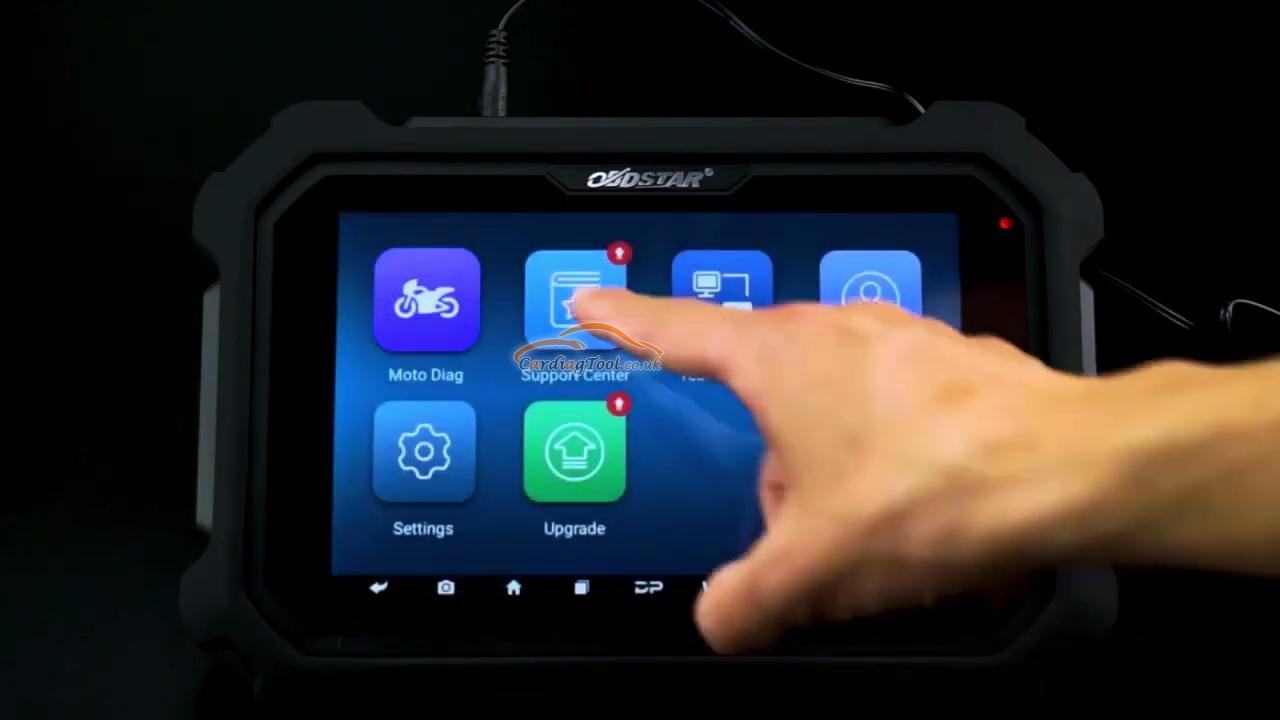
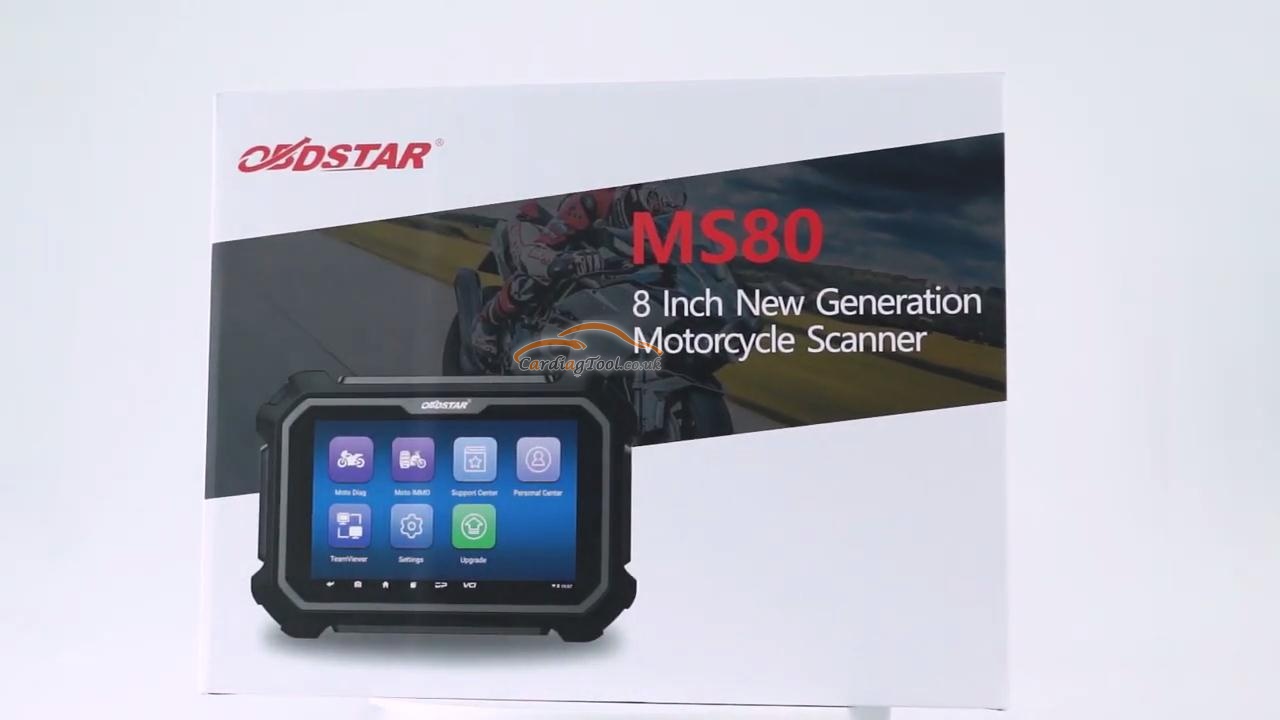
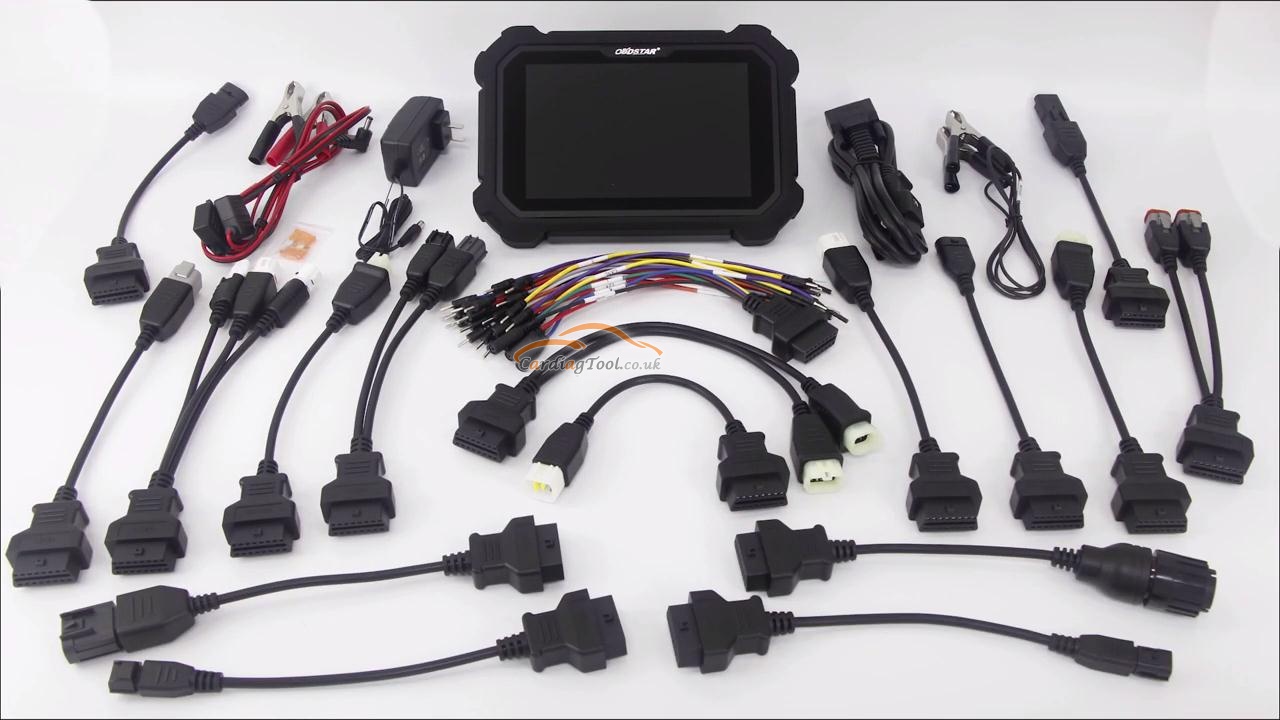
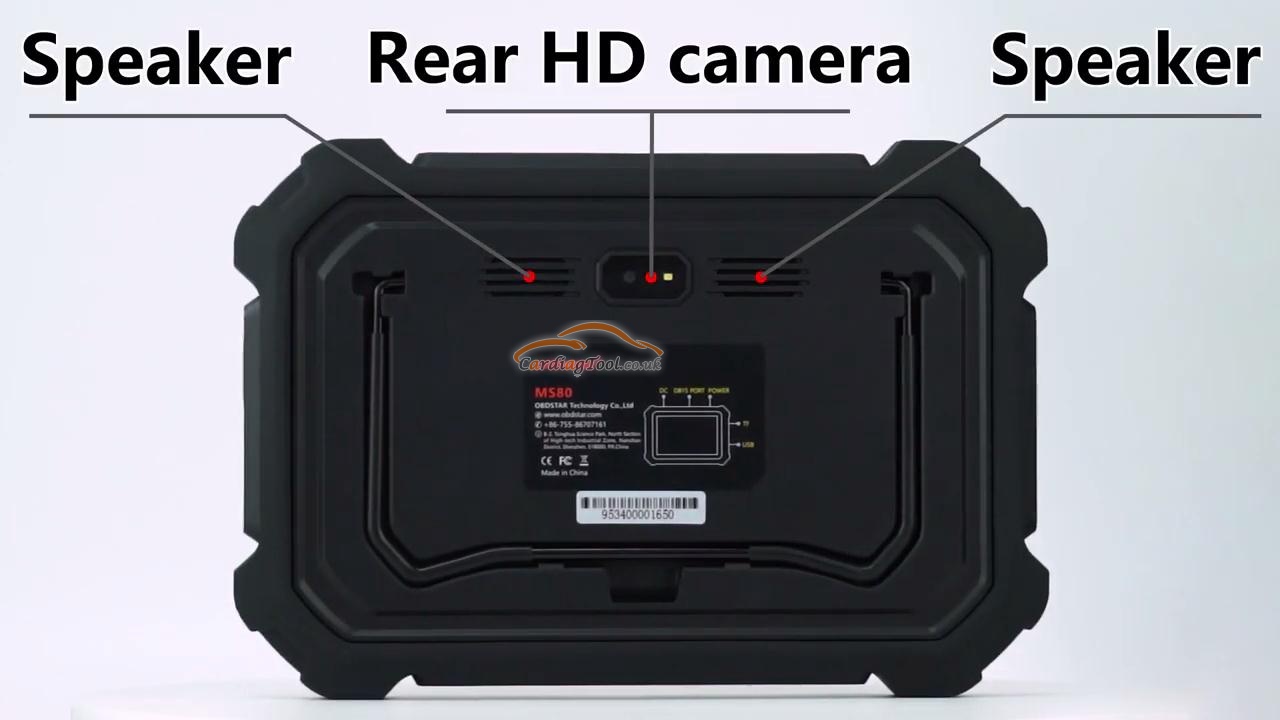
Here, we will provide some pictures of MS80 scanner to help you guys foster intuitive understanding about it.

obdstar-ms80-scanner-outlook-appearance-register-update-tutorial-2 obdstar-ms80-scanner-outlook-appearance-register-update-tutorial-3 obdstar-ms80-scanner-outlook-appearance-register-update-tutorial-4 obdstar-ms80-scanner-outlook-appearance-register-update-tutorial-5


All right. Next is the core of this article--register & update tutorial


Part 2. How to register & update OBDSTAR MS80 scanner?

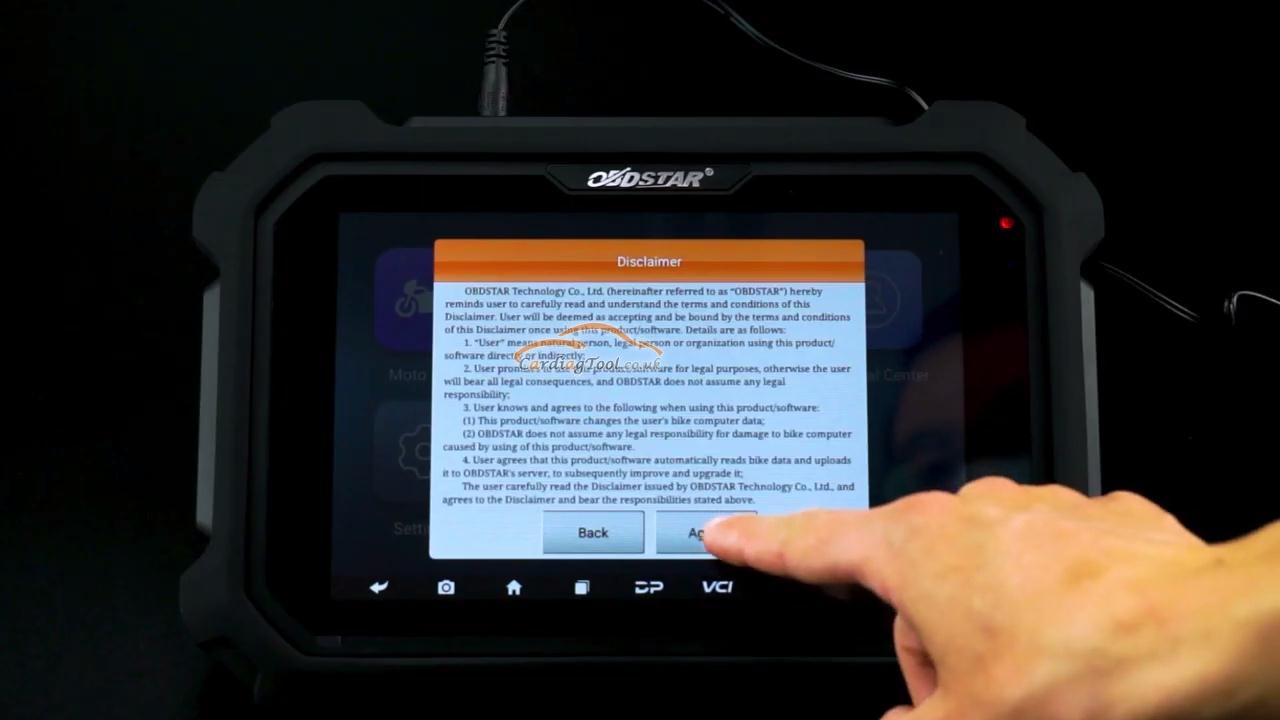
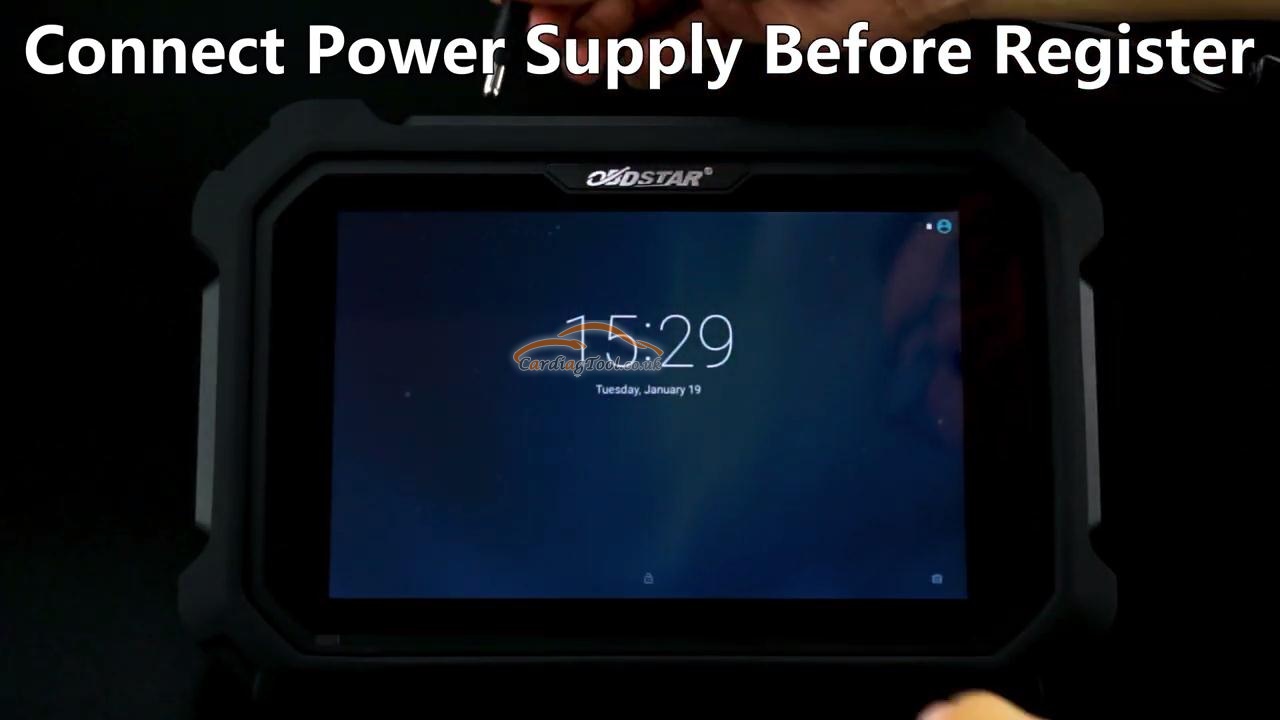
Please be sure to connect power supply before registration

obdstar-ms80-scanner-outlook-appearance-register-update-tutorial-6


Then click “Agree” to confirm the Disclaimer and you will get to the next step.

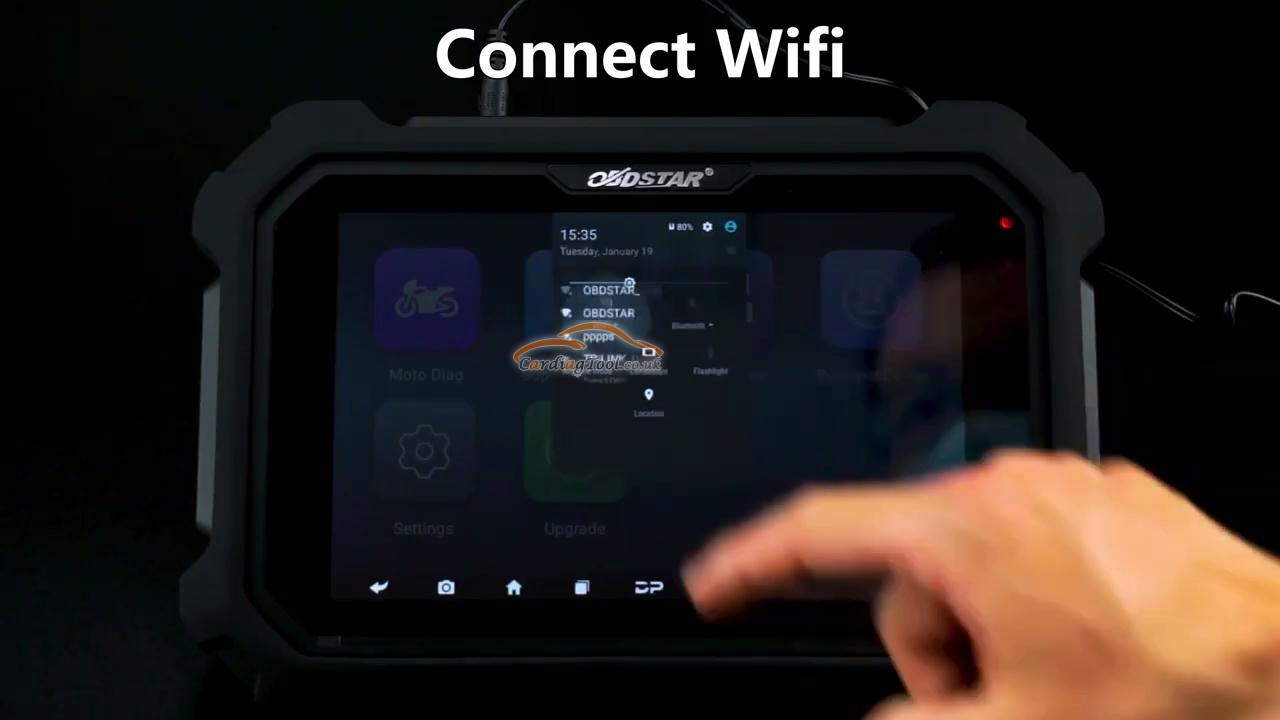
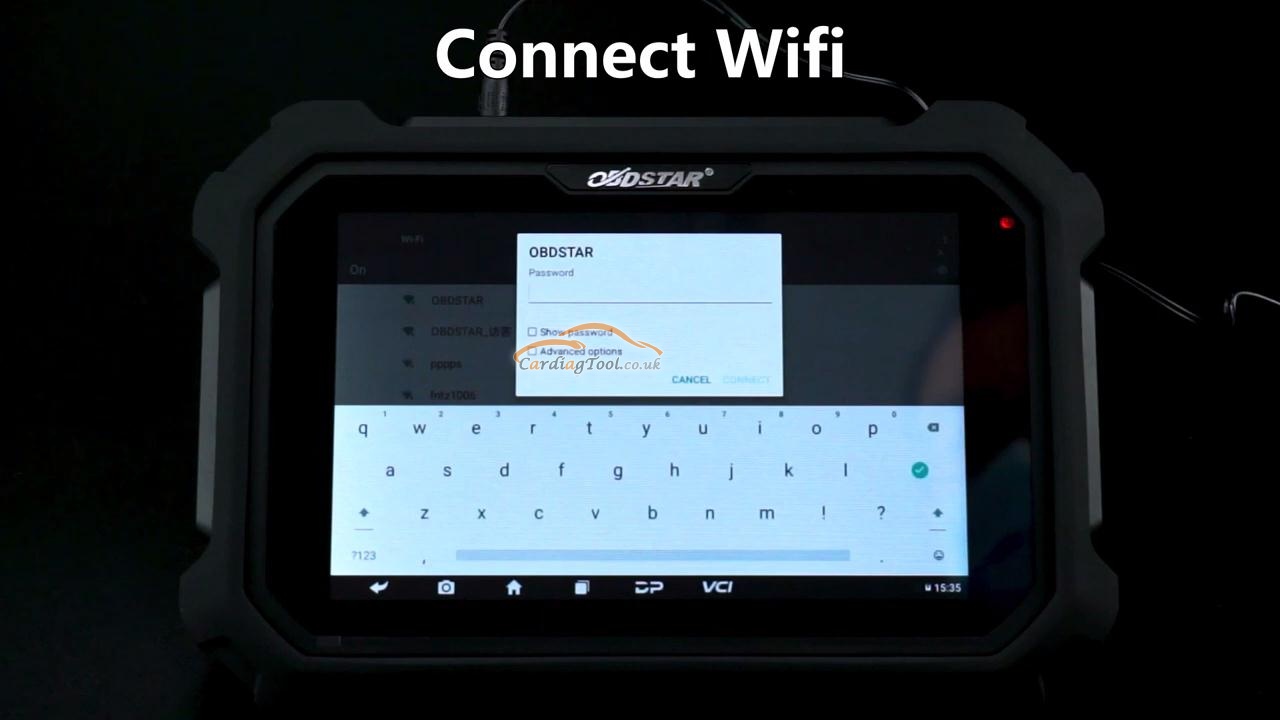
It’s the step of connecting the Wifi because the register and update process needs Internet connection.


Choose the Wifi signal you want to connect and input the password to finish it.

obdstar-ms80-scanner-outlook-appearance-register-update-tutorial-7 obdstar-ms80-scanner-outlook-appearance-register-update-tutorial-8 obdstar-ms80-scanner-outlook-appearance-register-update-tutorial-9


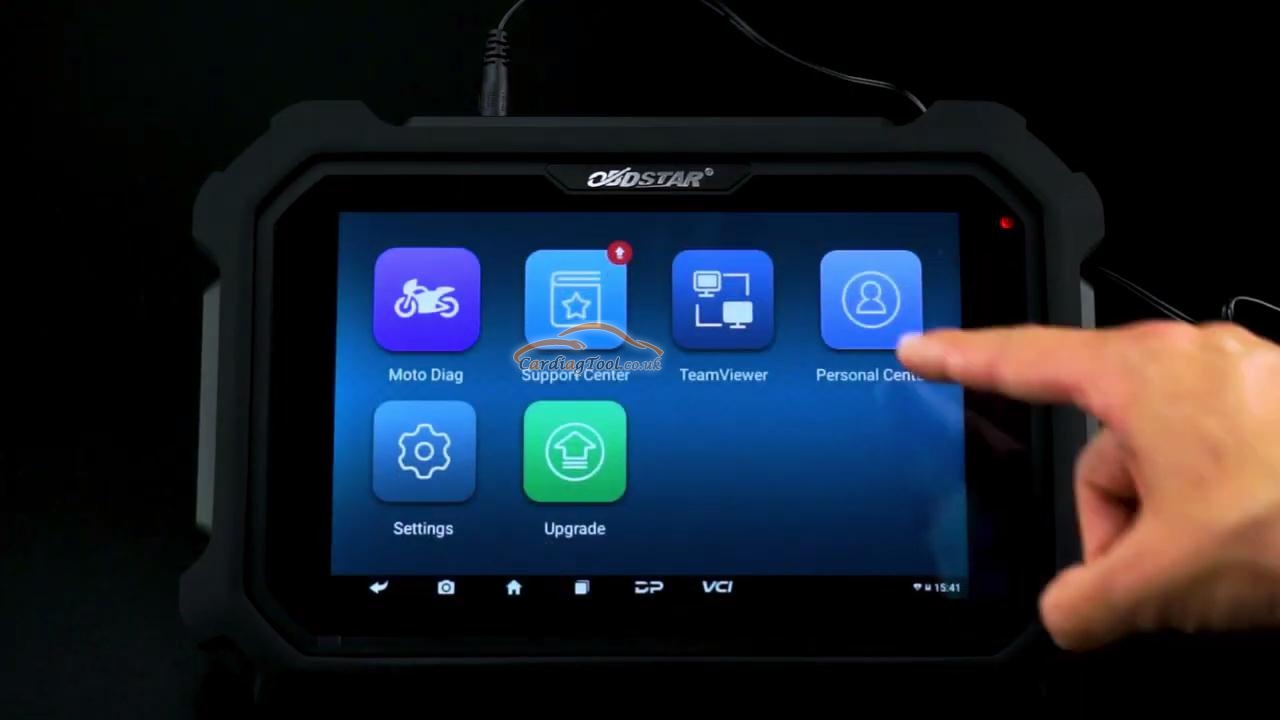
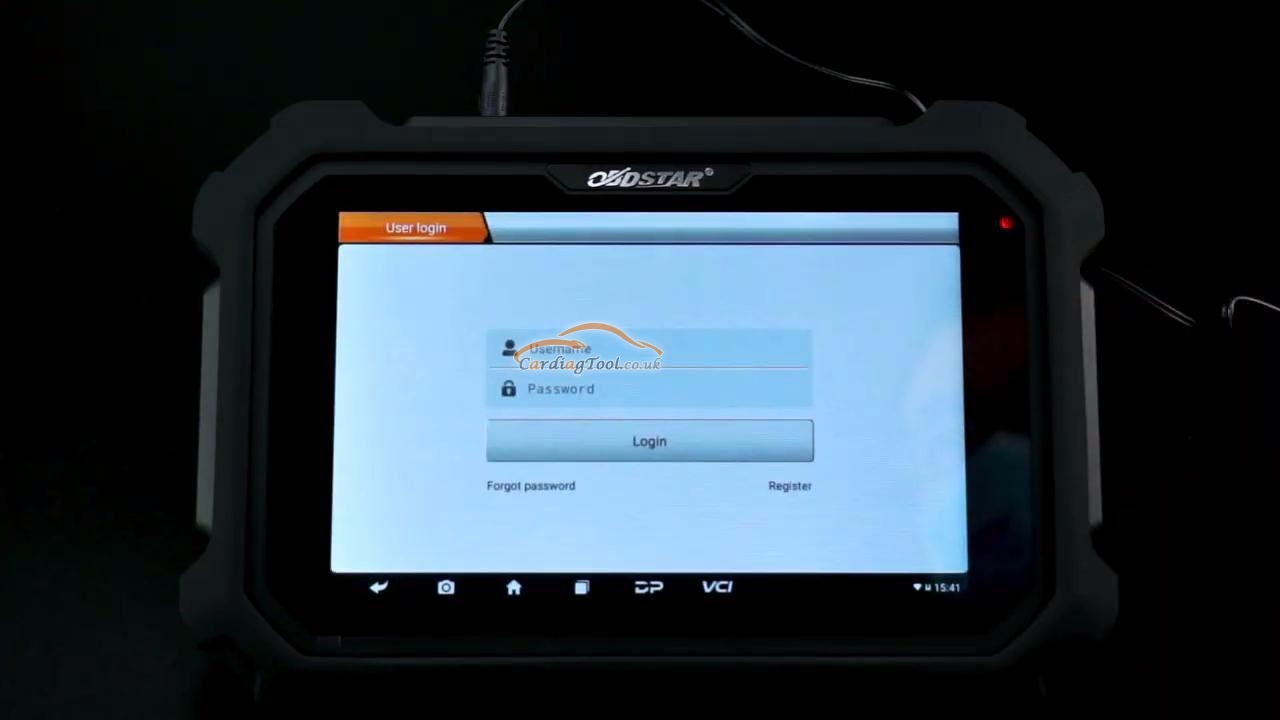
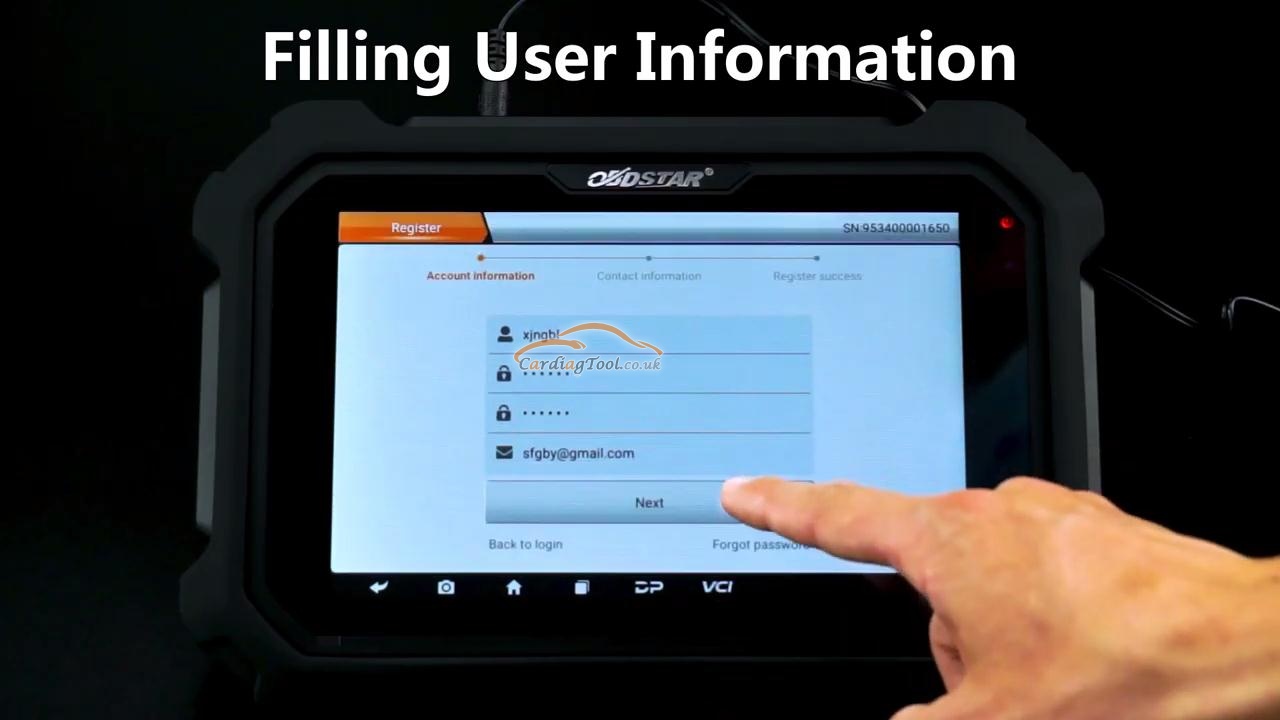
Come back to the Home screen and choose the Application of <<Personal Center>> to enter into. Press the <<Register>> button to start registering your personal account.


Fill in the User Information, including your user name, password and Email address. Press “Next” to continue.

obdstar-ms80-scanner-outlook-appearance-register-update-tutorial-10 obdstar-ms80-scanner-outlook-appearance-register-update-tutorial-11 obdstar-ms80-scanner-outlook-appearance-register-update-tutorial-12


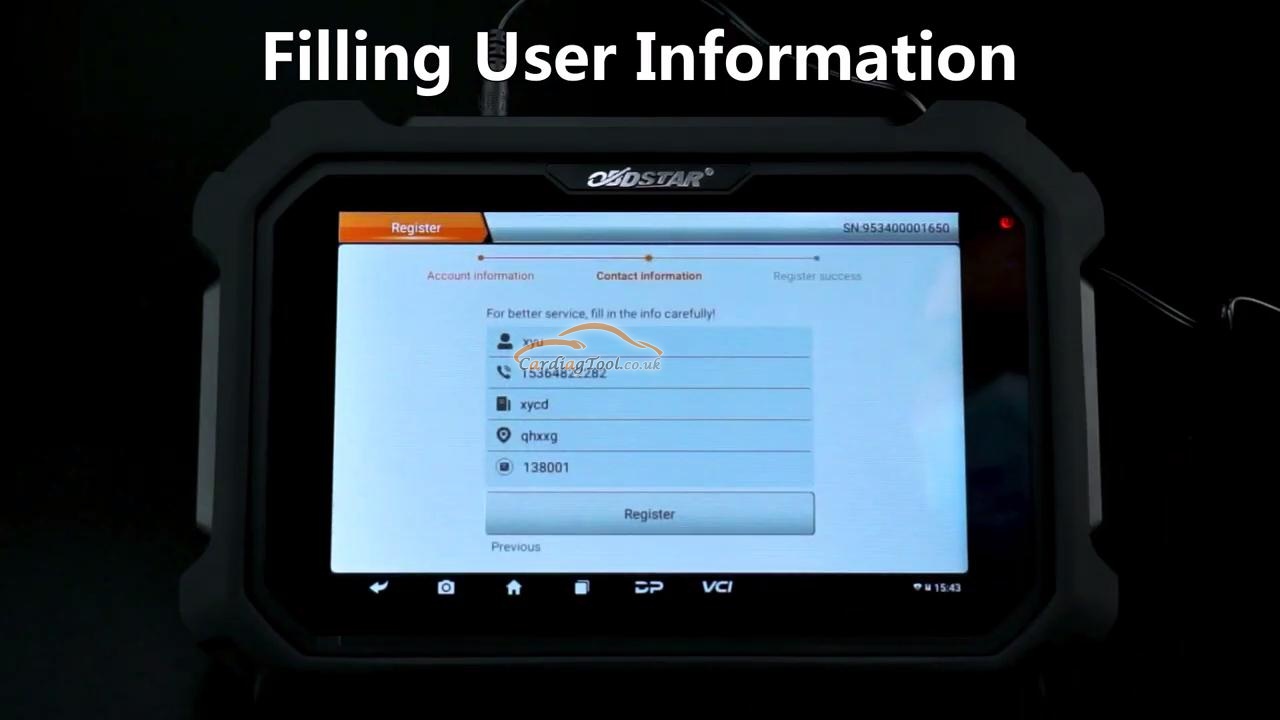
Then, you have to fill in the Contact Information, just follow the unit’s on-screen message and type the info needed on the box respectively. (This is all for better service and user experience, please take it seriously)


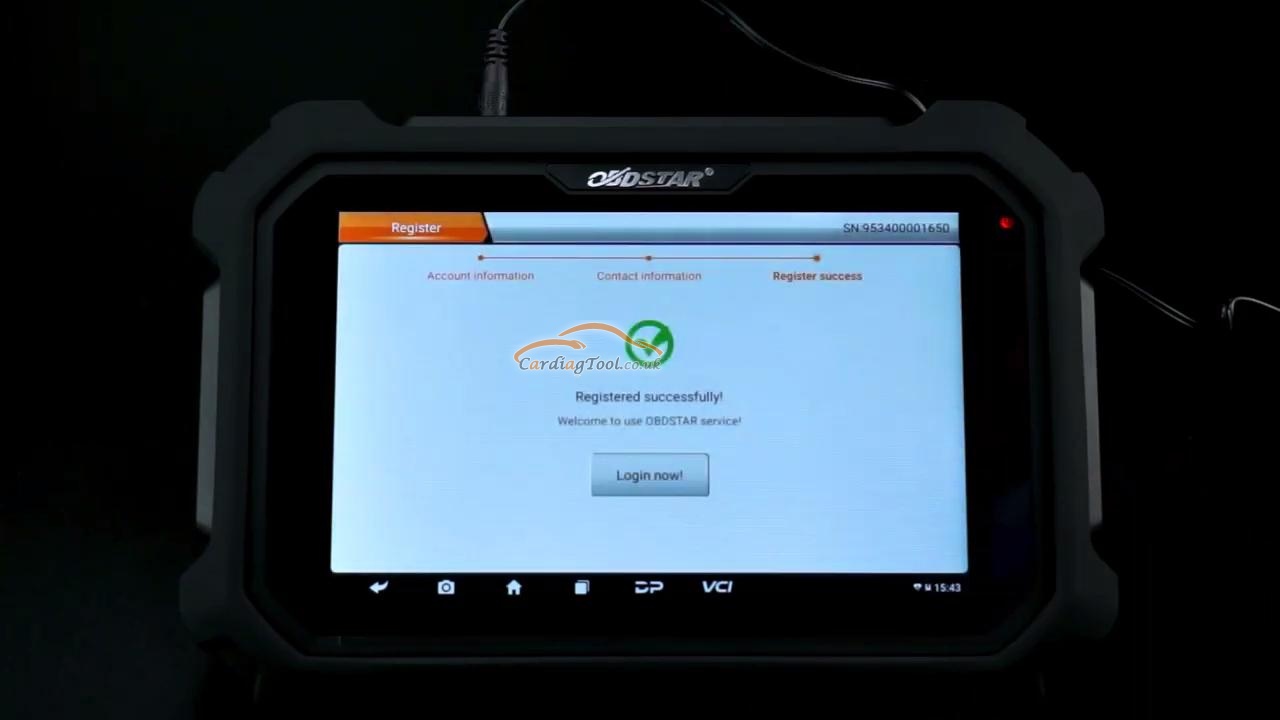
OK, press the <<Register>> button, Registered successfully!

obdstar-ms80-scanner-outlook-appearance-register-update-tutorial-13 obdstar-ms80-scanner-outlook-appearance-register-update-tutorial-14


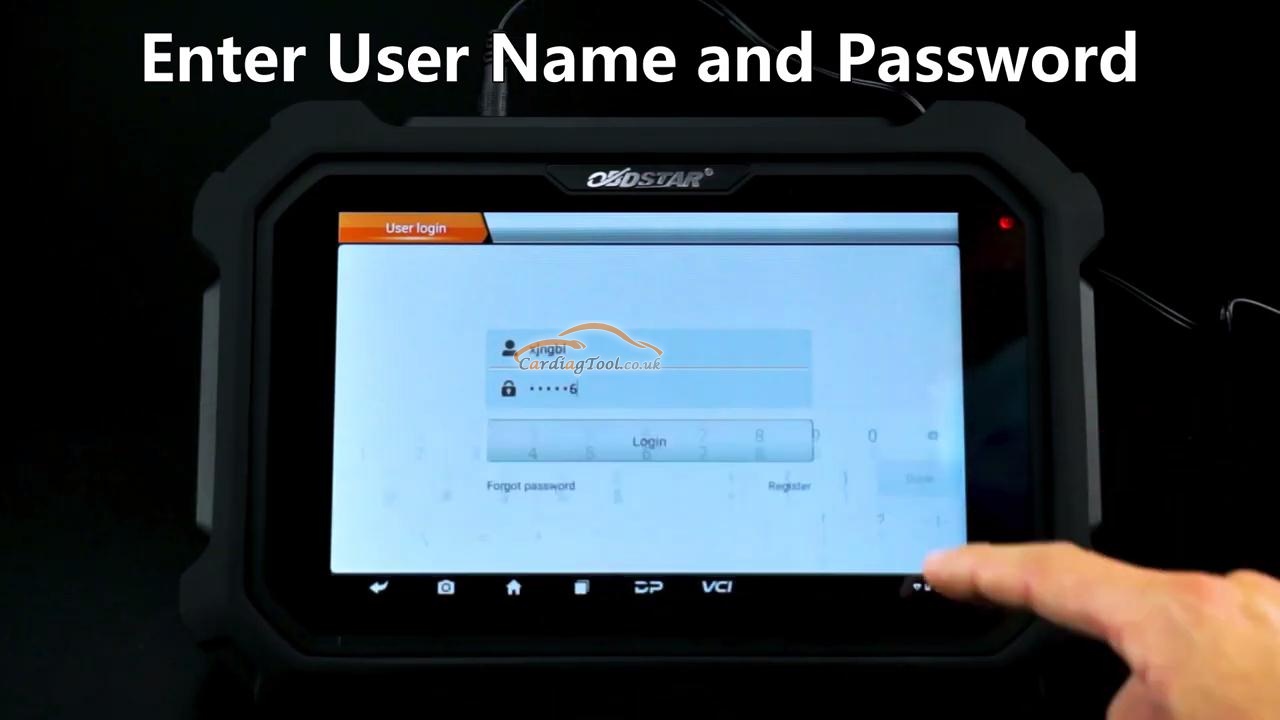
Press <<Login now!>> button to login in the registered account.

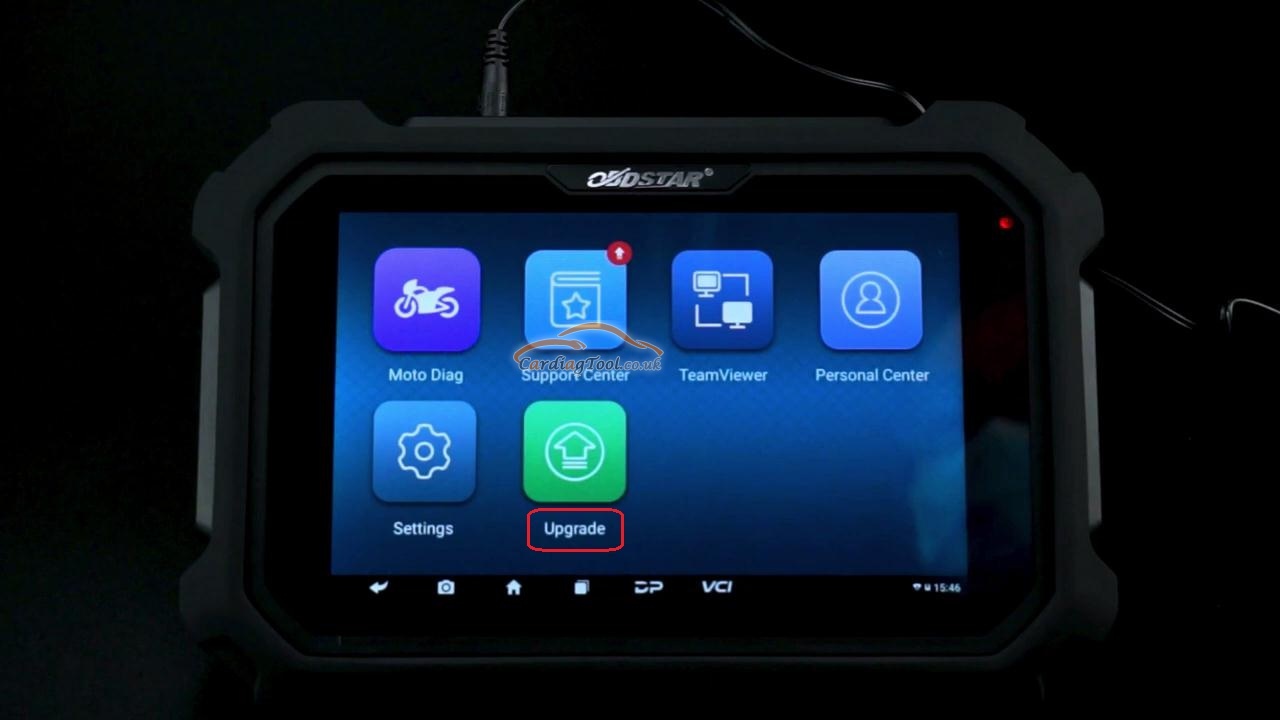
Then, you will come to the interface of “Personal Center”. Press the Back button to come to the Home screen and choose <<Upgrade>> application to start updating the unit.


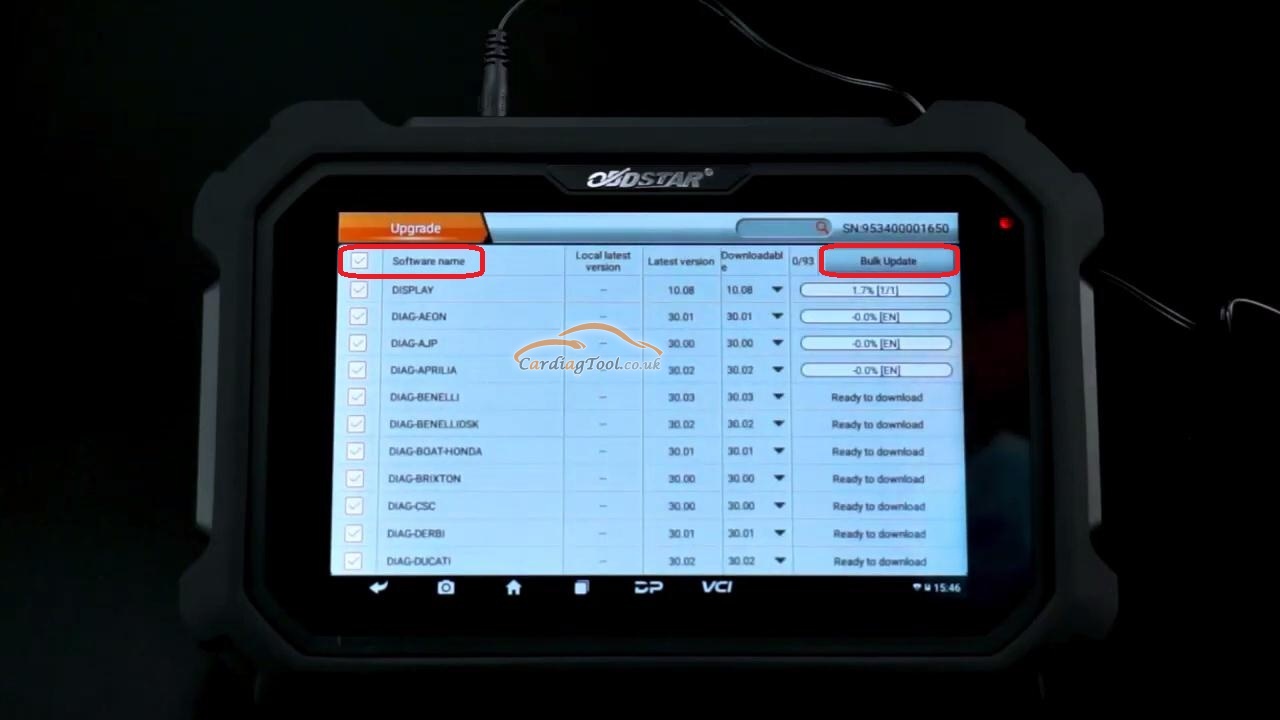
Make sure to kick the right box [Software name] and then press “Bulk Update” to upgrade the latest version of the software needed one by one.

obdstar-ms80-scanner-outlook-appearance-register-update-tutorial-15 obdstar-ms80-scanner-outlook-appearance-register-update-tutorial-16 obdstar-ms80-scanner-outlook-appearance-register-update-tutorial-17


Part 3. Embedded user manual, FAQs & Tech Videos.

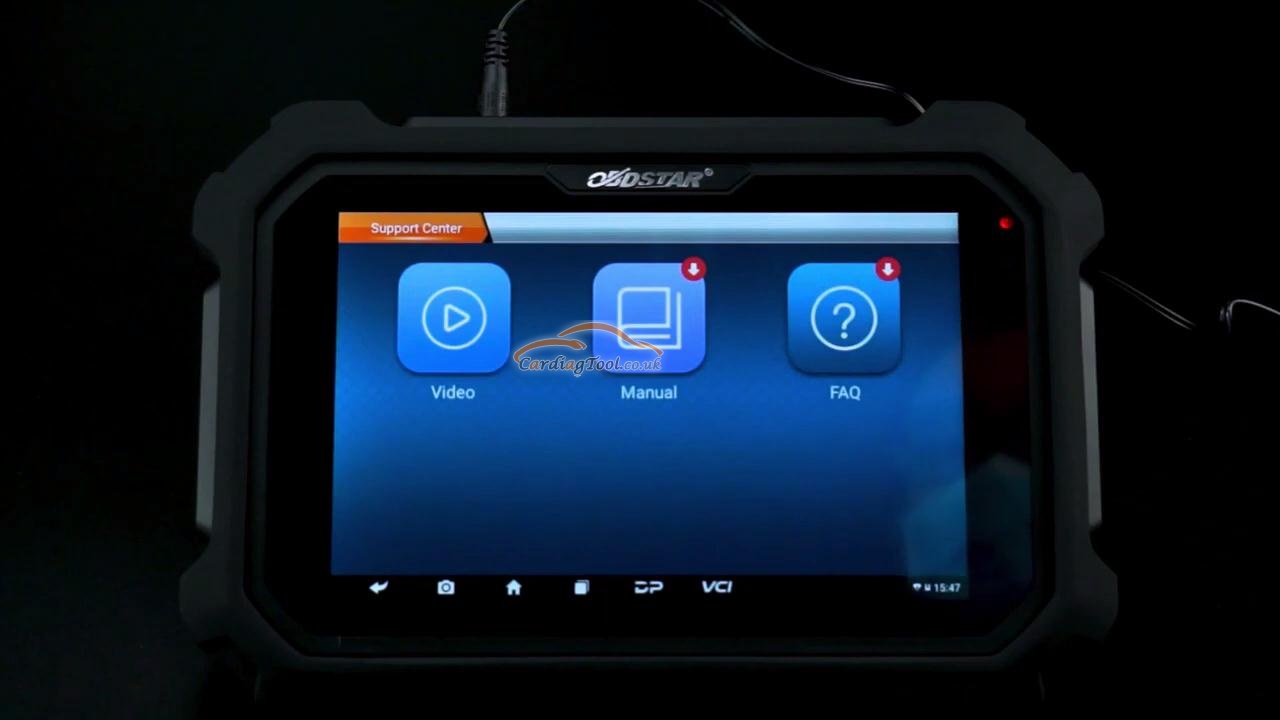
After upgrading your unit successfully, go back to the main screen and press <<Support Center>>


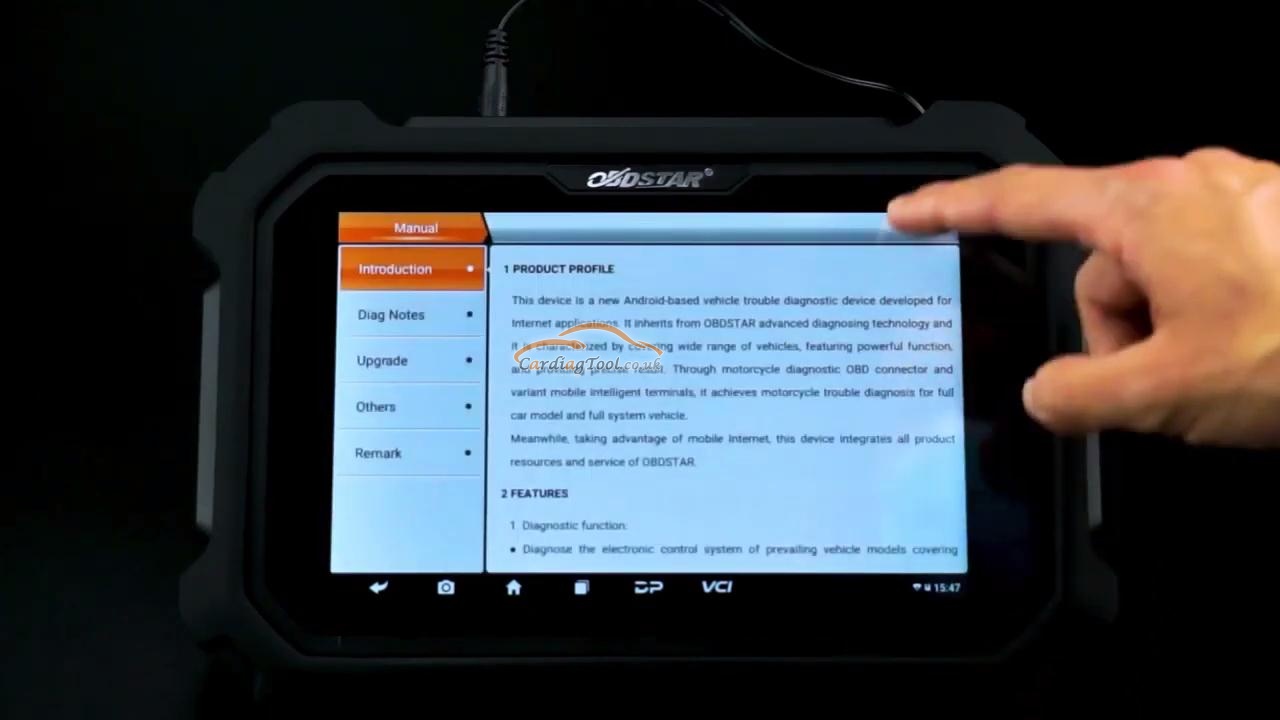
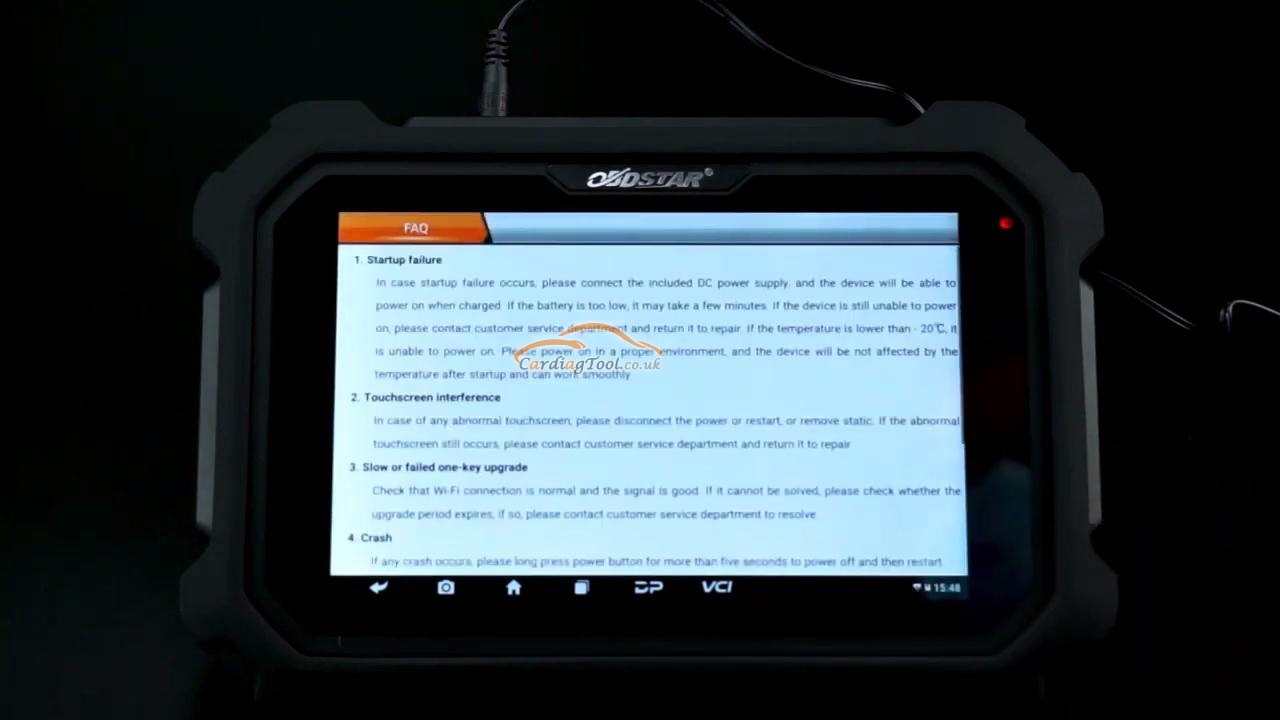
Right here, you can download the newly-released OBDSTAR official User Manual, Tech Videos & also FAQs to help you know about some tips of using this unit well and all the questions you may be concerned with and all kinds of details you should care about when working on your cars with this unit. This is very powerful function and has ever been made well enough by other similar car tool brand’s manufacturer.

obdstar-ms80-scanner-outlook-appearance-register-update-tutorial-18 obdstar-ms80-scanner-outlook-appearance-register-update-tutorial-19 obdstar-ms80-scanner-outlook-appearance-register-update-tutorial-20 obdstar-ms80-scanner-outlook-appearance-register-update-tutorial-21


Here is the video in Cardiagtool YOUTUBE Channel:
<" />
That’s all. Thanks so much for sharing your time with us!

Don't forget to contact us at:

Email:  sales@CarDiagTool.co.uk
Skype: cardiag.co.uk
Whatsapp: +86 15002705698

Or leave a message at https://www.cardiagtool.co.uk/

to tell us what suggestions or questions you have about our products.

Source:http://blog.cardiagtool.co.uk/obdstar-ms80-scanner-outlook-appearance-register-update-tutorial/

2021年1月28日星期四

What’s the Difference between Autel MaxiSys Elite and Autel MaxiSys Pro?

 The Autel Maxisys series diagnostics tablets are the fastest scan tool ever in the current car obd2 tool market. It is built for professional mechanics, technicians, and busy car repair shops. But with so many Autel scanners to choose from, deciding the best OBD2 scanner for your needs can be quite challenging. And if you are confused between the Autel Maxisys Elite and Autel Maxisys Pro, then this post for you. In this Autel Maxisys Pro VS Elite review, we’ve compared two of the best Autel Maxisys Professional diagnostic scanners.


But, Which is better? Autel Maxisys Pro or Maxisys Elite scan tools? We’ve created a comparison table below for you to see how they perform against one another and view their differences. Depending on your needs and budget, you will find out that a scan tool of your choice and features. They may seem similar, but they still differ. Read on to get what you want to know between them and make the right purchase choice.


This is what Autel MaxiSys Elite looks like:

difference-between-autel-maxisys-elite-autel-maxisys-pro-1

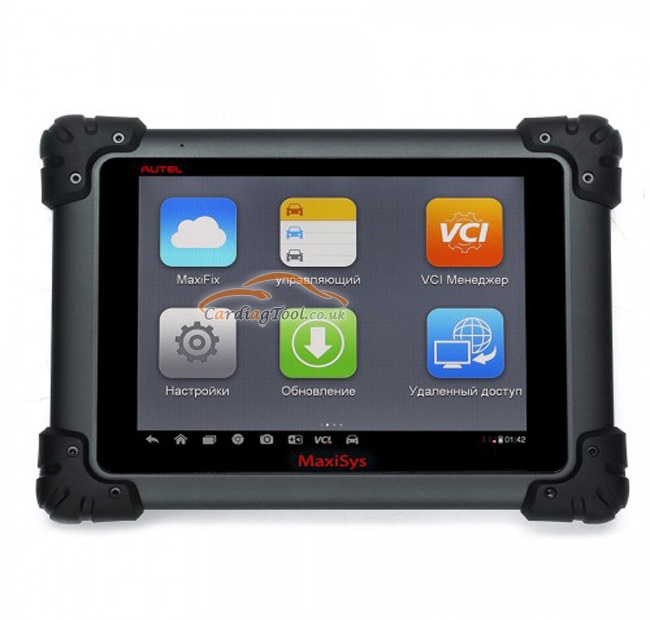
This is what Autel MaxiSys Pro looks like:

difference-between-autel-maxisys-elite-autel-maxisys-pro-2


Specification comparison chart: Autel Maxisys Pro VS Elite diagnostic scan tool:


FeaturesAutel Maxisys ProAutel Maxisy Elite
Vehicle coverage80+ US domestic, Asian, and European makes and models80+ US domestic, Asian, and European makes and models
Operating systemAndroid 4.4.4
Android 4.4.4 KitKat


CPU1.4 GHz Quad-Core
1.8 GHz Quad-Core


Wireless connectionWi-Fi, Ethernet & BluetoothWi-Fi, Ethernet, and Version 2.1  3Mbs Bluetooth
Camera5.0 Megapixel(Only Rear), AF with flashlight8.0 Megapixel(Rear), 2.0 MP(Front), AF with flashlight
Display9.7 inch LED capacitive touch screen9.7 inch Retina LCD capacitive touch screen
Screen Resolution
1024 x 768


2048 x 1536
Internal battery
11000 mAh 3.7v lithium polymer battery


13600 mAh 3.7v lithium polymer battery
Boot up time20 seconds15 seconds
VCI Connectivity
USB 2.0/WLAN/BT


USB 3.0/USB 2.0/WLAN/BT
SensorsGravity Accelerometer, Ambient Light Sensor (ALS)Ambient Light Sensor, G-sensor
Boot up time
20 seconds


15 seconds
Audio Input/OutputMicrophone, Dual Speakers, 4-Band 3.5 mm stereotype/standard headset jackMicrophone Dual Speakers 3-Band 3.5 mm stereo/standard headset jack
Power Consumption
6.5W


Max 20W


Operating Temperature0 to 50 ℃
-10 to +55°C


Storage Temperature
-20 to 60 ℃


-20 to +70°C
Weight3.12 pounds3.5 pounds
Dimensions11.81 x 8.66 x 1.97 inches12.16 x 8.66 x 1.38 inches
Software-update
1-year free online update


2 years free online update


Warranty
One-year warranty


One-year warranty


In the following content, we will have detailed comparison: Autel Maxisys Elite VS Pro in Features and functions:


1.Vehicle coverage

The Autel Maxisys Pro and Elite scan tools cover the same number of vehicles. Both of them have extensive vehicle coverage for more than 80 US domestic, European, and Asian vehicle makes and models. Some of the vehicles that they cover include BMW, Benz, Ford, Chrysler, EU Ford, GM, Kia, Daewood, Acura, Bentley, Bugatti, Porsche, Sprinter, Isuzu, Jaguar, Nissan, Toyota, Subaru, etc.


2.Construction

Even though they look similar, these two scanners are different in size and weight. The Autel Maxisys Pro measures 0.1 x 0.5 x 0.3 inches, while the Autel Maxisys Elite measures 25.6 x 7.5 x 16.9 inches. From these dimensions, you can see that the Pro scan tool is smaller than the Elite diagnostic scanner. Additionally, the Maxisys Pro is lighter than the Maxisys Elite scan tool.


3.Speed and accuracy

If you want the fastest Autel Maxisys scanner on the market, then the Autel Maxisys Elite will be the best choice. With a fast operating system in the Android 4.4.4 Kitkat and 1.8 GHz processor, this is a very fast and accurate scan tool. It is faster than the Maxisys Pro scan tool which has Android 4.0 and 1.4 GHz processor.


4.Functions

When it comes to functions, these two scanners offer the same functions such as ECU coding and programming, data logging, extensive OE-level diagnoses and service, smart Auto-VIN technology, tire pressure reset, SAS reset, and many other basic, special, and advanced functions.


5.Battery power

The Autel Maxisys Elite features a powerful 13600 mAH 3.7v lithium battery, while the Autel Maxisys Pro features an 11000 mAh 3.7v lithium polymer battery. Both of them have an excellent run time of more than 8 hours of continuous use.


6.Display

The Autel Maxisys Pro is lighter and portable. On the other hand, the Autel Maxisys Elite is heavier and not convenient to move around with due to its weight. In addition, they both have a large 9.7-inch LCD color screen. Autel Maxisys Elite scanner has a better resolution when compared to that of the Maxisys Pro scan tool.


7.Cost

If you want the best Autel scan tool and are not afraid to spend in order to get it, then the Autel Maxisys Elite is the scanner to go for. The Maxisys Pro is a high-quality and professional-grade scan tool but it still can’t be compared to the Maxisys Elite in terms of performance.


8.Update and warranty

One of the outstanding features of the Autel scan tool is that their scanners come with a free software update. Though, you shouldn’t be deceived that you will get a free lifetime update as most of the devices only come with a one-year of free updates. But with the Autel Maxisys Elite scan tool, you will get 2 years of free online updates.


Finally, its time for us to make a conclusion:

If you want the most advanced diagnostic Autel scan tool on the current market, then I would suggest that you go for the Autel Maxisys Elite scan tool. But if you want a high-quality, portable, and affordable diagnostic scanner between the two, then I will suggest that you pick the Autel Maxisys Pro scan tool.

That’s all. Thanks so much for sharing your time with us!

Don't forget to contact us at:

Email:  sales@CarDiagTool.co.uk
Skype: cardiag.co.uk
Whatsapp: +86 15002705698

Or leave a message at https://www.cardiagtool.co.uk/

to tell us what suggestions or questions you have about our products.

Source:http://blog.cardiagtool.co.uk/whats-the-difference-between-autel-maxisys-elite-and-autel-maxisys-pro/

2021年1月27日星期三

Autel Maxisys MS906BT Diagnostic Scanner Review: Good or Not?

 The Autel MS906BT scan tool shares the same OBD scanning and testing capabilities with Maxisys MS906 scanner. The two professional automotive diagnostic scanners can read and clear error codes, read live data, perform ECU coding, actuation tests, and adaptations. Furthermore, they are difficult to differentiate as they have a similar physical appearance. To know their differences and MS906BT features details, read this Autel Maxisys MS906BT reviews article.

1


Regardless of their resemblance, the Autel MS906BT comes with some additional features and functions that the MS906 doesn’t have. For example, the MS906BT can connect to the vehicle’s OBD system using VCI, while the MS906 cannot. Moreover, the MS906 code reader supports digital inspection camera add-ons and oscilloscope, while the MS906 doesn’t support them.
Another unique thing about the MS906BT scan tool is that it has the same functions as the Autel Maxisys MS908, but it is quite smaller and more convenient to carry around or use. To learn more about this outstanding scan tool, please continue reading the content below and you will get what you want to know.

2


Autel Maxisys MS906BT’Technical Specifications Chart:


FeaturesAutel Maxisys MS906BT
Operating System(OS)
Android 4.4.2, KitKat 


ProcessorSamsung Exynos T5260 6-Core Processor (1.3 GHz quad-core ARM Cortex-A7 + 1.7 GHz dual-core ARM Cortex-A15)
Display8.0″ LED capacitive touch screen with 1024x768P resolution
Internal Memory
2 GB RAM and 32 GB ROM


Oil ResetYES
Camera
Built-in 8-megapixel rear camera, autofocus & flashlight


Live dataYES
Views freeze frame dataYES
Instant remote control tech support anytime, anywhereYES
ConnectivityWi-Fi (802.11 b/g/n), USB: 2.0, Mini USB 2.0, Wireless BT V2.1+EDR, Class1, HDMI 1.4a
Real-time push message notificationsYES
Smart AutoVIN technologyYES
Audio Input/OutputMicrophone, Single Speaker, 3-Band 3.5 mm stereo/standard headset jack
SensorsGravity Accelerometer, Ambient Light Sensor (ALS)
Power and Battery10,000 mAh 3.7 V lithium-polymer battery, Charging via 12 V AC/DC power supply (up to 14 hours of continuous operation)
Input Voltage12 V (9-35 V)
Vehicle Coverage

more than 80 US, Asian and European makes and models; Abarth, Acura, Alfa, Audi, Bentley, Benz, Bmw, Fiat, Ford, Gm, Holden, Bugatti, Chevrolet, Chrysler,

Hyundai, Infiniti, Isuzu, Citroen, Dodge, Dacia, Daihatsu, Kia, Land Rover, Lexus, Lancia, Maybach, Mazda, Mini, Mitsubishi,Honda, Jaguar, Jeep, Nissan, Opel, Peugeot, Saab, Scion, Seat, Skoda, Smart, Sprinter, Subaru, Porsche, Renault, Suzuki, Toyota, Vw, Vauxhall, Volvo, Etc.

Operating Temperature-10 to 55°C (14 to 131°F)
Storage Temperature-20 to 70°C (-4 to 158°F)
Update OptionYes. (via internet)
Warranty
12-Month Limited Warranty


Here we go for the specific description of MS906BT from NINE Aspects:

  1. Extensive vehicle coverage

This is one of the most extensive car scan tools that you will ever come across. It has exceptional vehicle coverage of more than 80 US domestic, European, and Asian vehicle makes and models.


  1. Large display

It features a large 7-inch display screen that is easy to operate. You will just feel like you’re using an ordinary tablet. The screen is not only large but has a resolution of 1024 x 768. This means that you will get clear results in all light conditions.


  1. Intuitive user interface

The icons on the touchscreen are easy to access and respond quickly by simply touching the function that you want. On top of that, it has a multilingual menu that makes it easy for different language speakers.


  1. Fast processor

With an Android operating system and a fast quad-core processor, this is a suitable scanner for big garage and car repair shops. It uses the powerful Exynos 5260 6-core processor, which is extremely fast.

  1. A wide range of functions

This is an amazing scan tool for technicians and mechanics looking for an advanced code reader that can perform basic functions, advanced functions, and special functions. Some of its functions include read/clear error codes, live data, oil reset, ECU coding, DPF service, EPB, BMS, matching, and many others.


  1. Advanced support

Another reason why this scan tool beats other high-end scanners on the market is that you get comprehensive support. The Wi-Fi connectivity allows the user to link up with other technicians or check verified repairs and tips online. And if you want to contact the manufacturer directly, you can use the interactive data logging feature


  1. Built-in rechargeable lithium-polymer battery

This is a powerful scan tool that comes with its own battery. The built-in lithium-polymer 10, 0000 mAh 3.7v battery is double the size of the MS906 scan tool. It provides 14 hours of continuous use without having to recharge it.


  1. Compact and portable

With dimensions of 25.6 x 16.7 x 7.4 inches, the MS907BT is a very compact and convenient battery to carry or use. It also weighs 19.25, which is quite light when compared to other scanners in the same category.


  1. 12-month warranty

The manufacturer as well offers the user with a 12-month warranty. This assures the buyer that they are getting a quality product and in case of any issue, they are free to return the scanner.


MS906BT scanner is an amazing scanner, but it still has some shortcomings...

  1. Limited updates– one of the challenges of using this scan tool is that you will have to pay for the updates after one year.  This is very disappointing considering the initial price and quality of the scan tool. It could have been a free lifetime update.
  2. Compatibility issues– get in touch with the Autel support team and find out if the code reader is compatible with your car make and model or not.


To sum up:

If you’re in search of a more advanced scan tool at an outstanding price, then the Autel MS906bt is the code reader for you. Not only can it perform the most basic functions, but it can as well perform a number of advanced functions such as ECU coding and data logging. This makes it be suitable for professional mechanics as well as a DIY enthusiast who handles different car makes and models.

That’s all. Thanks so much for sharing your time with us!

Don't forget to contact us at:

Email:  sales@CarDiagTool.co.uk
Skype: cardiag.co.uk
Whatsapp: +86 15002705698

Or leave a message at https://www.cardiagtool.co.uk/

to tell us what suggestions or questions you have about our products.

Source:http://blog.cardiagtool.co.uk/autel-maxisys-ms906bt-diagnostic-scanner-review-good-or-not/

2021年1月25日星期一

Autel MK908P MK908: Most Detailed Vehicle Identification Tutorial?

 YES! Right here in Cardiagtool Tech Support Official Blog.

This article will share the most specific steps of Autel MK908P/MK908 in vehicle identification. There are actually four methods introduced here, so this article will be divided into four main parts as shown below:

  1. Auto VIN Scan
  2. Manual VIN Input
  3. Manual Vehicle Selection
  4. OBD Direct Entry

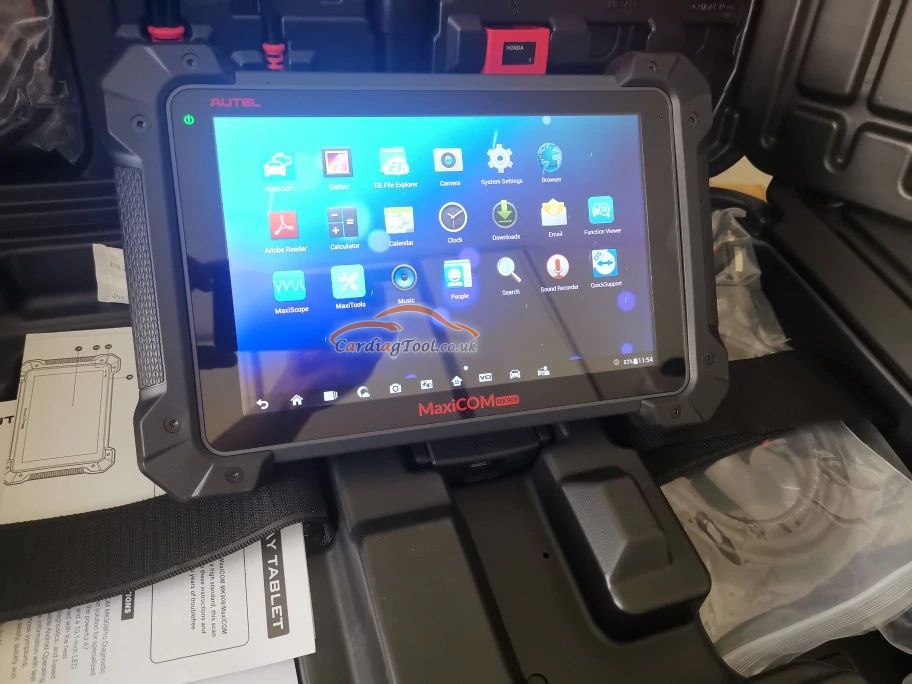
autel-mk908p-mk908-most-detailed-vehicle-identification-tutorial-1


Part 1.Auto VIN Scan

The MaxiCOM diagnostic system features the latest VIN-based Auto VIN Scan function to identify CAN vehicles in just one touch, which allows the technician to quickly detect vehicles, scan all the diagnosable ECUs on every vehicle and run diagnostics on the selected system.


What’s the main steps of performing Auto VIN Scan?

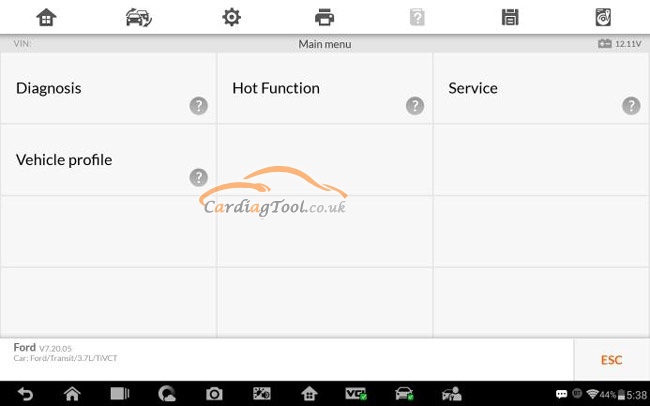
  1. Tap the Diagnostics application button from the MaxiCOM Job Menu. The Vehicle Menu displays.
  2. Tap the VIN Scan button on the top toolbar.
  3. Select Auto Detect. The tester starts VIN scanning on the vehicle’s ECU. Once the test vehicle is successfully identified, the system will guide you to the Vehicle Diagnostics screen directly.

autel-mk908p-mk908-most-detailed-vehicle-identification-tutorial-2


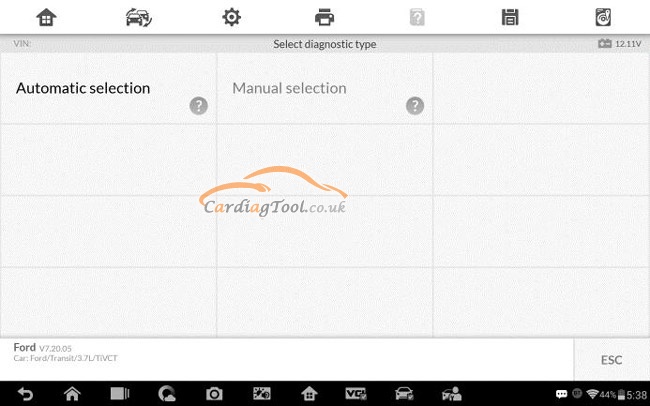
In some cases when users have selected the vehicle brand instead of performing Auto VIN Scan in the first place, the system still provides an option for vehicle VIN scan.

autel-mk908p-mk908-most-detailed-vehicle-identification-tutorial-3


Select Automatic Selection and the system will proceed to acquire VIN information automatically or allow users to input the VIN manually.


Part 2.Manual VIN Input

For some vehicles that do not support the Auto VIN Scan function, the

MaxiCOM diagnostic system allows you to enter the vehicle VIN manually, or

simply take a photo of the VIN sticker for quick vehicle identification.

Ø

What’s the main steps of performing Manual VIN Input?

  1. Tap the Diagnostics application button from the MaxiCOM Job

Menu. The Vehicle Menu displays (Figure 4-2).

  1. Tap the VIN Scan button on the top toolbar.
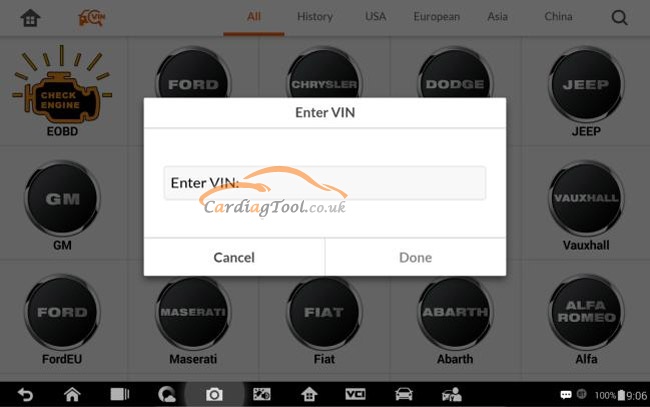
  2. Select Manual Input.
  3. Tap the input box and enter the correct VIN.

autel-mk908p-mk908-most-detailed-vehicle-identification-tutorial-4


  1. Tap Done. The vehicle will be identified in a few seconds, and once the matching is successful, the system will guide you to the Vehicle diagnostics screen directly.
  2. Tap Cancel to exit Manual Input.


Part 3.Manual Vehicle Selection

When the vehicle’s VIN is not automatically retrievable through the vehicle's ECU, or the specific VIN is unknown, you can choose to select the vehicle manually.32


Step-by-step Vehicle Selection

This mode of vehicle selection is menu driven; you simply follow the screen prompts and make a series of choices. Each selection you make advances you to the next screen. A Back button at the lower right corner of the screen returns you to the previous screen. Exact procedures may vary somewhat by various vehicles being serviced.


Part 4.Alternative Vehicle Identification

Occasionally, you may identify a test vehicle that the tester does not recognize; the database does not support, or has some unique characteristics that prevent it from communicating with the tester through the normal channels. In these instances, you are provided with the OBD direct entry, through which you can perform generic OBD II or EOBD tests.


That’s all. Thanks so much for sharing your time with us!

Don't forget to contact us at:

Email:  sales@CarDiagTool.co.uk
Skype: cardiag.co.uk
Whatsapp: +86 15002705698

Or leave a message at https://www.cardiagtool.co.uk/

to tell us what suggestions or questions you have about our products.

Source:http://blog.cardiagtool.co.uk/autel-mk908p-mk908-most-detailed-vehicle-identification-tutorial/

2021年1月24日星期日

OBDSTAR X300 DP Plus Odometer Correction for 2019 NISSAN TEANA Test

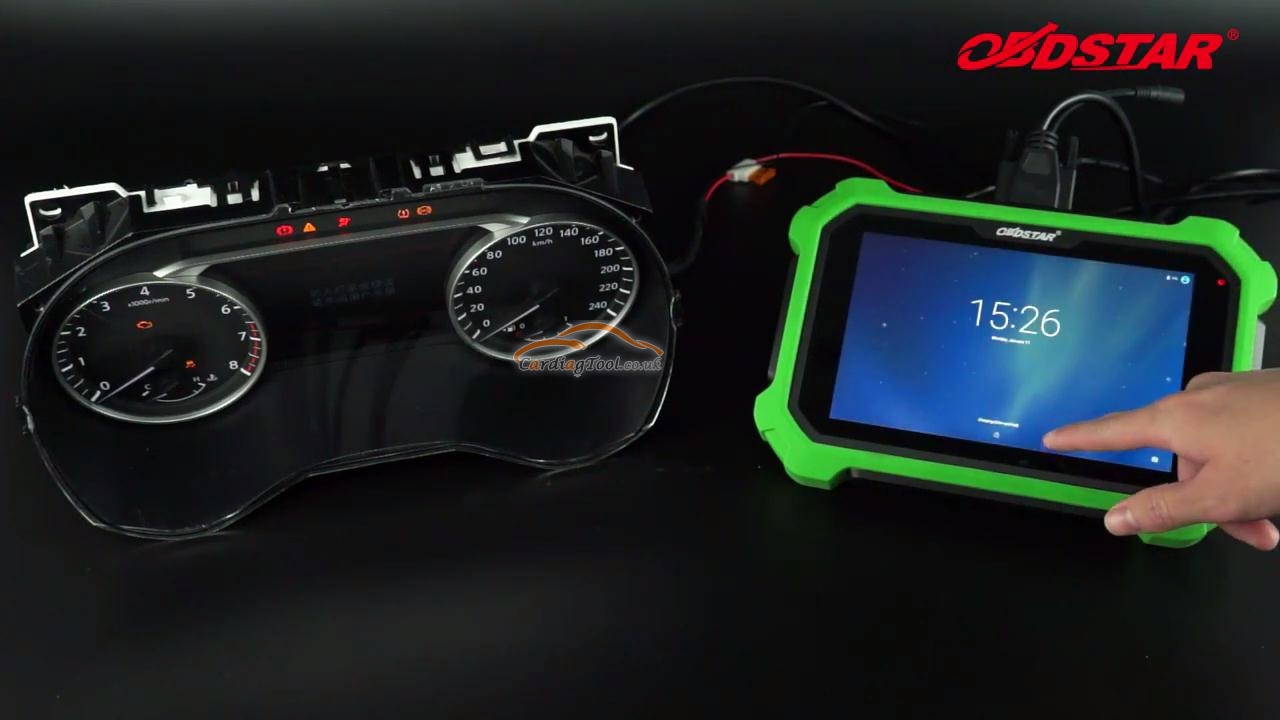
 OBDSTAR X300 DP Plus inherits from OBDSTAR advanced diagnosing technology and covers wide range of vehicles, with itself featuring powerful function, and providing precise test results. Through vehicle diagnostic OBD connector and variant mobile intelligent terminals, it achieves vehicle trouble diagnosis for full car model and full system vehicle.

obdstar-x300-dp-plus-odometer-correction-2019-nissan-teana-1


Here we are talking about the most practical operation procedures of using OBDSTAR X300 DP Plus tablet to correct odometer for 2019 Nissan Teana. Come check below and I am sure you will learn a lot on this matter by your kind reading and strictly following the procedures.


Operation Procedures:

Before this test, please connect the device with the vehicles you want to diagnose via OBD2 port. This is very easy, so we are gonna waste our time on it.

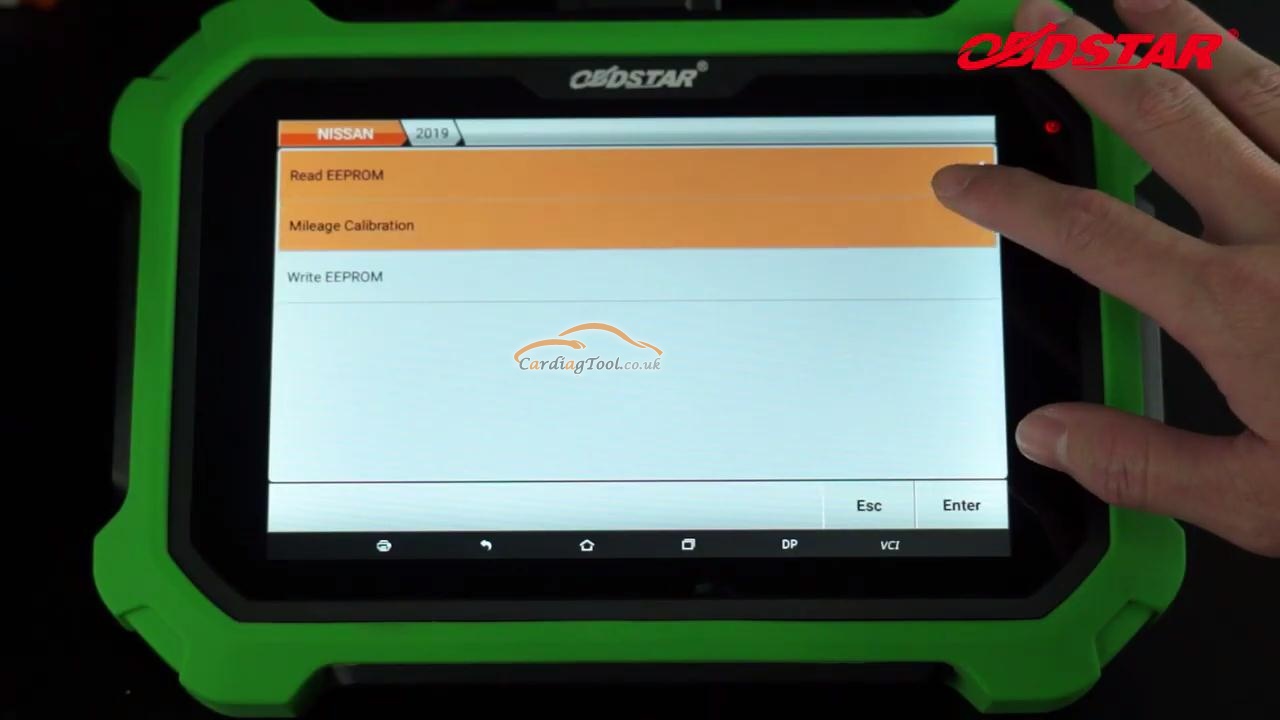
Three main steps here I want to share for this odometer correction.

Step 1.Read EEPROM

Step 2.Mileage Calibration

Step 3.Write EEPROM


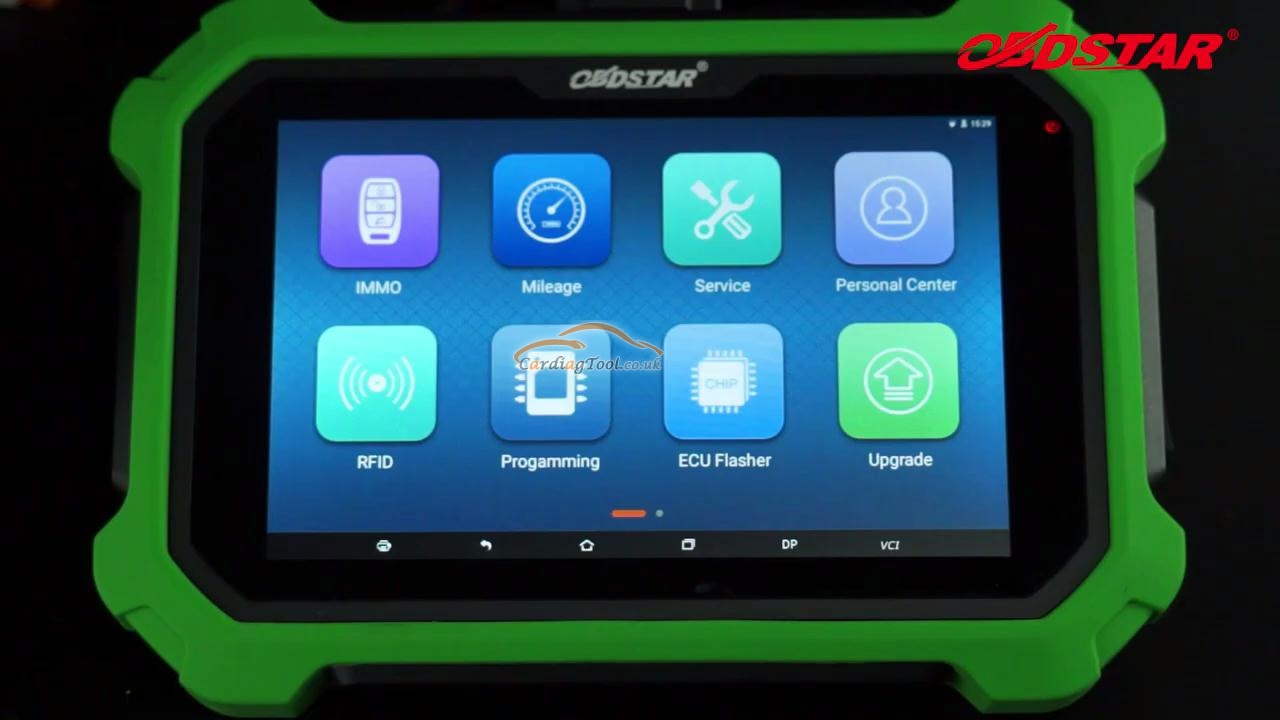
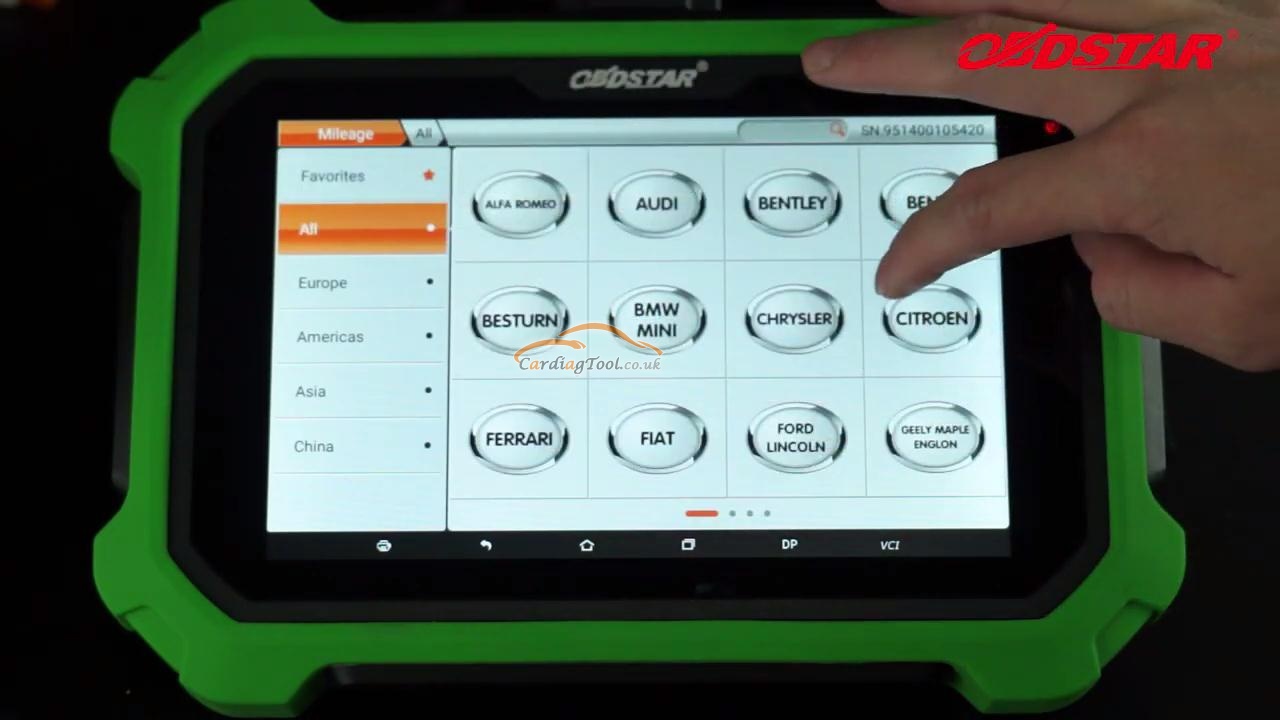
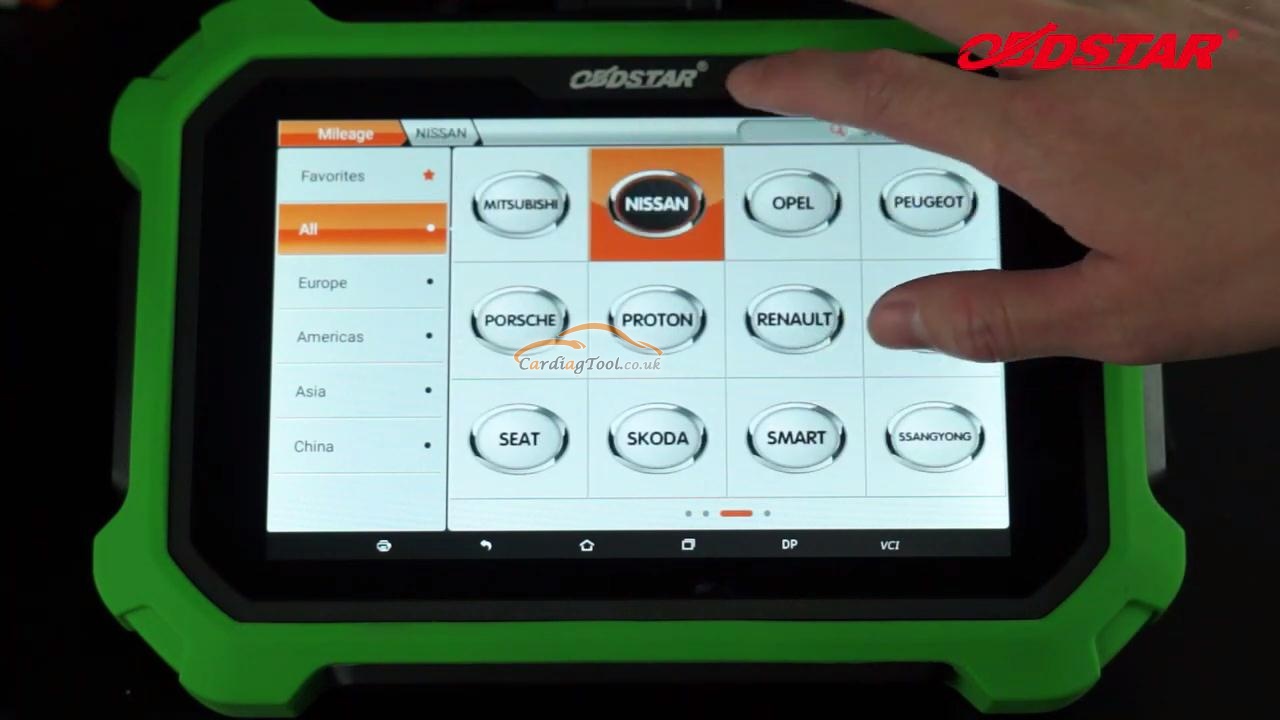
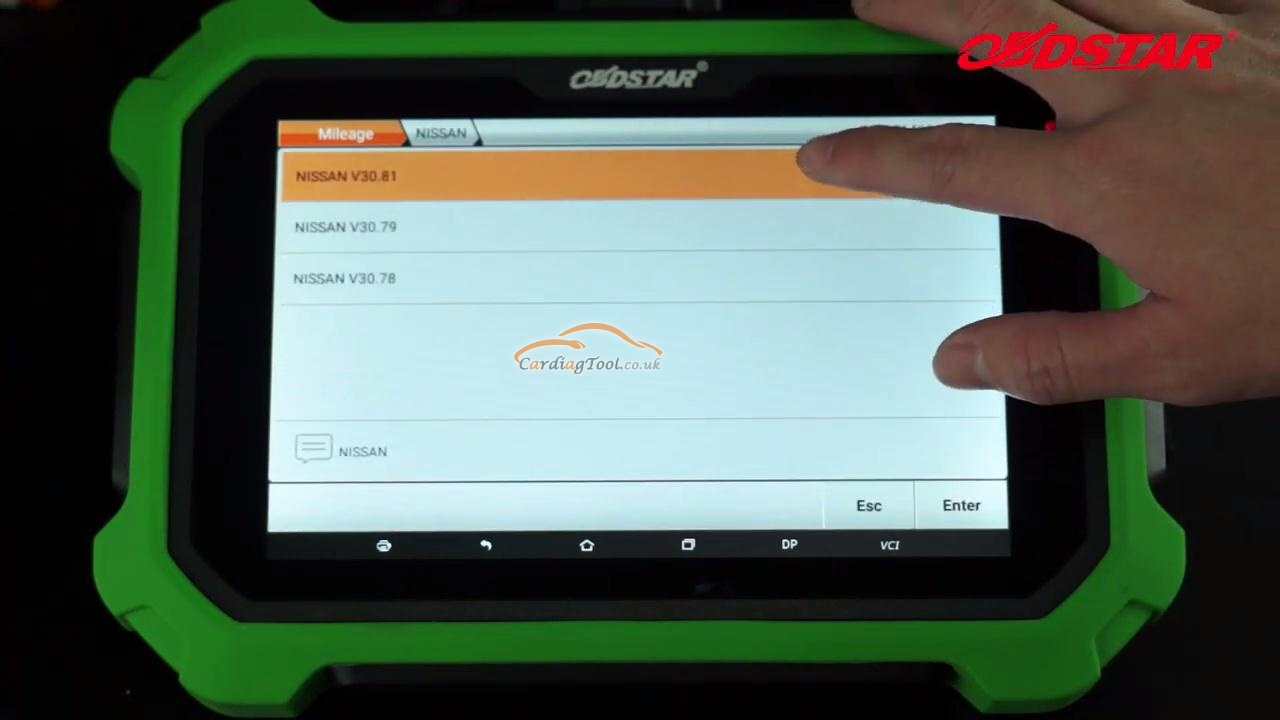
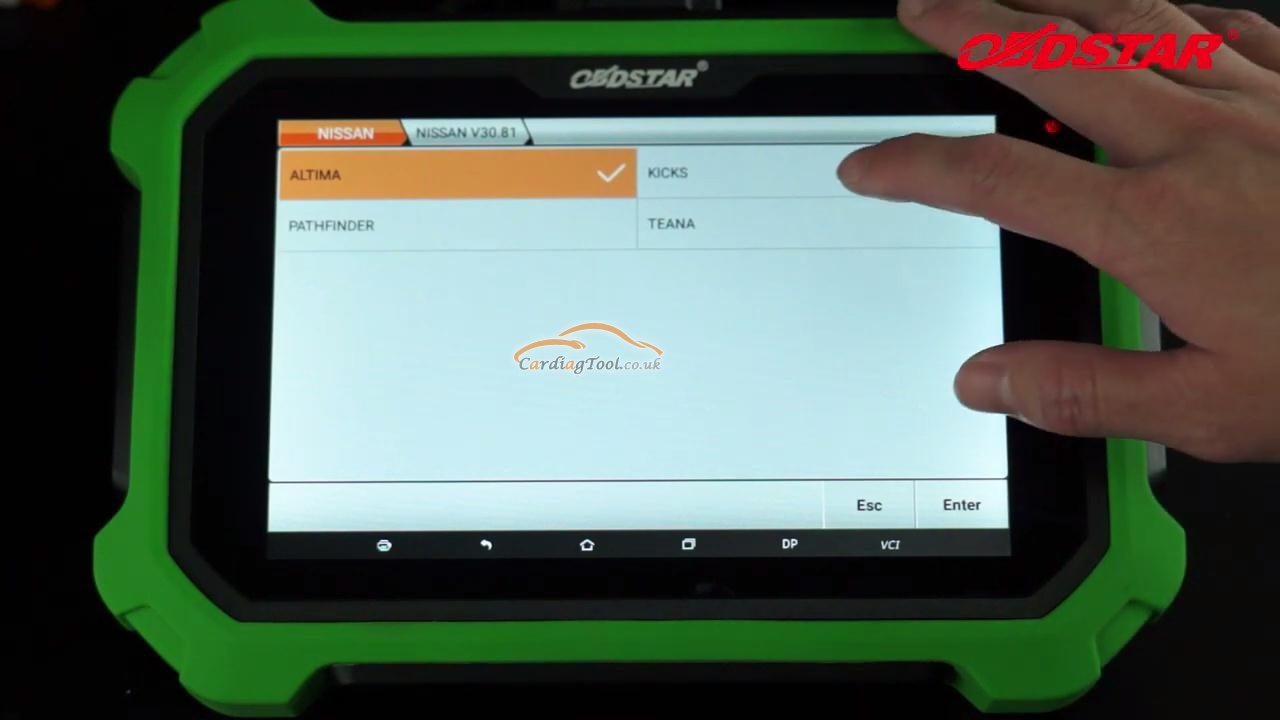
First, wake up your OBDSTAR X300 DP Plus unit and come to the menu-selection screen, you will see many icons listed up there. Choose “Mileage” button to move on. Select “All”>> “NISSAN”>> “NISSAN V30.81”

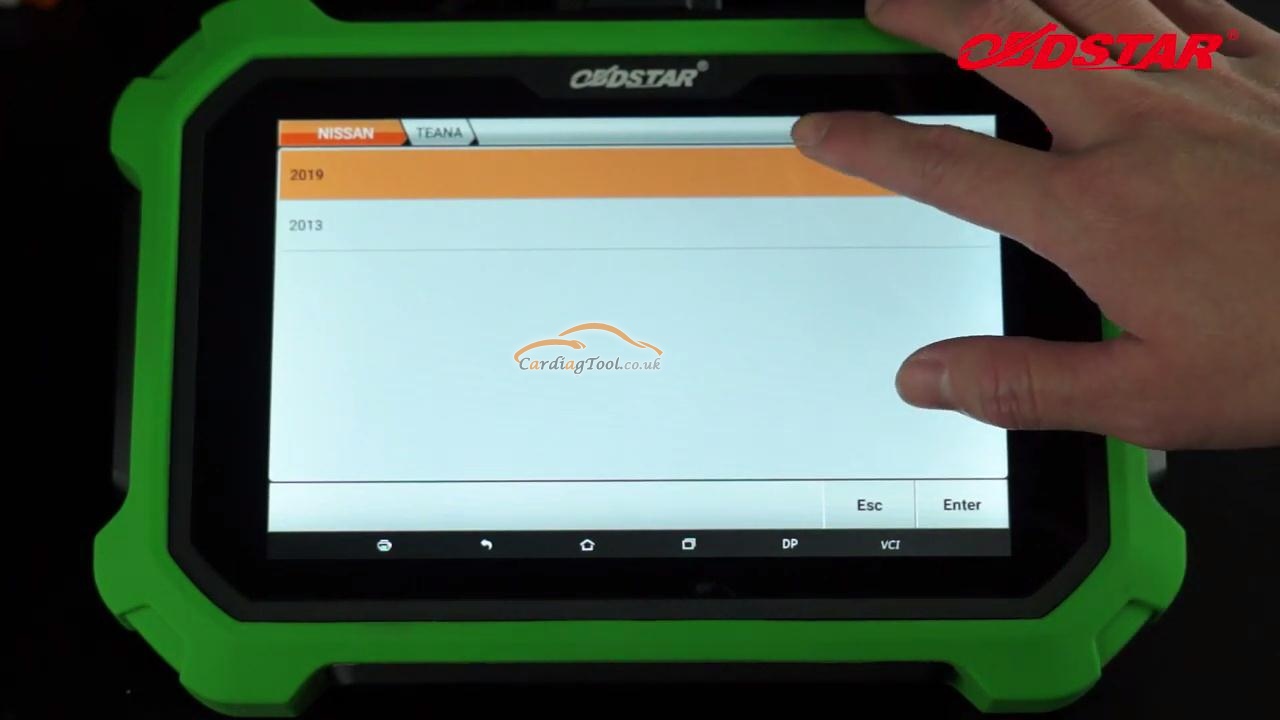
obdstar-x300-dp-plus-odometer-correction-2019-nissan-teana-2 obdstar-x300-dp-plus-odometer-correction-2019-nissan-teana-3 obdstar-x300-dp-plus-odometer-correction-2019-nissan-teana-4 obdstar-x300-dp-plus-odometer-correction-2019-nissan-teana-5


The screen will show “VCI is grading...VCI is grading...initializing...”, OK, we are good!!!

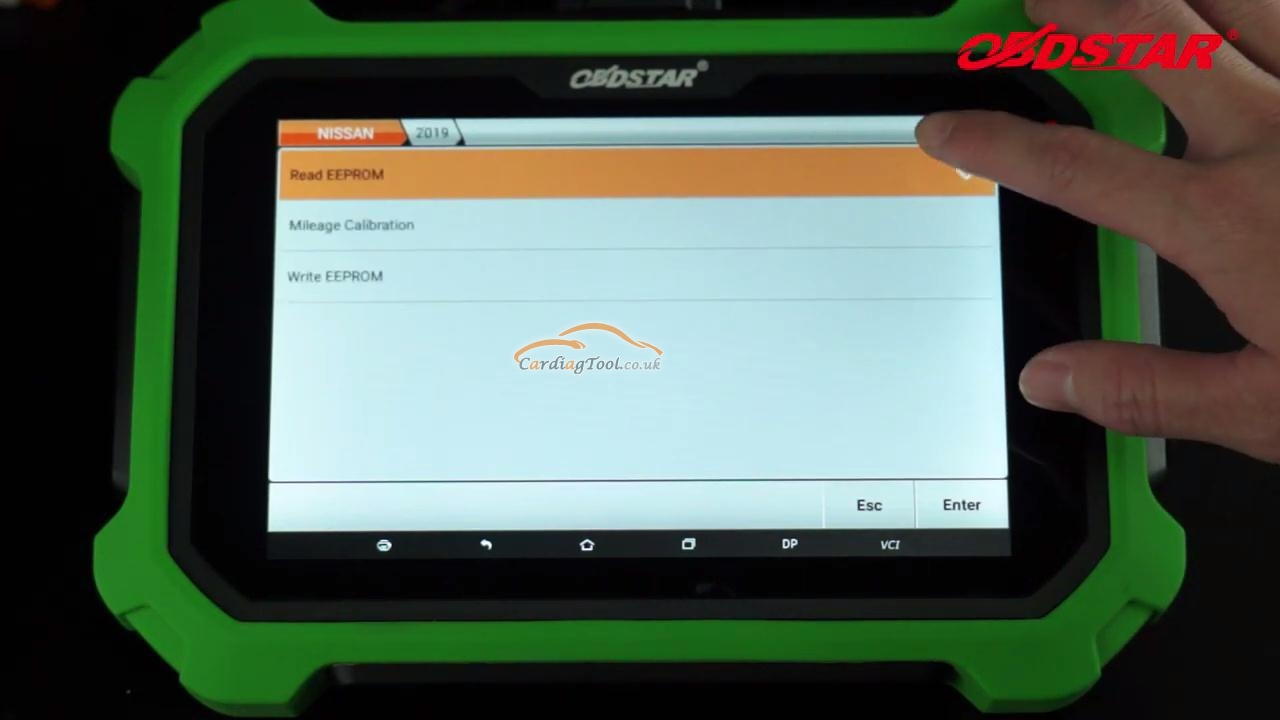
Select “TEANA”>> “2019”, we are gonna do the first step of Reading EEPROM.

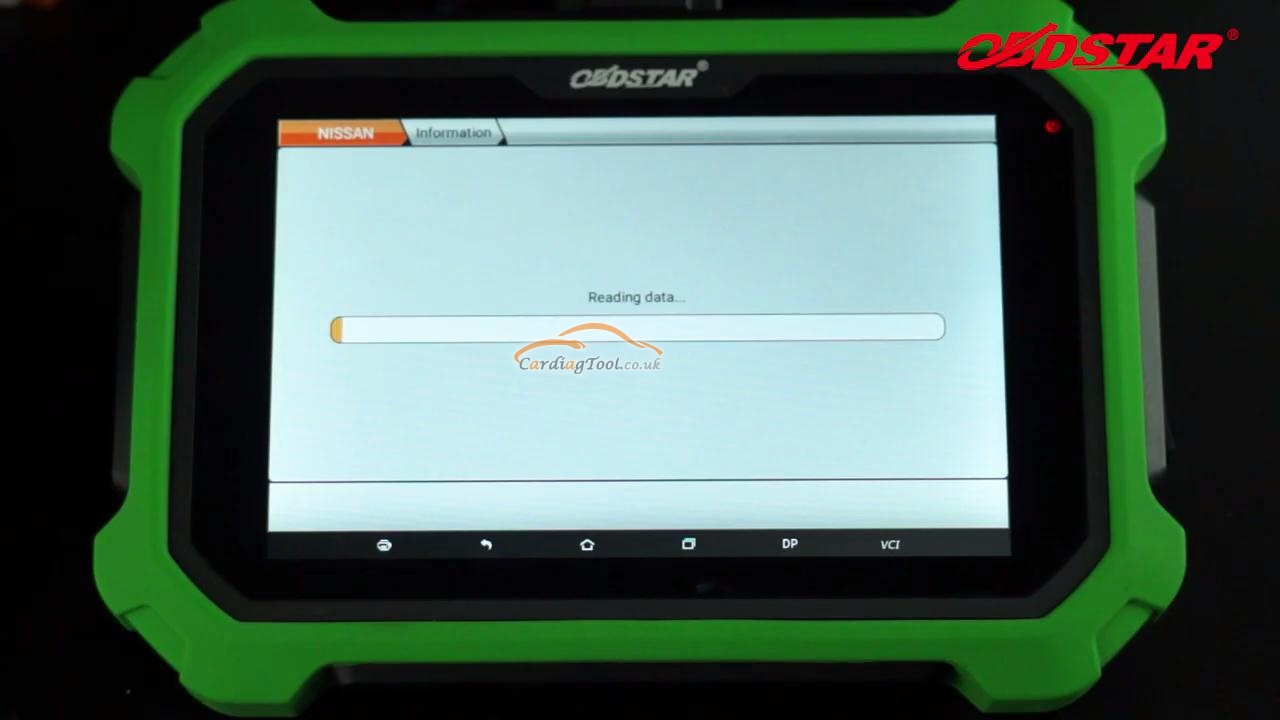
Click “Read EEPROM” button on the screen and the unit will begin this procedure itself.

obdstar-x300-dp-plus-odometer-correction-2019-nissan-teana-6 obdstar-x300-dp-plus-odometer-correction-2019-nissan-teana-7 obdstar-x300-dp-plus-odometer-correction-2019-nissan-teana-8 obdstar-x300-dp-plus-odometer-correction-2019-nissan-teana-9


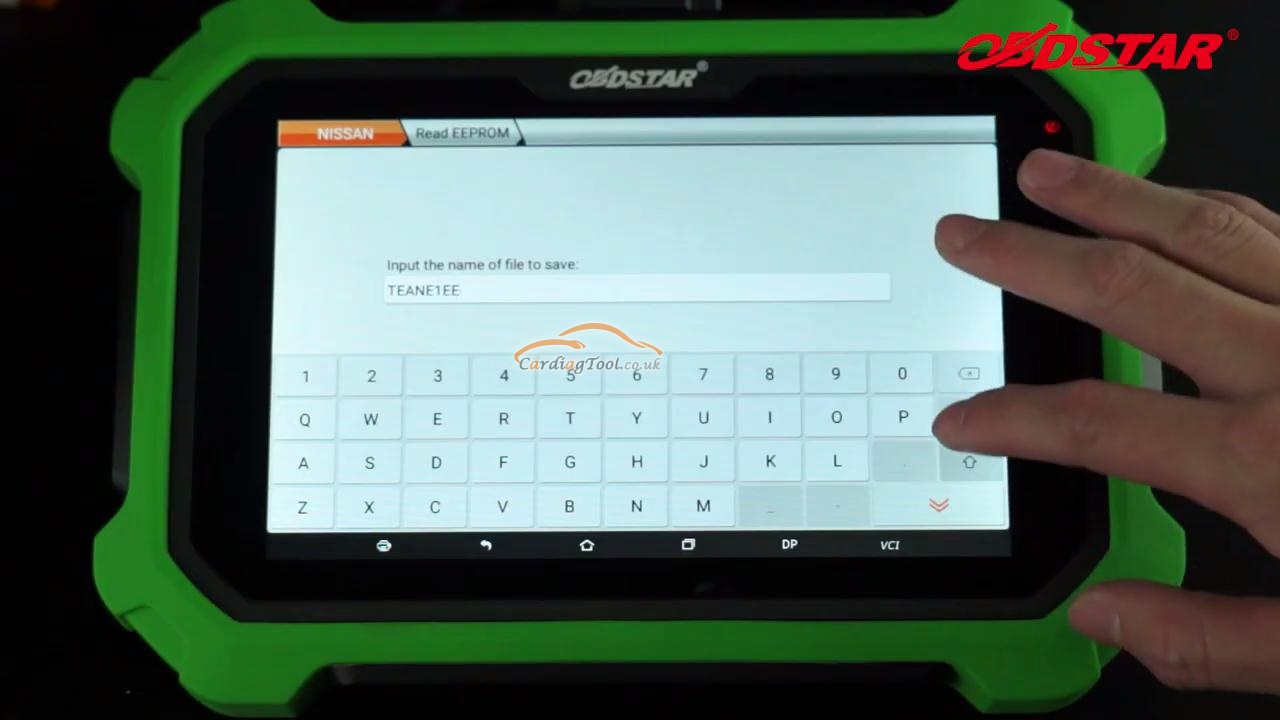
Then ,we have to input the name of file to save in this device, just do it. Here, for example, we will input “TEANE1EE”.

obdstar-x300-dp-plus-odometer-correction-2019-nissan-teana-10

Click “ENTER” AND it will show us “Operation success”.

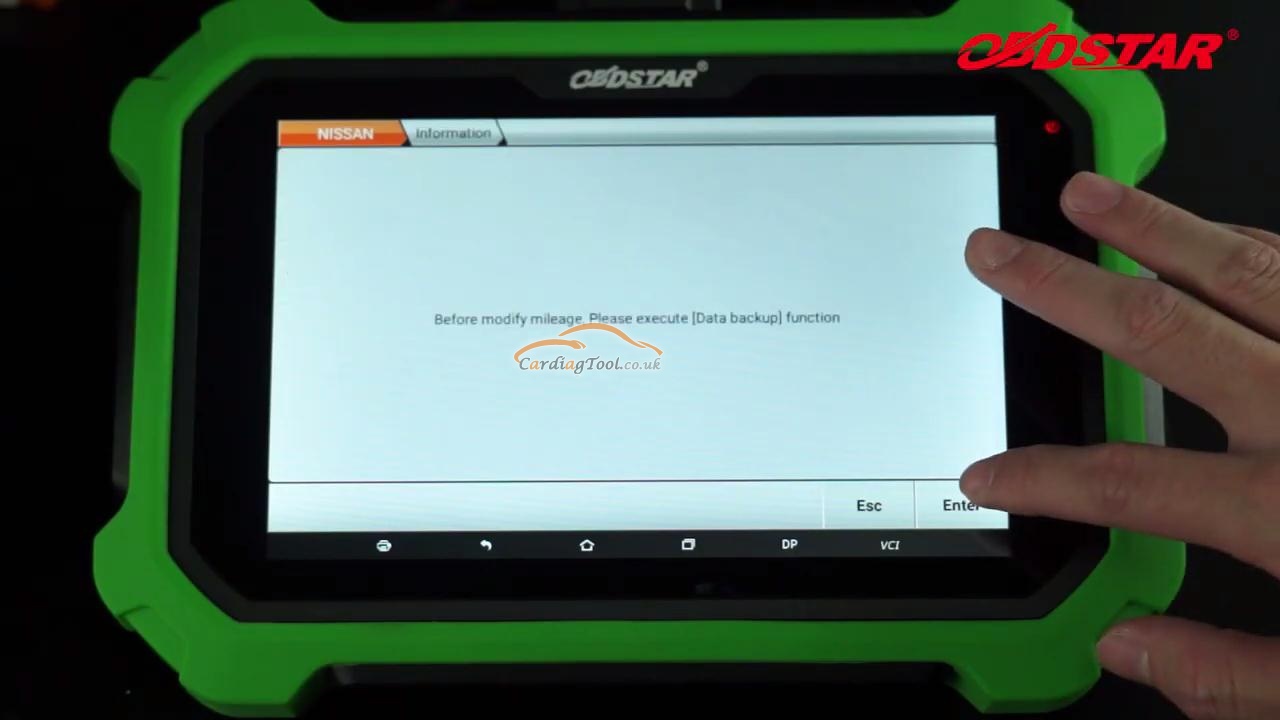
Next step is “Mileage Calibration”. Click it and the screen prompt the message below.

obdstar-x300-dp-plus-odometer-correction-2019-nissan-teana-11 obdstar-x300-dp-plus-odometer-correction-2019-nissan-teana-12

Click “ENTER” AND IT will tell you the current mileage of your vehicle and ask if you want to make a backup. Click “ENTER” to confirm.


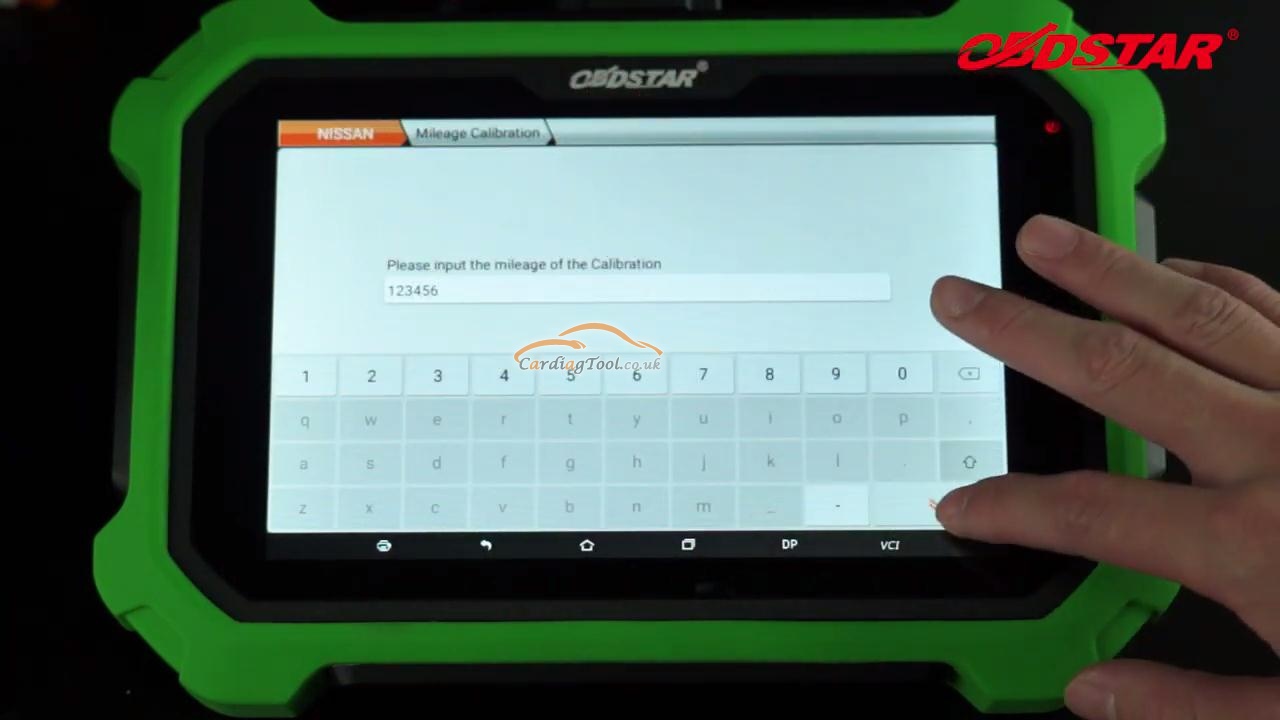
After backup the data, we will get to “Mileage Calibration”, for example, here, we input “123456 km”.


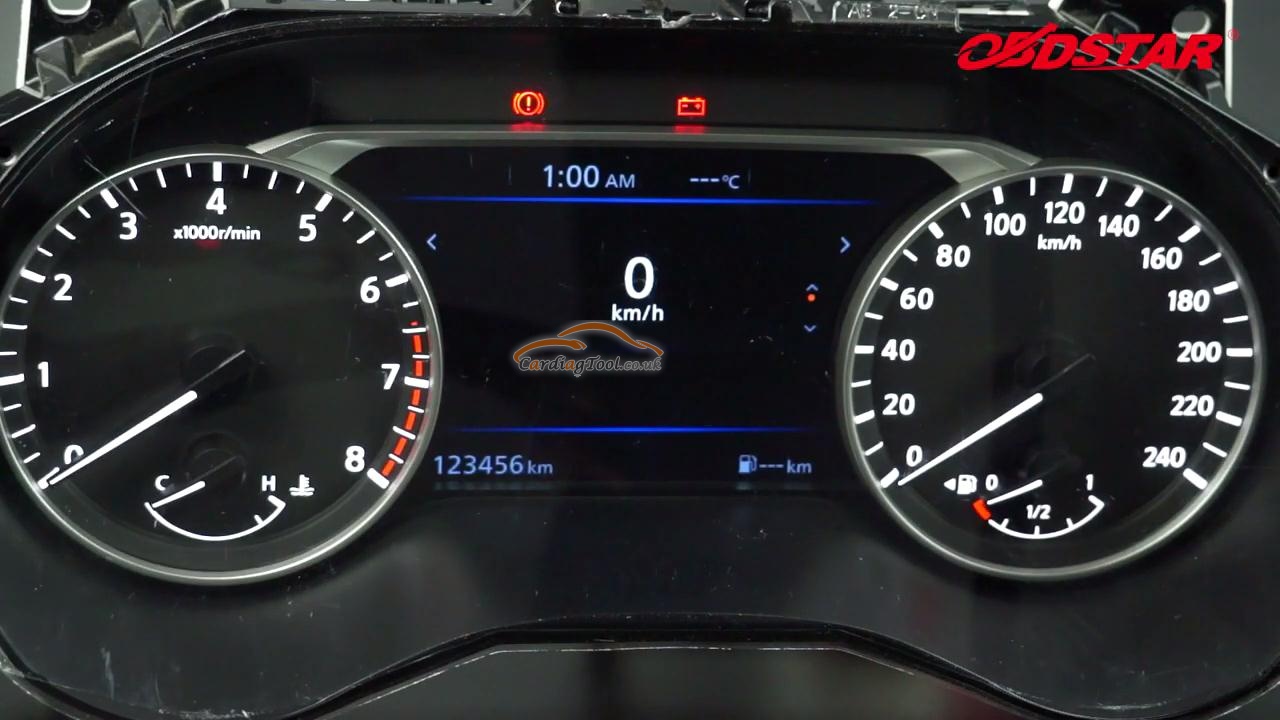
Click “ENTER” and the dashboard of your vehicle will restart. It shows the data of “123456 km” that we just modified, which means we did it!

obdstar-x300-dp-plus-odometer-correction-2019-nissan-teana-13 obdstar-x300-dp-plus-odometer-correction-2019-nissan-teana-14 obdstar-x300-dp-plus-odometer-correction-2019-nissan-teana-15

After this procedure, remember we make a backup of the data before correcting it?

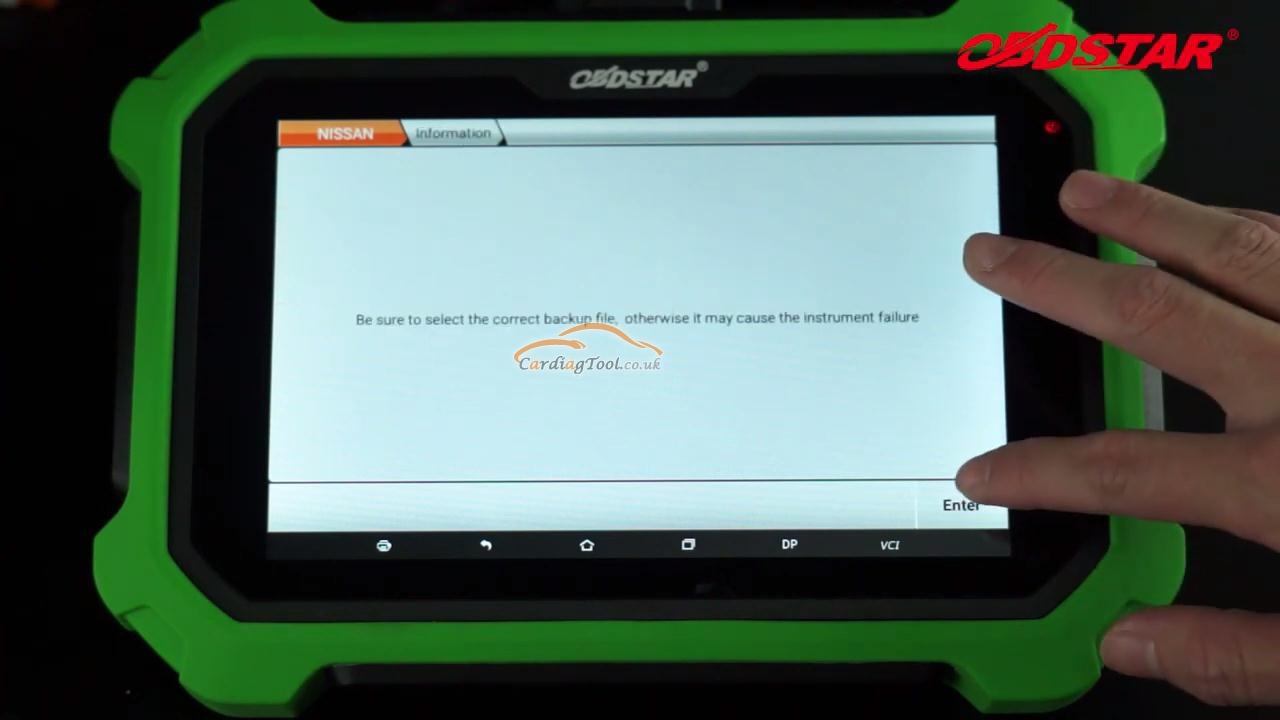
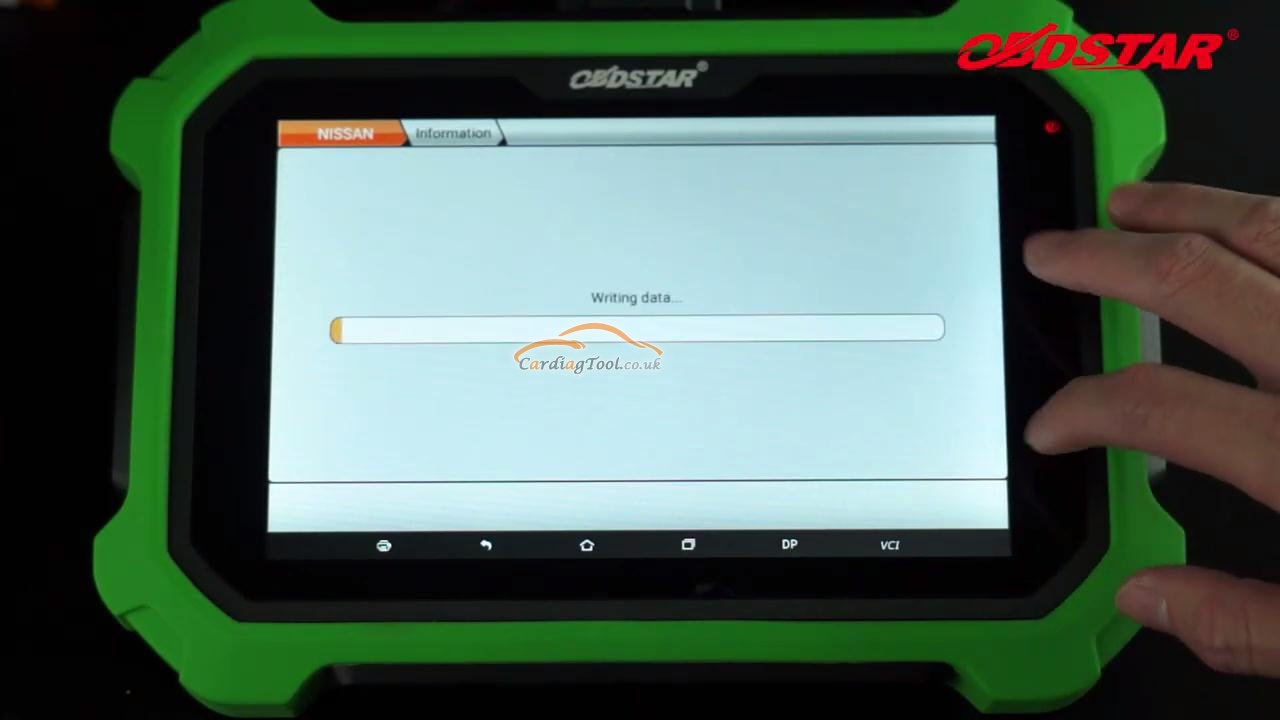
YES. So we are gonna click “Write EEPROM” and choose the correct backup file.

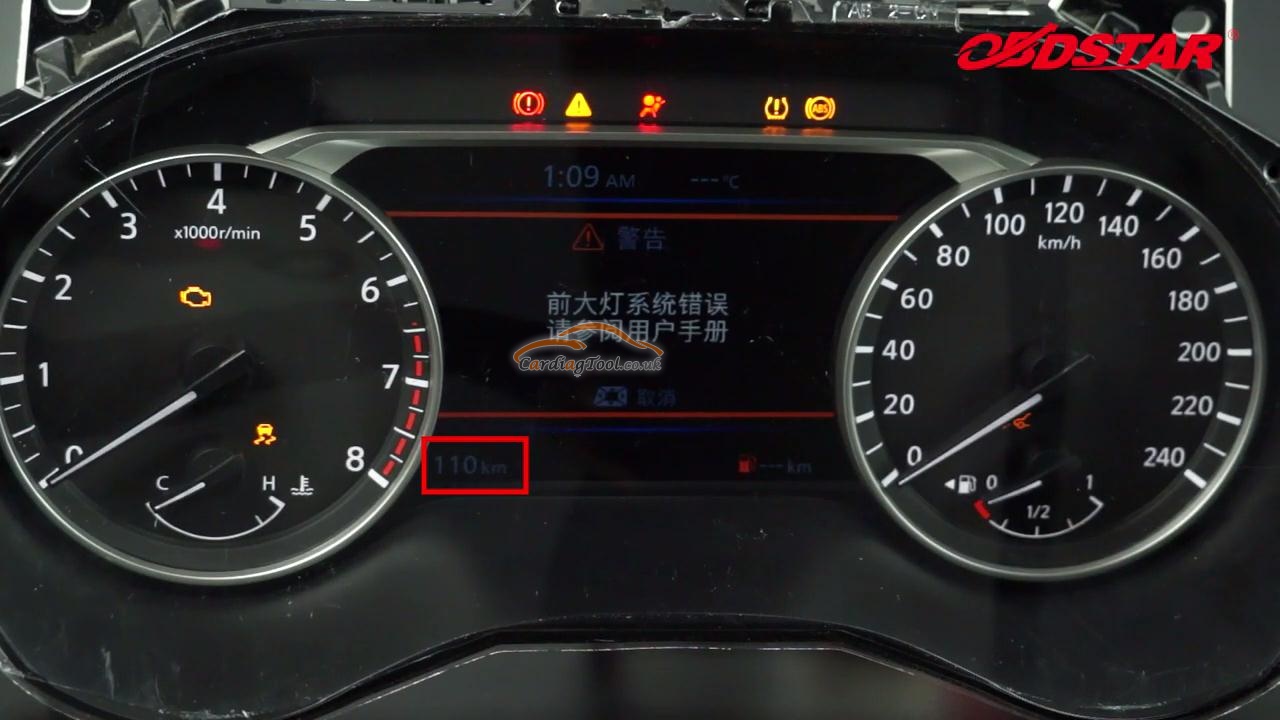
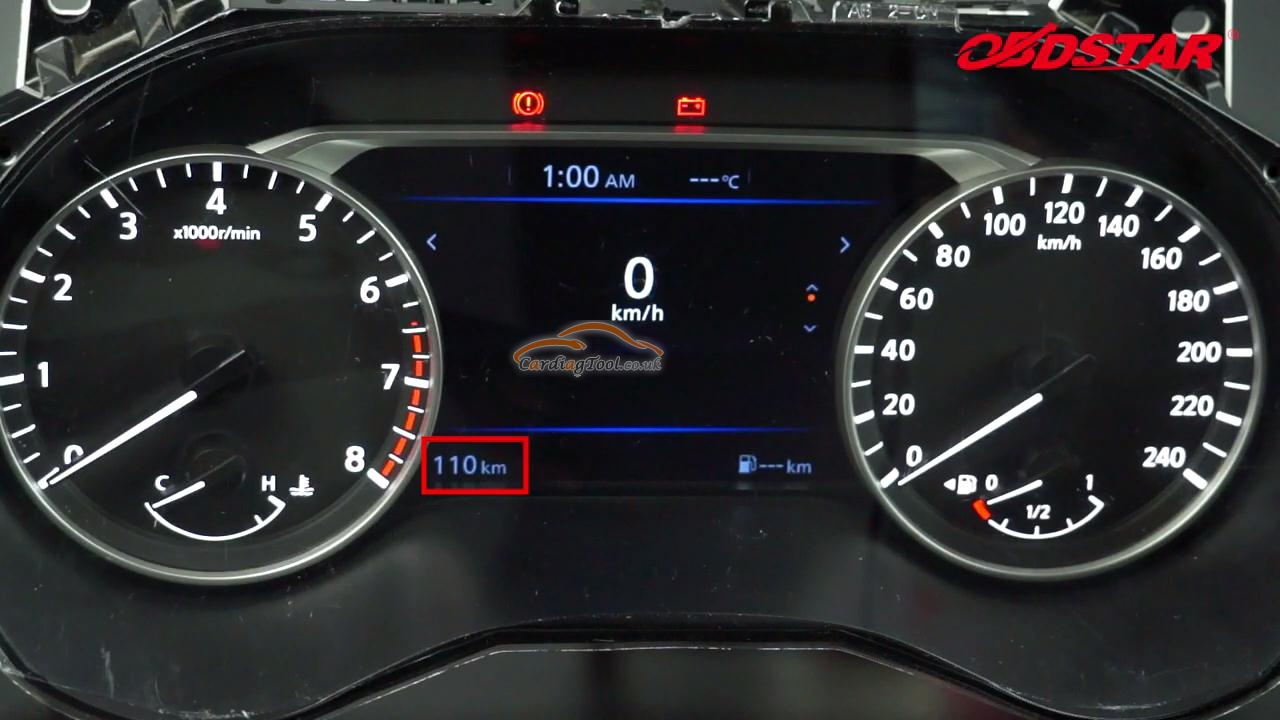
Find the file named “TEANE1EE.BIN” and click it..ENTER...wait until the dashboard restarts itself. It shows the original data of “110km”.

obdstar-x300-dp-plus-odometer-correction-2019-nissan-teana-16 obdstar-x300-dp-plus-odometer-correction-2019-nissan-teana-17 obdstar-x300-dp-plus-odometer-correction-2019-nissan-teana-18


Congratulations! We did it together. Job was finished successfully.


Here is the video in Cardiagtool YOUTUBE Channel, welcome to subscribe!

That’s all. Thanks so much for sharing your time with us!

Don't forget to contact us at:

Email:  sales@CarDiagTool.co.uk
Skype: cardiag.co.uk
Whatsapp: +86 15002705698

Or leave a message at https://www.cardiagtool.co.uk/

to tell us what suggestions or questions you have about our products.

Source:http://blog.cardiagtool.co.uk/obdstar-x300-dp-plus-odometer-correction-for-2019-nissan-teana-test/

2021年1月21日星期四

How to Register & Update Launch X431 V+ Diagnostic Tool Step by Step

 By equipping with an exclusive X-431 V+ protective sleeve to prevent it from being damaged, Launch X431 V+ diagnostic tool also comes with lots of adapters and cables, which means it can diagnose the electronic control system of prevailing vehicle models covering Asian, European, American and Chinese.

This article aims to share the specific steps on How to register & Update Launch X431 V+ Diagnostic Tool.

1

All right. let's get started.


Six-step Registration & Update Instruction:

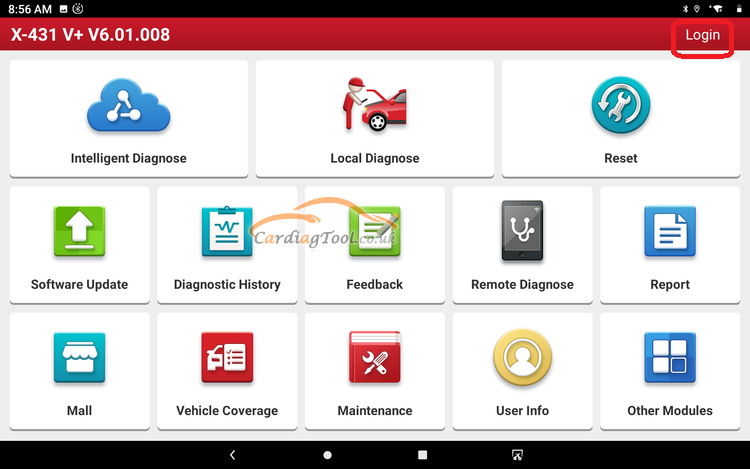
Step 1.Select "Login" button on the top right

launch-x431v+-diagnostic-tool-registration-update-1


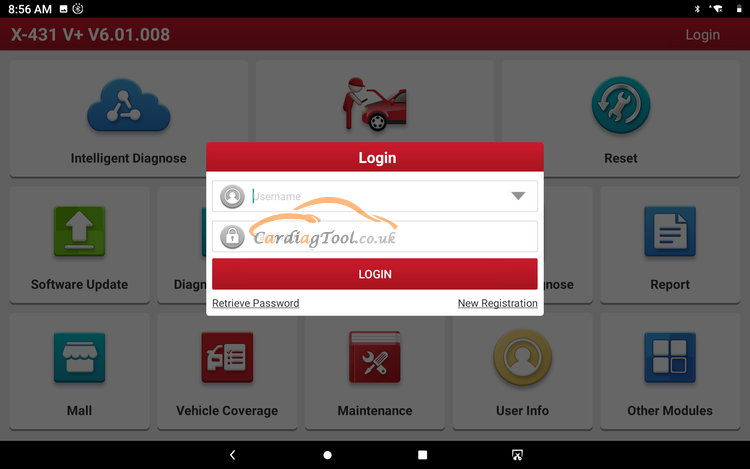
Step 2.You don't have an account to login in before registration, so select "New Registration".

launch-x431v+-diagnostic-tool-registration-update-2


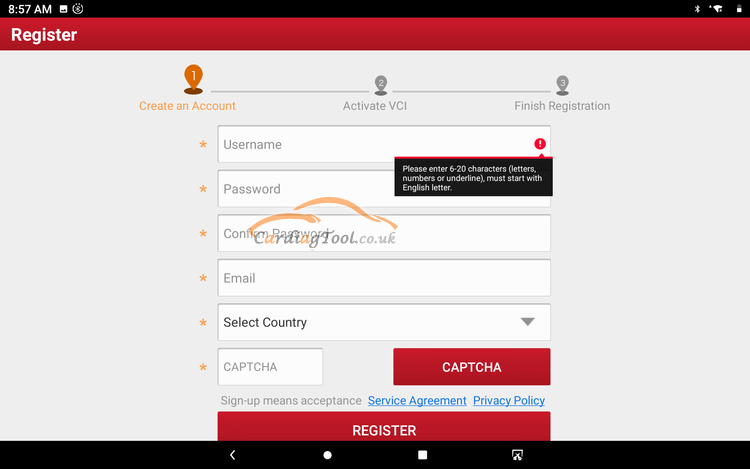
Step 3.Follow the on-screen instruction to input the user name, password, Email address that you confirm(Password has to be typed twice). Select the country and input the verification code, then click "Register" to move on.

launch-x431v+-diagnostic-tool-registration-update-3


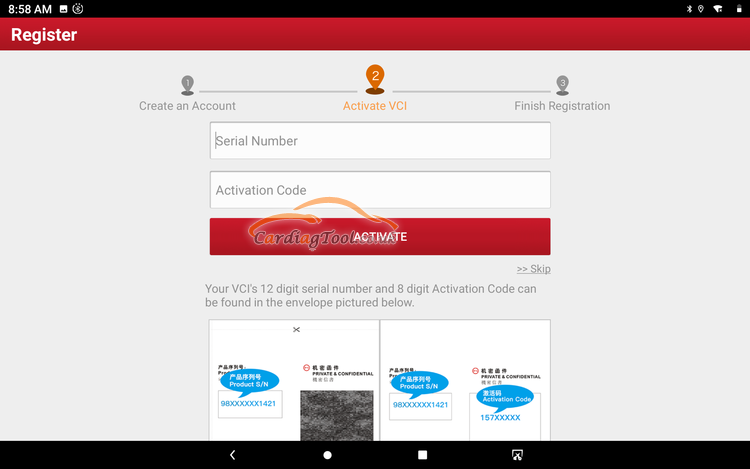
Step 4.In this interface, you need to input the Serial Number and Activation Code(They can be found on the product specification page after unboxing it). Click "Activate" to continue.

launch-x431v+-diagnostic-tool-registration-update-4


Step 5.The screen will prompt "Finish Registration". Congratulations! Click "OK" to download the model software.

launch-x431v+-diagnostic-tool-registration-update-5


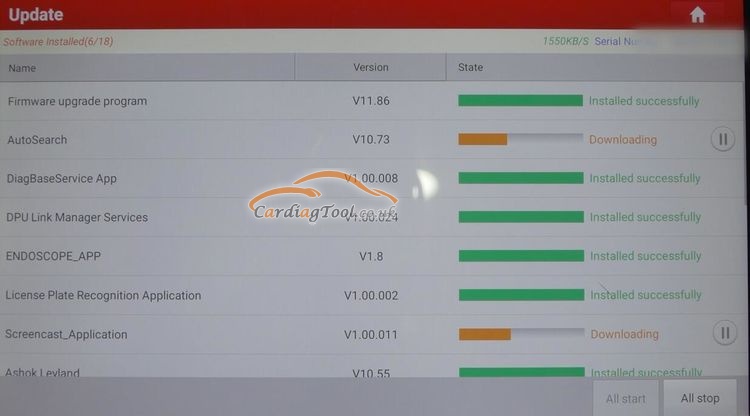
Step 6.You can download the latest App version and car model software to update them.

launch-x431v+-diagnostic-tool-registration-update-6 launch-x431v+-diagnostic-tool-registration-update-7


After all the six steps, congratulations! You have completed the register and update process of Launch X431 V+ successfully.

As an additional bonus for your insist and hard work and continuous support, this post, at the end, would like to share THE FAQs (frequently-asked questions) of Launch X431 V+.

Q1: What's language can this machine support?

A1:  24 languages supported : Italian, English, German, Japanese, Russian, French, Spanish, Portuguese, Polish, Turkish, Dutch,  Greek, Hungarian, Arabic, Danish, Korean, Persian, Romanian, Serbian, Finnish, Swedish, Czech


Q2: How many car brands can it support?

A2: It can support for 86 brands, more than 220 car models, such as Asian,European and American ect.


Q3: Which website can I update my machine?

A3: One-key update on the X431 V+ APP, dbscar.com.


Q: Will it need languages and areas authorization?

A: No, it doesn't need. This new X431 V+ supports more than 200 countries, 24 languages, it works nomater whitch county you are in. Such a powerful devce, just get one right now!

Q4: How to save power?
A4: Please turn off the screen while X-431 PRO3 keeps idle.
Set a shorter standby time.
Decrease the brightness of the screen.
If WLAN connection is not required, please turn it off.
Disable GPS function if GPS service is not in use.

Q5: Can you verify if this does most diesel as well like toyota, isuzu, and mitsubishi mostly japanese models.
A5: Dear sir, here is the vehicle coverage: if you need to confirm , please tell us the VIN ,car model and year for confirmation. Ford, Chrysler, GM, Mercedes Benz, BMW, Fiat, Peugeot, Saab, GMSA, EOBD2 Cars, Jaguar, Renault, Smart, Sprinter, VAZ, VW, Dacia, Land Rover, Romeo, Porsche, Volvo, AUDI, Citroen, Lancia, Acura, Daweoo, Lexus, Holden, Maruti, Tata, Infiniti, Proton, Isuzu, Mazda, Suzuki, Daihatsu, Mitsubishi, Toyota, Hyundai, Kia, Nissan, Subaru, Honda

Q6: Does this tool offer super car diagnostics? ferrari, maserati, lamborghini? clutch pid, service reset etc
A6: X431 V+ can test ferrari, maserati but not lamborghini, it can not only do clutch pid, service reset these basic function on your ferrari, maserati, but also can do such as battery reset, brake reset, oil reset, ABS bleeding, throttle adaptation, TPMS reset, DPF regeneration, gear learning and IMMO, etc

Q7: Can this scanner perform crank position relearn and idle relearn and can it do a crank position relearn on a 2007 subaru 2.5
A7: Sure, of course, still it can do key match, battery match, throttle match, epb reset, tpms reset, sas reset ,oil light reset, injector program, and this red outlook version is with 2 years free update, very economical, and now we are conducting promotion, please don't hesitate, have any problem just contact us.

Q8: Does it give full diagnostic on diesel vehicles?
A8: This diagnostic tool can work on some 12V diesel vehicles, if you need to confirm, please email us your car model, year and VIN, we will tell you the result.

Q9: How to do if the system runs slow?
A9: In this case, please do the followings:
> Check all running applications and stop the unnecessary applications (Steps: Settings > Apps > Running > Tap the desired application and then tap "Stop").
> Check all installed applications, remove the unnecessary applications (Steps: Settings > Apps > Downloaded > Tap the desired application and then tap "Uninstall").
If all steps mentioned above are finished and the system still works slowly. Please try to close the system and reboot your X-431 V+.

Q10: How to handle when you encounter “Insufficient storage space”?
A10: If this happens while downloading the diagnostic software, please proceed as follows:
Get your X-431 V+ username and password ready. If you forgot the password, please dial our hotline to retrieve it with the product serial number 98519*******.
Reset the X-431 V+ to the default factory settings (For details, please refer to Item 5 in this Chapter).
Tap “Settings”-->“WLAN”, choose the desired WLAN network to connect.
Open the browser and visit www.dbscar.com to download and install the latest App.
After the installation is complete, launch the application and login with your username and password.
Tap --> “Update” to download the diagnostic software.

Note: For new App, the software structure and storage space occupied by the vehicle softwares have been optimized so as to avoid the occurrence of insufficient storage.

Q11: How to reset X-431 V+?
A11: Resetting may cause data loss. Before doing so, please make sure important data and information has been backed up.
Do the following to reset X-431 V+:
Tap “Settings”-->“Back & Reset”;
Tap “Factory data reset”;
Tap “Reset tablet”;
Tap “Clear all data” to start resetting until the tool automatically reboots.

Q12: Why some videos on the website can be not played?
A12: It possibly results from:
The current browser does not support Flash playing;
Flash player does not support this video.
Try to use other browsers to watch it or install other Flash player.

Q13: The data and time of X-431 V+ can not be set.
A13: It is because Automatic date & time is set on your X-431 V+. Tap Settings > Date & time, deselect “Automatic date & time” and then set the date and time manually.

That’s all. Thanks so much for sharing your time with us!

Don't forget to contact us at:

Email:  sales@CarDiagTool.co.uk
Skype: cardiag.co.uk
Whatsapp: +86 15002705698

Or leave a message at https://www.cardiagtool.co.uk/

to tell us what suggestions or questions you have about our products.

Source:http://blog.cardiagtool.co.uk/how-to-register-update-launch-x431-v-diagnostic-tool-step-by-step/
Xhorse VVDI2 Professional Tool Tutorials: Software Update

  Xhorse VVDI2 Full version   has Highlights as follows: 1.Free Lifetime Online firmware and software update Xhorse VVDI2 Full Version V7.1....