2022年1月24日星期一

Xhorse VVDI PROG Tutorials: Software Interface, Online Update & Driver Installing

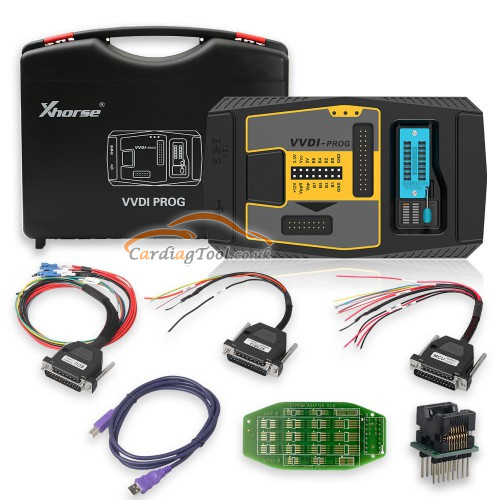
 Xhorse VVDI PROG Programmer has Highlights as follows:

  1. Built-in update software: Make VVDI Prog firmware update timely.
    Latest Software Version: V5.1.0, Firmware Version: 2.0.0
  2. High-speed USB communication interface: Make software automatically connect.
  3. Smart operation mode: possible causes of error will be listed
  4. Reserve ports: For future update.
  5. Self-test function: Check if the machine works well or not.
  6. Power supply: Through USB cable, software will automatically prompt if the external USB power supply is needed
    7. Multi-language: English, French, Italian, Polish, Portuguese, Spanish, Turkish, Czech, Russian, Arabic
    8. Get free BMW ISN read function and NEC, MPC, Infineon etc chip continously update service

xhorse-vvdi-prog-software-update-driver-installing-1


This article is to share Xhorse VVDI PROG Tutorials on Software Interface, Online Update & Driver Installing
Part 1. Xhorse VVDI PROGs Software Interface

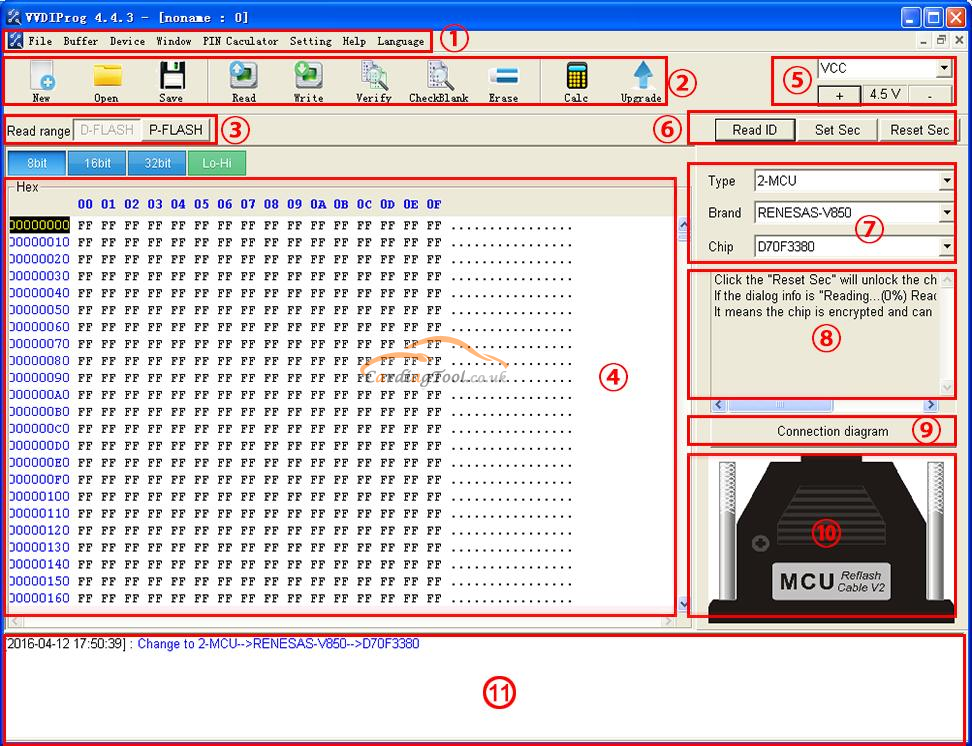
  1. Operation options

File : Load data file

Buffer : Support copy, paste, search, fill function

Device : Support chip read, write, erase operation

Window : Compare two data files

Setting : Read&Verify, Write&Verify, Erase&Check Blank configuration

Language : Change the language, current support English, Chinese, Polish, Arabic, Czech, Spanish, French, Italian, Portuguese, Russian,

Turkish


  1. General options

Provide General function buttons, simple and easy for operation, include: new, open, save, read, write, verify, check blank,erase,calculator & upgrade


  1. Read range

Parts of chips include several data areas, for example EEPROM, FLASH and etc. click on the button select read range


  1. Data display

Display the read data or load data, include hex and ASCII format


  1. Power configuration

Display the status of power ( VCC, VPP, 12V), support change the voltage of VCC and VPP (The default voltage usually not need to change)


  1. Special function options

Provide chips special function, for example parts of chips have read chip ID, set security, reset security etc .


  1. Chip option

Select right option according to type,brand and chip


  1. Option Information

Display parameter information of current option


  1. Connection diagram button

Click on button, get the connection diagram of current chip


  1. adapter Type

Display needed adapter of current option

xhorse-vvdi-prog-software-update-driver-installing-2


  1. Operation Information

Display operation information and saved in “log.bin” file


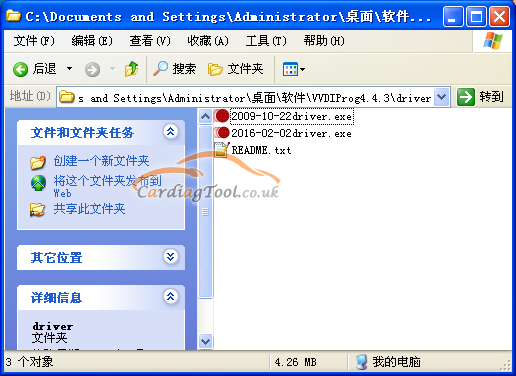
Part 2.Xhorse VVDI PROGs Driver installing

The driver install software saved in “driver” folder, include 2009 and 2016

version (recommend select 2009 version)

xhorse-vvdi-prog-software-update-driver-installing-3


Part 3.Xhorse VVDI PROGs Online Update

Important message: “Online Update”function requires internet support.

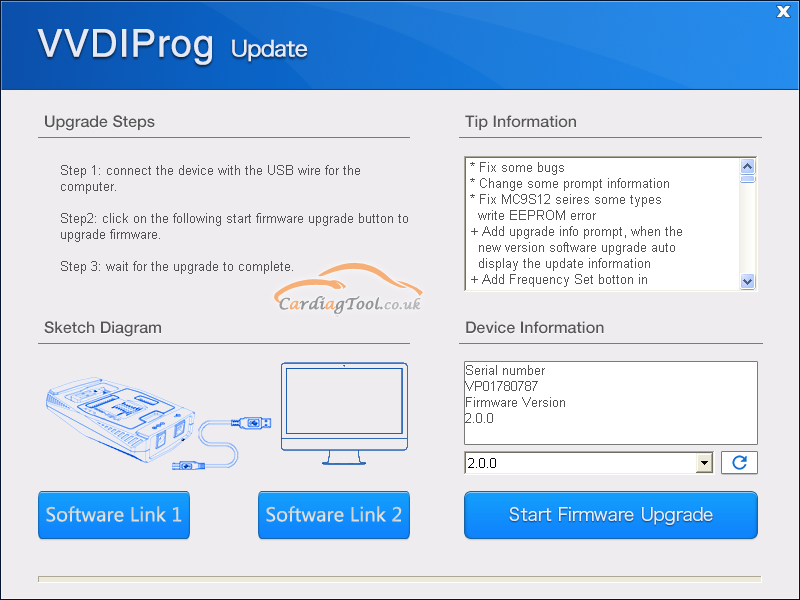
Step 1.Click the Upgrade button enter the upgrade interface, show as following picture.

xhorse-vvdi-prog-software-update-driver-installing-4


Step 2.Enter update interface,if software show”communication with server failed” please close your Anti-virus and computer firewall and retry.

If software show“unable to find equipment”,please reconnect device


Step 3.Tip information show the latest software version and upgrade information


Step 4.Device information show the device SN, device firmware version and the latest firmware version


Step 5. Firmware upgrade steps:

(1). Select the firmware version

(2). Click “Start Firmware Upgrade” button

(3). Don’t close or pull out USB cable before upgrade finished


Step 6.Software upgrade steps:

  1. Click “Software Link 1” or “Software Link 2” button, download software from the web
  2. Extract the File


Check here to buy Original Xhorse Tool: https://www.cardiagtool.co.uk/wholesale/original-xhorse-tool/
Source: http://blog.cardiagtool.co.uk/xhorse-vvdi-prog-tutorials-software-interface-online-update-driver-installing/

2022年1月23日星期日

Confirmed! Launch X431 V+ PRO3 Diagnostic Tablet FAQs

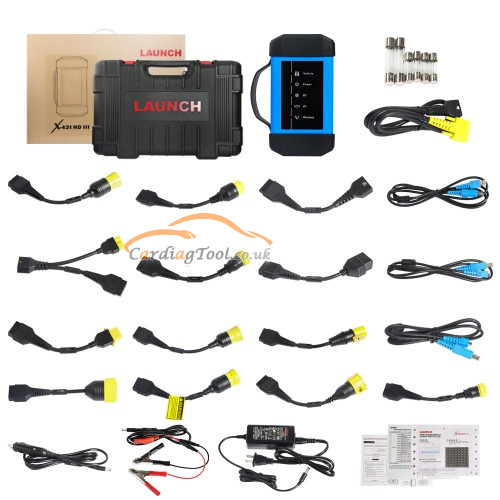
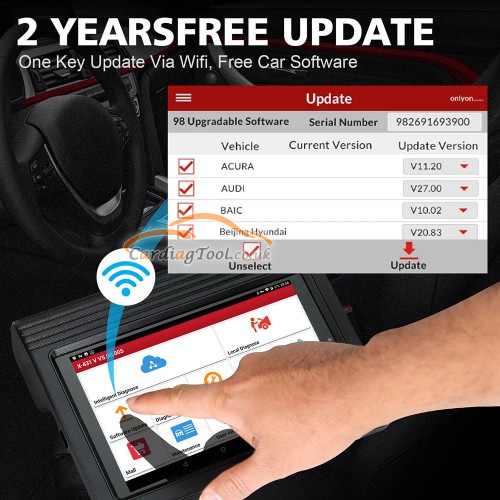
 Launch X431 V+ Pro3 professional diagnostics Wifi 10.1inch Tablet Plus X431 HD3 Heavy Duty Module Supports Both Cars and Trucks. Launch X431 V+ Pro3 and X431 HD3 Heavy Duty Module is with one year free update. They can still work well without update.

launch-x431-pro3-faqs-1


Q1:How to save power?

>>Please turn off the screen while the tool keeps idle.

>>Set a shorter standby time.

>>Decrease the brightness of the screen.

>>If WLAN connection is not required, please turn it off.

>>Disable GPS function if GPS service is not in use.


Q2: Communication error with vehicle ECU?

Please confirm:

  1. Whether diagnostic connector is correctly connected.
  2. Whether ignition switch is ON.
  3. If all checks are normal, send vehicle year, make, model and VIN number to

us using Feedback feature.


Q3: Failed to enter into vehicle ECU system?

Please confirm:

  1. Whether the vehicle is equipped with this system.
  2. Whether the VCI dongle is correctly connected.
  3. Whether ignition switch is ON.
  4. If all checks are normal, send vehicle year, make, model and VIN number to

us using Feedback feature.


Q4: How to reset the tablet?

Resetting may cause data loss. Before doing so, please make sure important data

and information has been backed up.

Do the following to reset the tablet:

  1. Tap “Settings” -> “Back & Reset”.
  2. Tap “Factory data reset”.
  3. Tap “Reset tablet”.
  4. Tap “Clear all data” to start resetting until the tool automatically reboots.


Q5: How to download the X-431 PRO3 V4.0 App after resetting the tablet?

Important Message: Before registration, please make sure the network is properlyconnected.

After the tablet has been successfully reset, follow the steps below to download the App:

  1. Launch the browser and the default official Launch website opens (If a blank page pops up, just type in www.x431.com in the input bar).
  2. Tap “Login”, input the username and password and tap “Log In.”
  3. Make sure that the serial number is correct, tap “APP application program” and tap the Download icon to start downloading.
  4. After the download is complete, follow the on-screen instructions to install it.

5.After installation, use the existing username and password to login and go to update center to download the diagnostic software.


Q6: What to do if the language of vehicle diagnostic software does not match the system language?

English is the default system language of the tool. After the system language is set to the preference language, please go to the update center to download the vehicle diagnostic software of the corresponding language.

If the downloaded diagnostic software is still displayed in English, it indicates that the software of the current language is under development.


Q7: How to retrieve the login password?

Please follow below steps to proceed in case you forgot the login password:

  1. Tap the application icon on the home screen to launch it.
  2. Tap [Login] button on the upper right corner of the screen.
  3. Tap "Retrieve password".
  4. Input product S/N and follow the on-screen prompts to retrieve the password.

Original Launch X431 Tool: https://www.cardiagtool.co.uk/wholesale/original-launch-x431-tool/

Source: http://blog.cardiagtool.co.uk/confirmed-launch-x431-v-pro3-diagnostic-tablet-faqs/

2022年1月20日星期四

Launch X431V Pro Tutorials on Feedback Diagnostic Logs & View Its History

 Launch X431 V Pro diagnostic tablet integrates more applications and services, such as creating maintenance data base and case library, providing instant maintenance information, establishing public and private maintenance social circle etc.

launch-x431-v-feedback-diagnostic-logs-1


Part 1.Feedback Diagnostic Logs Function

This “Feedback Diagnostic Logs” function allows customers to feedback your diagnostic problems to us for analysis and troubleshooting.

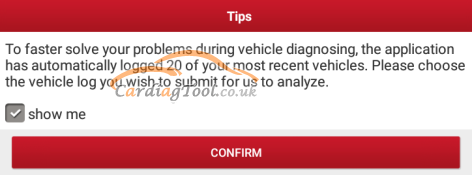
Tap “Feedback”, a pop-up message will appear:

launch-x431-v-feedback-diagnostic-logs-2


Tap “Confirm”, the following 3 options will be displayed on the left column of the screen.

A.Feedback

Tap certain tested vehicle model to enter the feedback screen.

1) Tap “Choose File” to open the target folder and choose the desired diagnostic logs.


2) Choose the failure type and fill in the detailed failure description in the blank text box and telephone or email address. After inputting, tap “Submit Result” to send it to us.


B.History

Tap it to view all diagnostic feedback records. Different process states are marked with different colors.


C.Offline list

Tap it to display all diagnostic feedback logs which have not been submitted successfully due to network failure. Once the handset gets a stable network signal, it will be uploaded to the remote server automatically.


Part 2.View Diagnostic History

Generally once a vehicle diagnosis is performed, the tool will record the every details of diagnostic process. The History function provides direct access to the previously tested vehicles and users can resume from the last operation, without the necessity of starting from scratch.


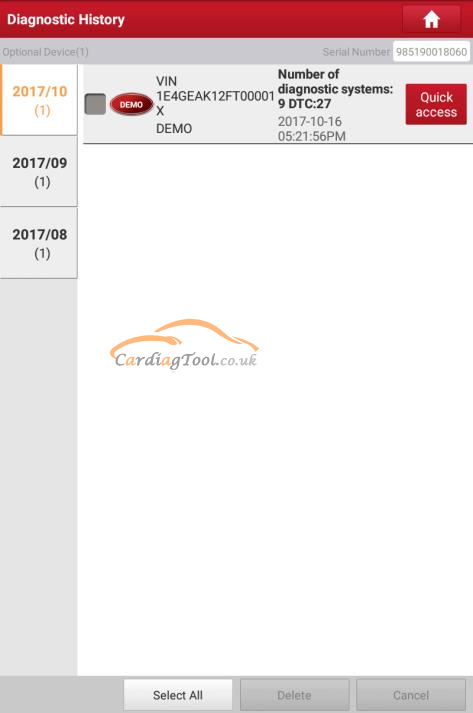
Tap “Diagnostic History” on the Job menu screen, all diagnostic records will be listed on the screen in date sequence.

launch-x431-v-feedback-diagnostic-logs-3


  • Tap certain vehicle model to view the details of the last diagnostic report.
  • To delete certain diagnostic history, select it and then tap “Delete”. To delete all historical records, tap “Select All” and then tap “Delete”.
  • Tap “Quick access” to directly navigate to the function selection page of last diagnostic operation. Choose the desired option to proceed.

Check here to shop: https://www.cardiagtool.co.uk/launch-x431-v-8inch-tablet-diagnostic-tool.html

https://www.cardiagtool.co.uk/

Source: http://blog.cardiagtool.co.uk/launch-x431v-pro-tutorials-on-feedback-diagnostic-logs-view-its-history/

2022年1月19日星期三

Autel MaxiCheck MX808 Diagnostic Tablet In-depth Review

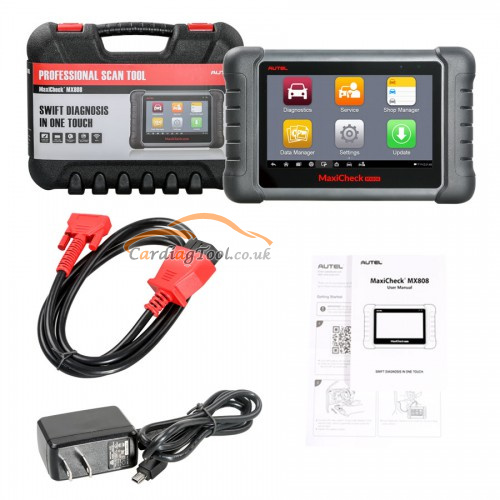
 For many car enthusiasts who have owned different types of scan tools from various brands, they said some have disappointed them, and some have lived up to their expectations. One of the scan tools that I would love to share with you is the Autel Maxicheck MX808 professional scan tool. It is the advanced version of the Autel MD808 Pro and the Same as the Autel Maxicom MK808 diagnostic tool.

Autel Maxicheck MX808 scan tool comes with a battery for off-car review analysis and has a fast quad-core processor. This ensures that you carry out different functions quickly and accurately. I would definitely recommend this amazing scanner for serious car dealers and mechanics. At just a great price, you get amazing features and functions. Read on to see its functions, pros, and cons.


Technical Specifications of the Autel MaxiCheck MX808:

FeaturesAutel MX808
Imageautel-mx808-review-1
Works:All 1996 US-based, 2000 EU-based, and newer vehicles
Operating System:Android
Processor:Cortex-A9 processor(1.5 GHz)
Display:7inch LCD capacitive touch screen (1024×600 resolution)
Memory:32GB
Connectivity:• Mini USB 2.0 • Wi-Fi • USB 2.0 • Micro SD card(supports up to 32GB)
Sensors:Ambient light sensor for brightness auto changing
Audio Input/Output:• Input: N/A • Output: buzzer
Power and Battery:• 3.7 V/3200mAh lithium-polymer battery • Charges via 5 VDC power supply
Battery Charging Input:5 V/1.5 A
Power Consumption:500 mA (LCD on with default brightness, Wifi on) @3.7 V
Tested Battery Life:Around 4.5 hours of continuous use
Operating Temperature:-10 to 60°C(14 to 140°F)
Storage Temperature:-20 to 70°C (-4 to 158°F)
Operating Humidity:5% – 95% non-condensing
Read/Clear Codes:Yes
Freeze Frame Data:Yes
ENG/AT/ABS/SRS EPB SAS Codes:Yes
Auto VIN Detection:Yes
Display live data in text, graph & analog for easy data review:Yes
Support IMMO functions:Yes
Reset Steering Angle Sensor (SAS):Yes
Support TPMS sensor relearn:Yes
Check Engine Light:Yes
Reset service mileage and service intervals:Yes
Oil Reset:Yes
Live Data:Yes
battery registration and reset:Yes
Mode:6
I/M Readiness:Yes
Vehicle Coverage:Acura, Audi, Benz, Auford, Bentley, Bmw, Bugatti,
Chevrolet, Chrysler, Gm,  Holden, Euford, Ford, Honda,
Hyundai, Infiniti, Kia, Jaguar, Land Rover, Isuzu,
Mitsubishi, Maybach, Mini, Nissan, Mazda, Lexus,
Skoda, Saab, Scion, Smart, Opel, Porsche, Seat,
Sprinter, Subaru, Vauxhall, Suzuki, Toyota, Volvo, Vw etc..
Weight:788 g (2.42 lb.)
Dimensions (W x H x D):237.8 mm (9.4”) x 148.6 mm (5.9”) x 35.5 mm (1.4”)
Software Update:Lifetime free software updates
Warranty:Limited 12-month Warranty


Whatthe Advantage of Autel Maxicheck MX808 scan tool?

1.It has Auto VIN technology which can automatically detect the vehicle’s make, model, and year information within a very short period of time.

2.It supports all the OBD2 protocols and 10 test modes with the inclusion of enhanced mode 6, onboard monitor, vehicle info, I/M readiness, freeze frame, and component test.

3.Relearn parking brake pad after replacement

4.The MX808 scan tool supports IMMO functions, forced DPF regeneration, and adjusting injectors.

5.It also performs various TPMS OBD2 service functionssuch as oil reset service, DPF service, BMS service, EPB service, and Relearn.

6.Other reset services that it offers include reset steering angle sensor, battery registration and reset service mileage, and service intervals.


Whats the Shortcoming of the Autel MX808 scan tool

Cumbersome to register the gadget – many users have reported that registering this scan tool is very difficult and time-consuming. As a result, using it straight away from the box is very challenging. But once you’re done registering the gadget, it is easy and fast to use.


Generally give a score: 5A middle level Autel Diagnostic Scanner, recommend to buy.

Source: http://blog.cardiagtool.co.uk/autel-maxicheck-mx808-diagnostic-tablet-in-depth-review/

2022年1月18日星期二

Autel MaxiPro MP808K Diagnostic Tool In-depth Review

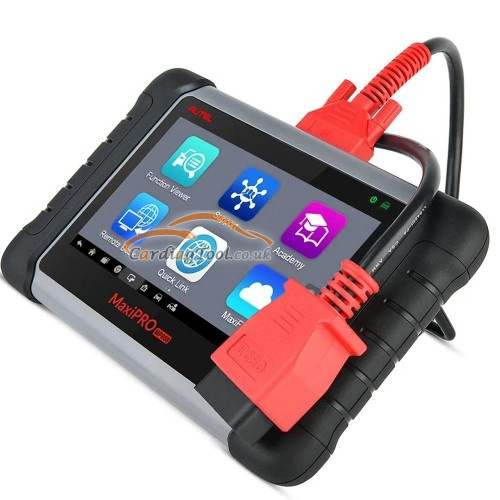
 Autel MaxiPro MP808K diagnostic scanner offers value for money. It performs special functions such as key fob programming, automated bleed, active tests, EPB, live data, ECU information, adaptation, matching, codes, etc. This outstanding unit enables mechanics to keep all data files, vehicle records, and customer info adequately organized. Nevertheless, it is vital to note that all the advanced functions are not universally compatible. Thus, you should get in touch with customer care and find out if it’s compatible.


Technical Specifications of the Autel MP808K Diagnostic Scan Tool:

FeaturesAutel MP808K
Imageautel-mp808k-review-1
Weight:14.85 pounds
IMMO Keys function:Yes
C+omes with :complete 11 connectors
Main Brands:Skoda, Opel, Citroen, Porsche, Rover, Audi, Chrysler, Dodge, Jeep, Acura, Lexus, Honda, Ford, Nissan, Lincoln, Mazda, etc
Covers all available vehicle modules:Yes
View Live Data:Yes
Active Test:Yes
View Freeze Frame:Yes
Oil Reset Service:Yes
Tooth Learning/Anti-theft Matching:Yes
ABS,SRS, Body control module:Yes
Battery Register /Battery Maintenance:Yes
Software Update Option:Yes, 1-Year Free Update
Warranty:1-year warranty


The Autel MP808K is an improved version of MP808 and DS808. However, the feature that separates it from these scanners is the complete 11 connectors that it comes with. This allows it to access and scan all electronics systems on more than 80 vehicle makes and models. Besides, it also has a 12-month free software upgrade and a 1-year warranty. At such a price, you get more than what you pay for.


Autel MaxiPro MP808KPros:

Extensive vehicle coverage

Performs a variety of functions

It is sleek and compact

Easy to use with a user-friendly design

12-month free updates

1-year warranty


Autel MaxiPro MP808KCons:

No cons of it has been found yet so far


Check here to buy Autel MaxiPro MP808K: https://www.cardiagtool.co.uk/autel-maxipro-mp808k-diagnostic-tool.html

Source: http://blog.cardiagtool.co.uk/autel-maxipro-mp808k-diagnostic-tool-in-depth-review/

2022年1月17日星期一

Xhorse VVDI KEY TOOL PLUS Jeep Compass ID4A Smart Key Programming

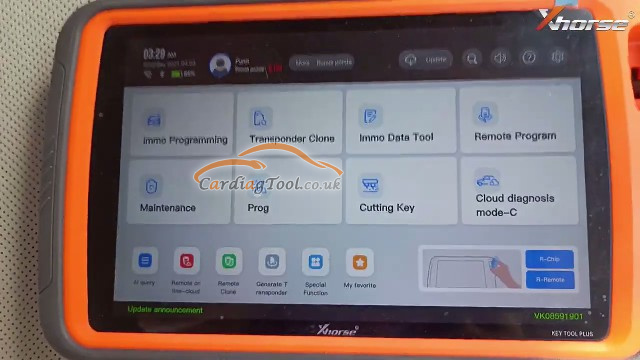
 XHORSE VVDI KEY TOOL PLUS professional key programmer has typical features summarized below:

1. VVDI Key Tool plus full version all in one security solution.
2. Global Advanced Version, combines all IMMO function of all VVDI Tools.
3. Support DOIP/CAN-FD/ CAN and K protocol switch pin/Chip pin detection/Toyota smart key programming without simulator/Long distance IMMO collection.


This article is to share the Xhorse VVDI KEY TOOL PLUS tutorials on Jeep Compass ID4A Smart Key Programming.


Main Steps:

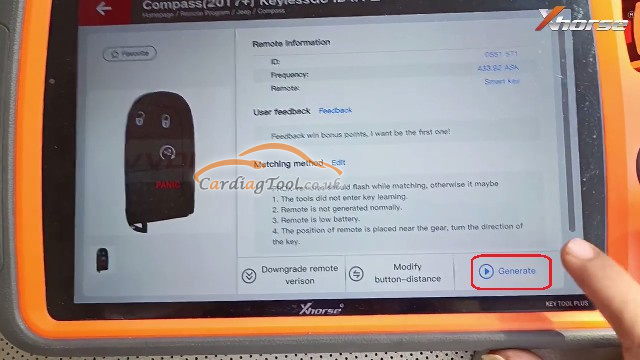
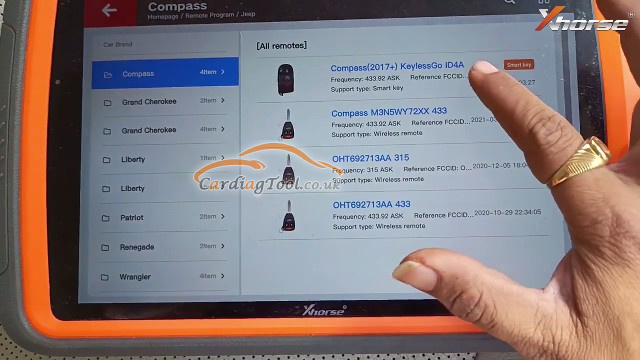
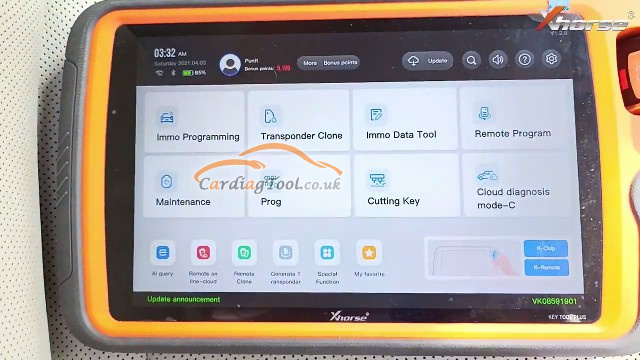
Tap Remote Program>>Select the model type and year>>Compass(2017+) KeylessGo ID4A>>Generate

xhorse-key-tool-plus-jeep-compass-key-programming-1 xhorse-key-tool-plus-jeep-compass-key-programming-3 xhorse-key-tool-plus-jeep-compass-key-programming-2


Go to

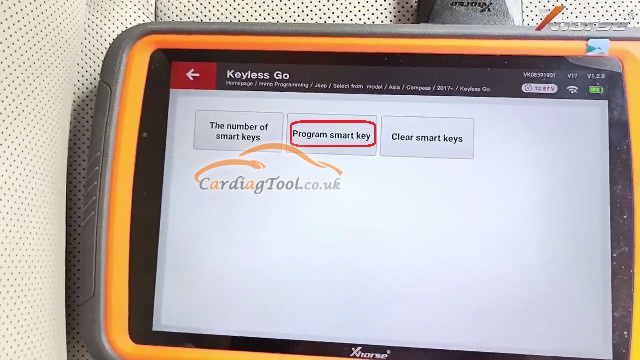
Immo Programming>>Jeep>>Select from model>>Asia>>Compass>>2017->>Keyless Go>>Start programming

xhorse-key-tool-plus-jeep-compass-key-programming-4

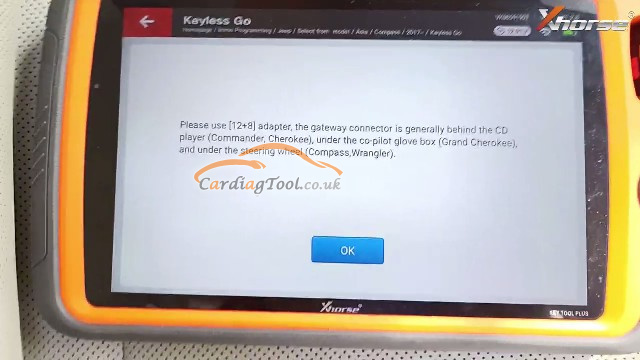
Then it will appear this alerted massage:

xhorse-key-tool-plus-jeep-compass-key-programming-5

Next, tap Program smart key, and switch ignition off, turn on the security warning light (double flash lights).


Please make sure there are no wireless devices near the smart key.


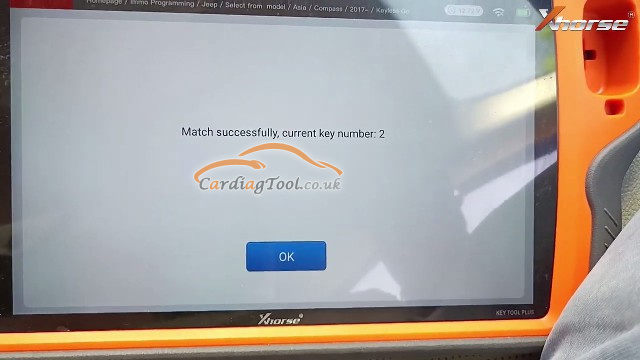
Now, it is matched and programmed successfully.

xhorse-key-tool-plus-jeep-compass-key-programming-6 xhorse-key-tool-plus-jeep-compass-key-programming-8 xhorse-key-tool-plus-jeep-compass-key-programming-7


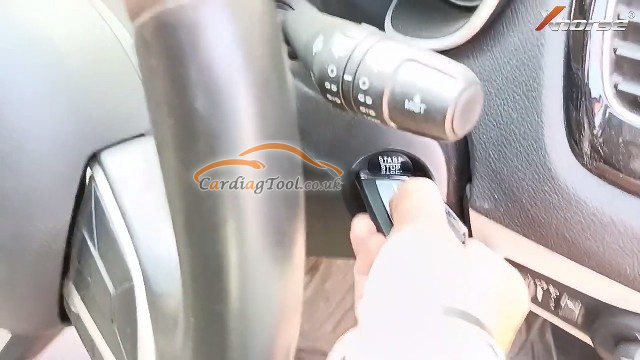
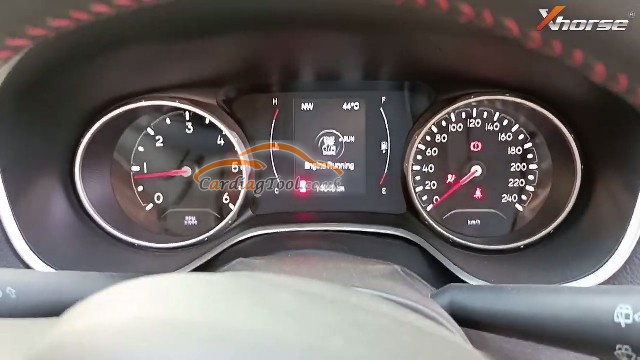
It starts the car normally.

xhorse-key-tool-plus-jeep-compass-key-programming-9


More Original Xhorse Tool, check here: https://www.cardiagtool.co.uk/wholesale/original-xhorse-tool/
Source: http://blog.cardiagtool.co.uk/xhorse-vvdi-key-tool-plus-jeep-compass-id4a-smart-key-programming/

2022年1月14日星期五

AUTEL MaxiSys MS906BT Tutorials on Programming Toyota G Chip key & Remote

 Autel Maxisys MS906BT diagnostic tablet is a wireless automotive diagnostic scanner that comes with bluetooth MaxiVCI that enables technicians and home mechanics to access and diagnose all available vehicle modules remotely at OE-level with best possible coverage.


This article is to share the use guide on Programming Toyota G Chip key & Remote by AUTEL MaxiSys MS906BT.


Main Steps:

Firstly, turn the ignition on with the working key

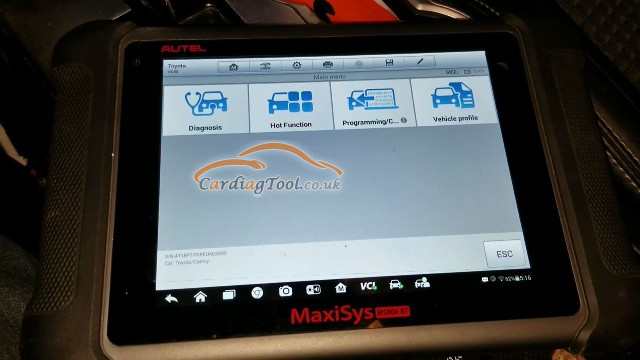
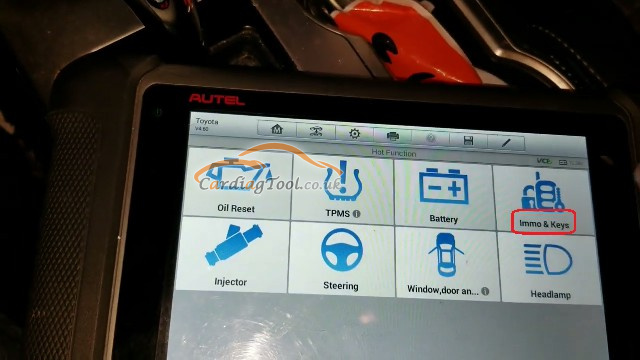
Go to Hot function>>Immo & Keys>>Key Registration

autel-ms906bt-toyota-g-chip-key-programming-1autel-ms906bt-toyota-g-chip-key-programming-2


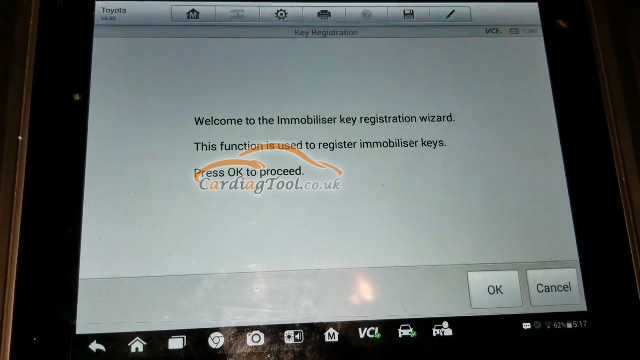
This function is used to register immobilizer keys. Press OK to proceed.

autel-ms906bt-toyota-g-chip-key-programming-3


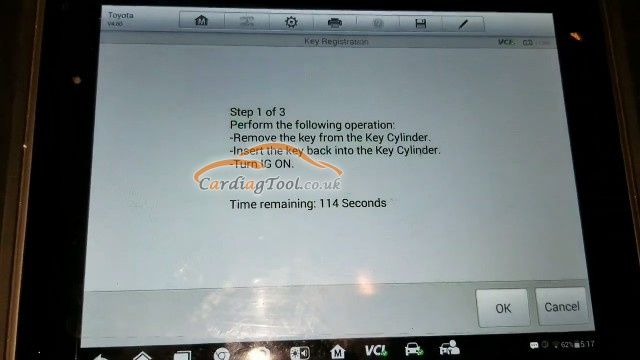
Three steps are used in this process to add a working key.

Step 1: this picture below is how we operate to make it really work, just follow it strictly:

autel-ms906bt-toyota-g-chip-key-programming-4


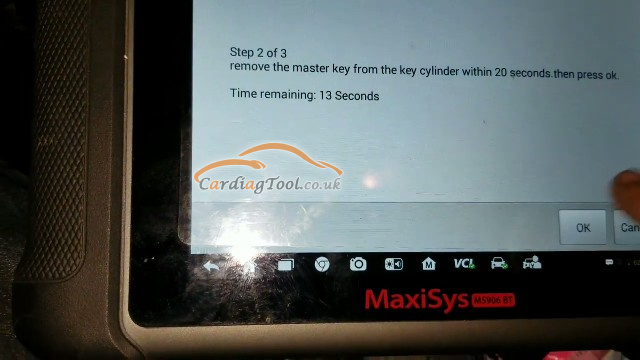
Step 2: Remove the master key from the key cylinder and press OK.

autel-ms906bt-toyota-g-chip-key-programming-5


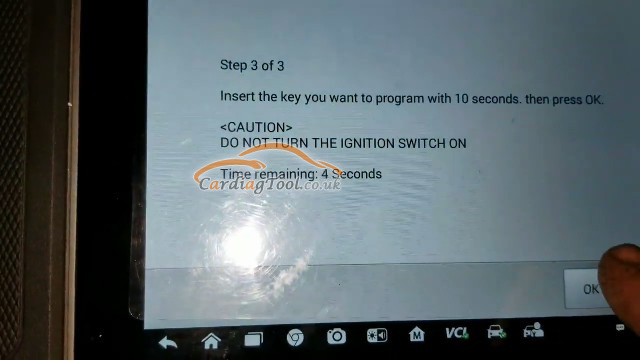
Step 3: Insert the key you want to program and press OK. Do not turn the ignition switch on.

autel-ms906bt-toyota-g-chip-key-programming-6


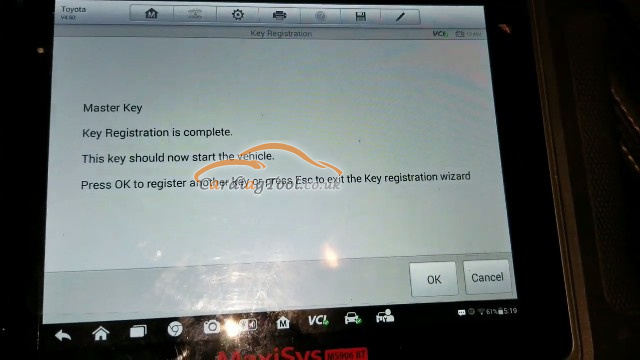
It will get into the “Registering” process automatically.


Master key registration is complete successfully!

autel-ms906bt-toyota-g-chip-key-programming-7


Go to the body control module to program the remote.

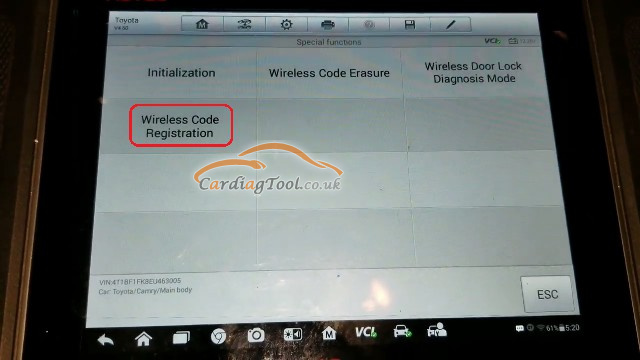
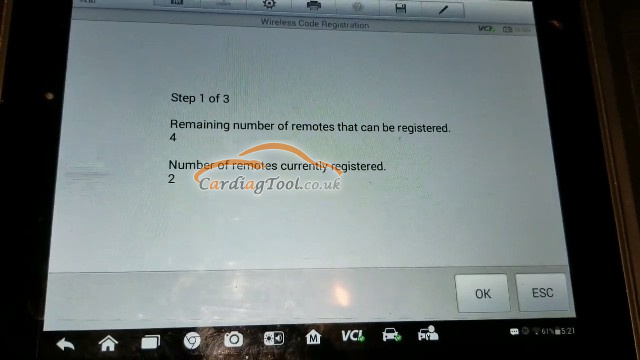
Go back to “Diagnosis” function>>Control unit>>Main body>>Special Functions>>Wireless Code Registration


Follow the instruction until it turns into this screen:

autel-ms906bt-toyota-g-chip-key-programming-8


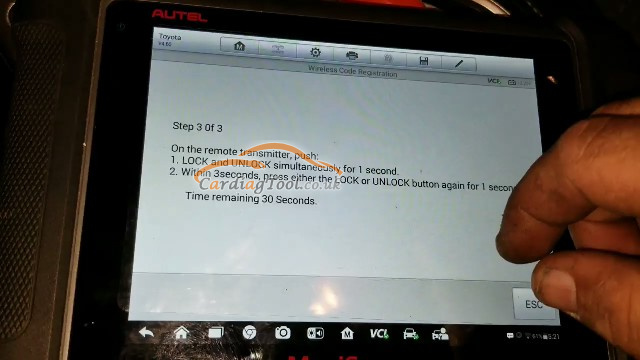
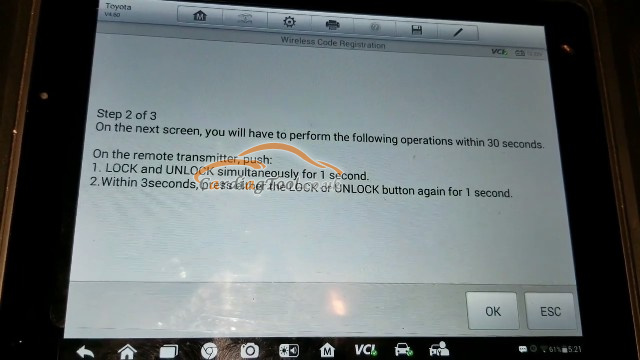
Follow the below another three steps of Wireless Code Registration to complete the remote programming.

autel-ms906bt-toyota-g-chip-key-programming-9 autel-ms906bt-toyota-g-chip-key-programming-11 autel-ms906bt-toyota-g-chip-key-programming-10


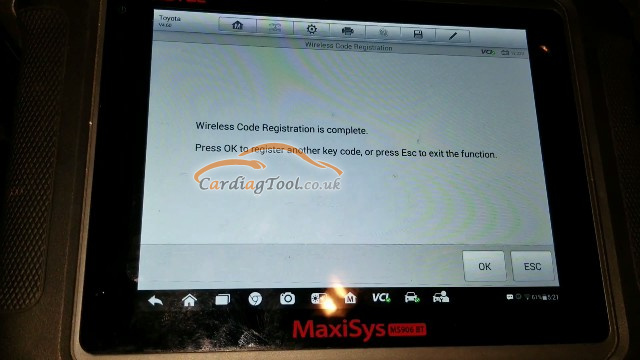
Wireless Code Registration is completed successfully!

autel-ms906bt-toyota-g-chip-key-programming-12


More original Autel tool: https://www.cardiagtool.co.uk/wholesale/original-autel-tool/

Source: http://blog.cardiagtool.co.uk/autel-maxisys-ms906bt-tutorials-on-programming-toyota-g-chip-key-remote/

2022年1月13日星期四

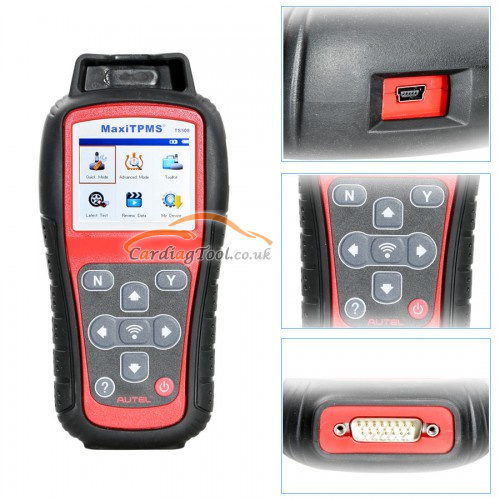
Highly Cost-efficient: Autel MaxiTPMS TS508 In-depth Review

 With the help of sturdy and compact qualities, Autel TS508 TPMS  Service tool is a versatile device that will perform a wide range of functions.


Autel TS508TPMS service tool is also very easy to use and delivers accurate results. You will have two service modes to pick from which are quick mode and advanced mode. With this TPMS Tool unit, you will be able to perform tasks such as reading TPMS sensors, program sensors, keep tabs on TPMS health conditions, and activate all known TPMS sensors. Read on to find out more about this professional-grade Autel TPMS tool.


Technical Specifications of the Autel MaxiTPMS TS508 TPMS:

FeaturesAutel MaxiTPMS TS508
Imageautel-ts508-in-depth-review-1
Display:TFT color display (320 x 240 dpi)
Connectivity:Mini USB 2.0 x 1
Power:3.7 V Li-polymer battery; 3200 mAh
Operating Temperature:0°C to 50°C (32°F to 122°F)
Storage Temperature:-20°C to 70°C (-4°F to 158°F)
Software Update:Free
Warranty:Limited One-Year


Help customers learn more details:

1.Construction

Autel pays a lot of attention to creating durable and reliable tools. The Autel ts508 TPMS tool is well-made to last long. It features an ergonomic design with strong housing and a rubber cover. These ensure that the device is well protected and can withstand tough garage floor conditions. Also, If you are looking for a more advanced tool, then check this Autel TS508k TPMS tool.


2.Intuitive user-interface

Another feature that makes Autel stand out from other brands is that it creates easy-to-use devices. The Autel ts508 tool has intuitive navigation and step-by-step on-screen instructions that are easy to use. Moreover, it provides both visual and audible responses to affirm sensors are functioning as needed.


3.Functionality

With the option of choosing either the quick mode or advanced mode, this is a versatile tool that you will fall in love with. The quick mode performs the basic TPMS functions such as scan sensor, program sensor, sensor information, and relearn procedure, while the advanced mode performs tasks such as display relearn procedure, check sensor and diagnose TPMS system, program MX sensors, and perform sensor position relearn. It is more advanced than the Autel TS501 scan tool.


To program sensors, you will select one of the following methods: copy by activation, copy by OBD, auto-create 1 to 16 sensors, and copy by manual input. Also, you can read/erase TPMS codes, read ECU sensor ID, read DTC from the ECU, check ECU ID matching condition, and much more.


4.Compatibility

This device works well with all vehicles that are equipped with a TPMS system. This includes domestic, European, and Asian vehicles. But before buying, check and find out if it’s compatible with your car make and model as some people have complained.


5.Multilingual menu

You have the option of choosing French, English, or Spanish. English is the default language but you can easily change it to a language of preference.


6.Additional accessories

It has some additional accessories that simplify using it and they include a USB cable, OBDII cable, carrying case, User manual, and a CD.


7.Lifetime software updates

For you to use this unit on the latest car models, you will need to update it to have the most current software. The upgrades are free and it is offered for a lifetime. All you need to do is to register the TPMS tool on the official Autel website and download the latest software via USB.


Pros:

Has a powerful rechargeable Li-polymer battery

Enables the user to manually input OE ID into MX

It has 4 MX sensor programming options for convenience

Connects with the TPMS module utilizing OBD2 cable for sensor ID relearning

Indicates vehicle specific relearn procedures

Offers faster and smarter TPMS repairs with the two service modes

Read DTCs from ECU and erases DTCs

Compact and strong construction

Protective rubber cover to prolong the life of the unit

Free software updates

1-year warranty


Cons:

It is somehow challenging to update


Our suggestions for customers:

Autel ts508 diagnostic TPMS tool is suitable for both pros and car enthusiasts. It covers a wide range of vehicles and can perform both basic and advanced functions. Even though it is very effective in performance, I would highly recommend it for professional mechanics or individuals with a busy car repair shop due to its high initial price.

https://www.cardiagtool.co.uk/

Source: http://blog.cardiagtool.co.uk/highly-cost-efficient-autel-maxitpms-ts508-in-depth-review/

2022年1月12日星期三

Xhorse VVDI KEY TOOL PLUS BMW 520D CAS4 All Keys Lost Programming

 Xhorse VVDI KEY TOOL PLUS  professional tool is available to control the key cutting machines developed by Xhorse. Greatly saving cost and facilitating the work process. Furthermore, more advanced functions will be supported for the convenience of locksmiths in the future.


Step-by-step Operation Procedures:

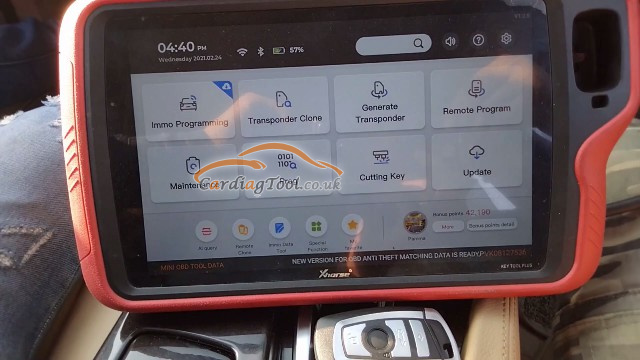
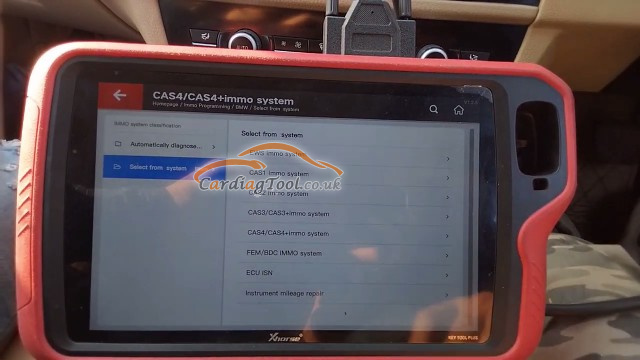
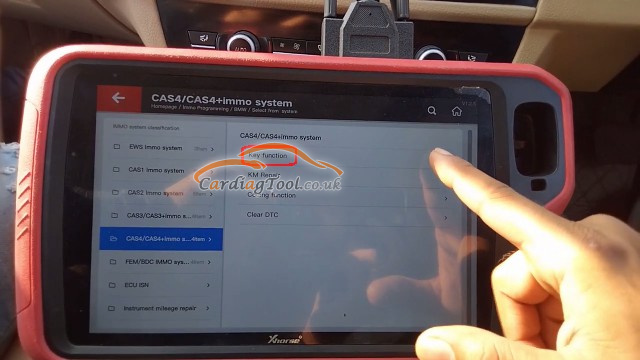
Firstly, go to

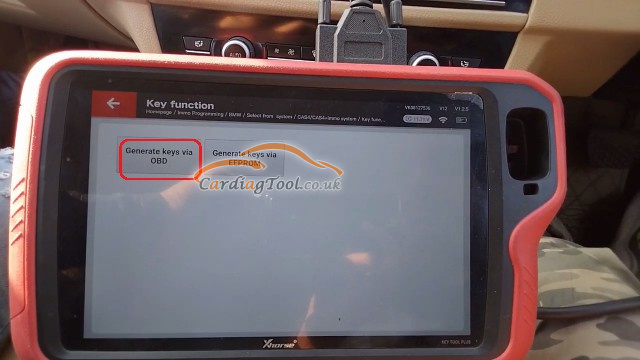
Immo Programming>>Europe>>BMW>>Select from system>>CAS4/CAS4+immo system>>key function>>Start programming

xhorse-key-tool-plus-bmw-520d-all-keys-lost-1xhorse-key-tool-plus-bmw-520d-all-keys-lost-2xhorse-key-tool-plus-bmw-520d-all-keys-lost-3


Then, click on

Generate keys via OBD>>Read key information>>Continue

xhorse-key-tool-plus-bmw-520d-all-keys-lost-4


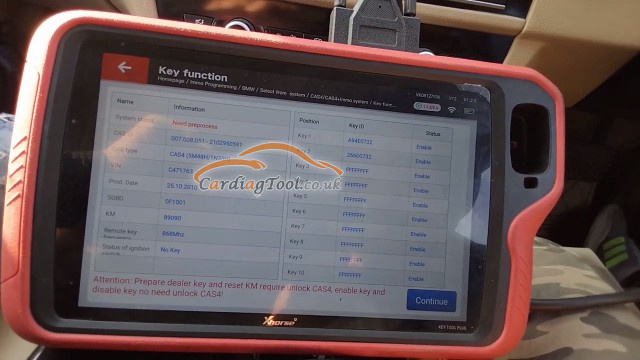
You will see the key function listed as below:

xhorse-key-tool-plus-bmw-520d-all-keys-lost-5


Click on

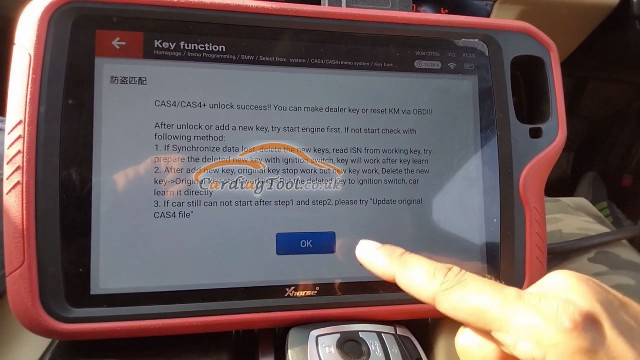
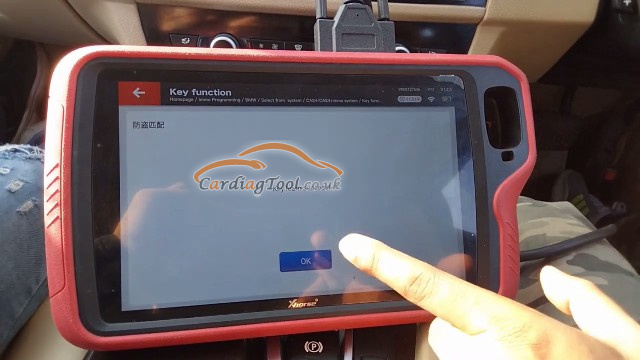
Unlock CAS4/CAS4, after a few minutes until it appears the following screen, which means this step is successful.

xhorse-key-tool-plus-bmw-520d-all-keys-lost-6


Next, go to

Prepare dealer key with ignition switch>>Key 3>>Yes>>OK


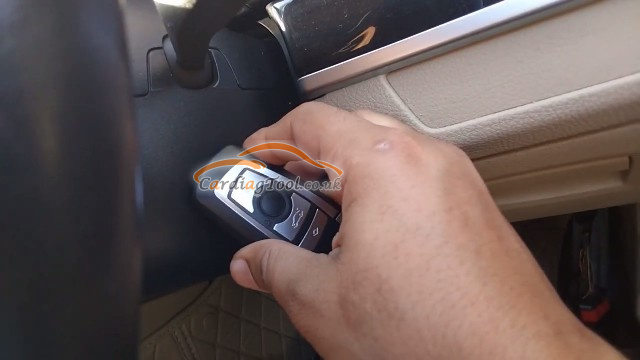
Insert a new key to ignition switch and put it close to emergency start position like this:

xhorse-key-tool-plus-bmw-520d-all-keys-lost-7


Learning key process...Key leans successfully.

xhorse-key-tool-plus-bmw-520d-all-keys-lost-8

Test to see if it works.

Yes, tap the window lock buttons, it succeeds!

xhorse-key-tool-plus-bmw-520d-all-keys-lost-9


More original Xhorse tools, please check: https://www.cardiagtool.co.uk/wholesale/original-xhorse-tool/
Source: http://blog.cardiagtool.co.uk/xhorse-vvdi-key-tool-plus-bmw-520d-cas4-all-keys-lost-programming/
Xhorse VVDI2 Professional Tool Tutorials: Software Update

  Xhorse VVDI2 Full version   has Highlights as follows: 1.Free Lifetime Online firmware and software update Xhorse VVDI2 Full Version V7.1....